Updated on: 2018 June 04
Content is available on itos!
Post overview:
.Equipment stats
.Explanation of the recipe and how to obtain it
.Location of materials and specific mob spawn locations per map
Weapon Stats
Note: you can also view it on tosneet English version, it is added now: https://tos.neet.tv/items?name=masinios&f=1
I made this section before it was added on tosneet, please use whichever translation you prefer (tosneet or this post).
Shield <<< click
Mashinos shield, 3 socket slots, red/orange level 350
Physical def +764

+37 CON
+67 SPR
+437 magic def
2 block rate
+234 strike attack
Final Block rate +2%

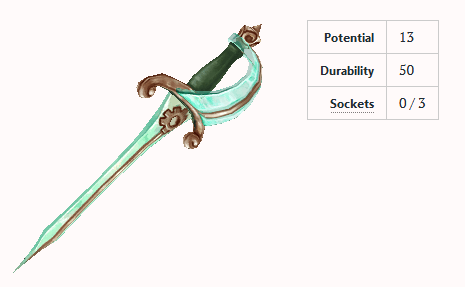
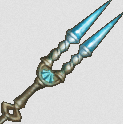
Rapier <<< click
Mashinios rapier Lvl 350 red/orange, 3 sockets.
Attack: 1271 - 1404
AoE attack ratio +1
STR +59
Crit rate +45
*Special effect: your attacks have a 15% to activate a -sharpening- buff for 5seconds. If you stack this buff 5 times, your next basic attack will deal 5 hits.
Sharpening buff: +60 critical attack damage per stack.
Sharpening buff can proc with every hit and every line of attack. If you have Blessing extra lines, the blessing line is able to proc the Sharpening buff too.
The special effect ‘Sharpening buff stacks’ will NOT disappear if you do not use a normal attack. If you use a basic attack, all stacks will disappear and you will start stacking again.
There is NO cooldown on the stacking effect, and no cooldown on the proc.
The duration of each stack is 10 seconds, and your stacks will refresh in duration if you keep stacking.
Currently, it will give +240 critical attack damage with 5 stacks (seems it skips the first stack!?). Also, the first stack will be numbered ‘0’, so maybe this is the error.
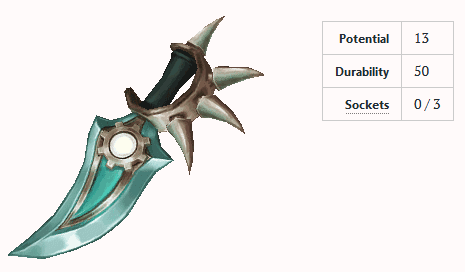
Sword <<< click
Mashinios Sword red/orange 350, 3 socket slots
Attack: 1271 - 1404
AoE attack ratio +1
Critical rate +45
Critical attack damage +219
Lightning elemental attack +337
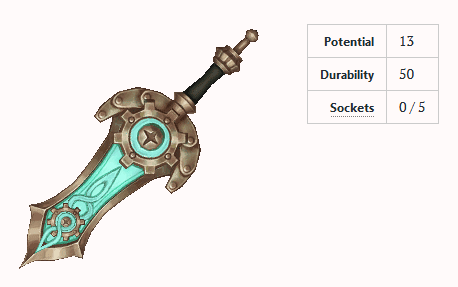
2-Handed Sword <<< click
Mashinios Two-handed Sword red/orange 350, 5 socket slots
Attack: 1444 - 1766
+1 AoE attack ratio
STR +90
DEX +32
Critical attack damage +445
*Special effect: Your attacks have a 1% chance per 1 enemy, up to a maximum of 10% chance, to gain a stack. If you gain 5 stacks, you get 10 seconds of War Mode buff.
War mode: Physical attack +120, AoE attack ratio +2, Physical def -400, Maximum HP -2000
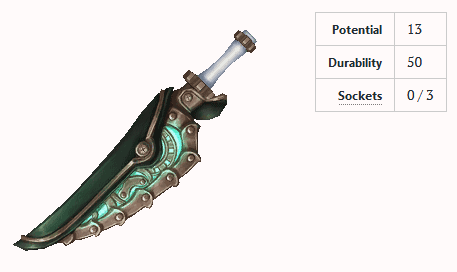
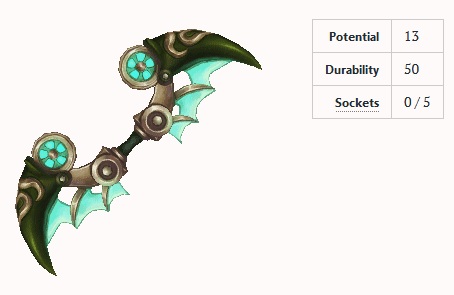
Dagger <<< click
Mashinios Dagger red/orange 350, 3 socket slots
Attack: 1144 - 1264
DEX +59
Critical rate +39
Lightning elemental attack +303
*Rogue Backstab damage +150%
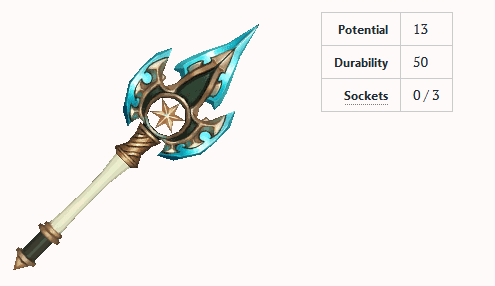
Spear <<< click
Mashinios Spear red/orange 350, 3 socket slots
Attack: 1324 - 1618
DEX +113
Critical rate +27
Lightning elemental attack +279
*Special effect: attacks have a 5% chance to apply 10x your Lightning Elemental damage.
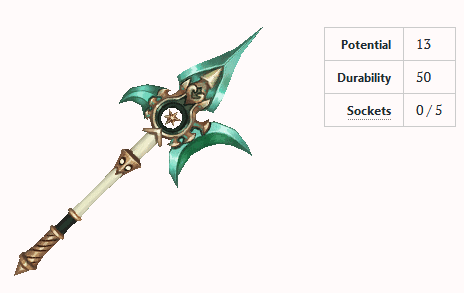
2-Handed Spear <<< click
Mashinios Pike red/orange 350, 5 socket slots
Attack: 1478 - 2000
+2 AoE attack ratio
STR +90
DEX +32
Attack range +5
*Special effect: attacks have a 10% chance to reduce enemy stamina by 1.5, and give the enemy a stack. When the enemy gets 10 stacks, they will get the ‘Impact debuff’. Impact debuff = 10 seconds slow, and physical defence -800.
@Crossbow <<< click
Mashinios Crossbow 350 red/orange, 3 socket slots
Attack: 1204 - 1471
Dex +57
Lightning elemental attack +297
*+2 quarrel shooter skills
*+1 running shot skill
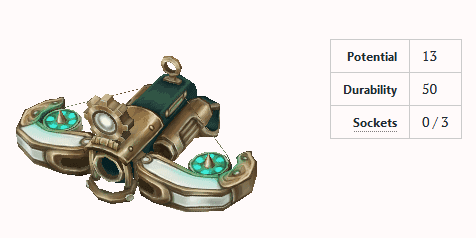
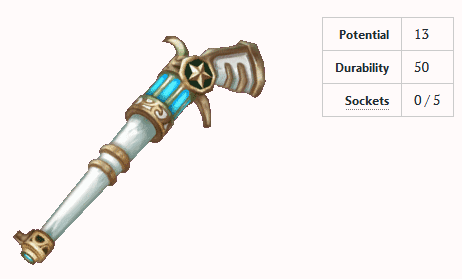
@Pistol <<< click
Mashinios Pistol red/orange 350, 3 socket slots
Attack: 1204 - 1471
AoE attack ratio +1
STR +37
DEX +71
Critical rate +43
*+1 level for full metal jacket (bulletmarker)
*+1 level for Limacon (schwarzer reiter)
*+1 level for pistol shot (corsair3)
@Bow <<< click
Mashinios Bow red/range 350, 5 socket slots
Attack: 1284 - 1926
STR +48
DEX +74
Critical rate +43
Critical attack damage +262
*Special effect: Attacks have 10% chance to reduce enemy critical resistance by -10 for 5 seconds. Max 20 stacks.
@Rifle <<< click
Mashinios Musket red/orange 350, 5 socket slots
Attack: 1204 - 2006
STR +77
Maximum attack +777
Minimum attack -77
Block penetration +100
*Special effect: your critical hits have a 10% chance to reduce enemy block rate by -400.
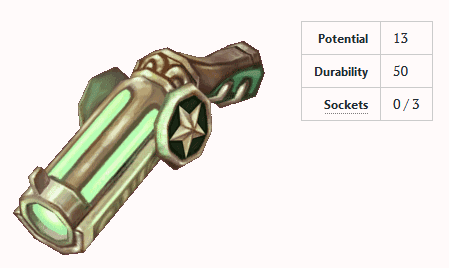
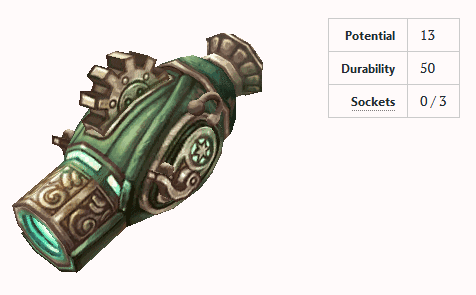
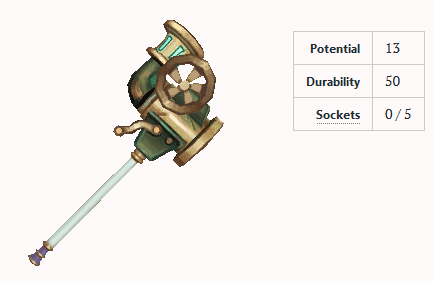
@Cannon <<< click
Mashinios Cannon red/orange 350, 3 socket slots
Attack: 1177 - 1766
+3 AoE attack ratio
Maximum attack +314
Critical rate +37
*+1 to Sweeping cannon skill
*+1 to Bazooka stance skill
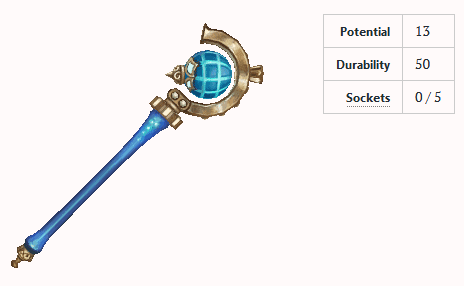
M Rod click to view weapon stats
Mashinios Rod red/orange 350, 3 socket slots
Magic attack: 1337
SPR +122
HP +1654
*Special effect: Skills (attacks) have a 10% chance to increase your SPR by +5. Max 10 stacks.
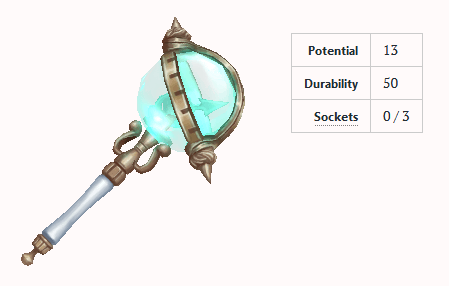
Mashinos rod procs on Auto-attack and when using skills. Even when hitting ice wall video here
M Staff click to view weapon stats
Mashinios Staff red/orange 350, 5 socket slots
Magic attack: 1605
+1 AoE attack ratio
INT +122
Magic amplification +645
Lightning elemental attack +337
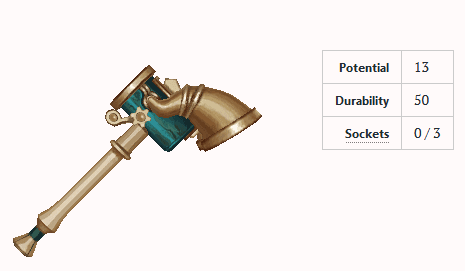
M Mace click to view weapon stats
Mashinios Mace red/orange 350, 3 socket slots
Attack: 1144 - 1264
Magic attack: 1203
INT +57
SPR +57
Lightning elemental attack +295
*Special effect: Your attacks have a 30% chance to deal +2000 Lightning Elemental Damage.
The +2000 can proc on every hit and every line. If you use basic attack with an extra line, you can get +2000 and another +2000 for the extra line. It will work with skill damage too, and Damage over time, poisons, card effects.
Some tests on wooden dummy:
On AA (test): https://www.youtube.com/watch?v=CEpUyzyIh20
-sometimes it adds an extra line of damage (30% proc chance)
On skill (test): https://www.youtube.com/watch?v=svKfsIaNl2A
-Hand knife (no proc, 1 hit of damage)
-God smash (proc, 1 hit + 1 hit of damage)
-God smash (no proc, 1 hit of damage)
M 2-Handed Mace click to view weapon stats
Mashinios Two-handed Mace red/orange 350, 5 socket slots
Attack: 1300 - 1589
Magic attack: 1444
+2 AoE attack ratio
STR +122
DEX +50
Block penetration +59
If you prefer to view the weapon stats in pastebin format, click here: https://pastebin.com/jeE3rrZS
Since Rank 9 patch, all armours have safe anvil upgrade until +5 (like weapons). Also applies to bracelet & amulet.
How to use tosneet to view anvil and enhancement effects <<<click here
View the weapon transcend and anvil enhancements here: https://tos.neet.tv/items?name=masinios&f=1
This page will open (but in English):
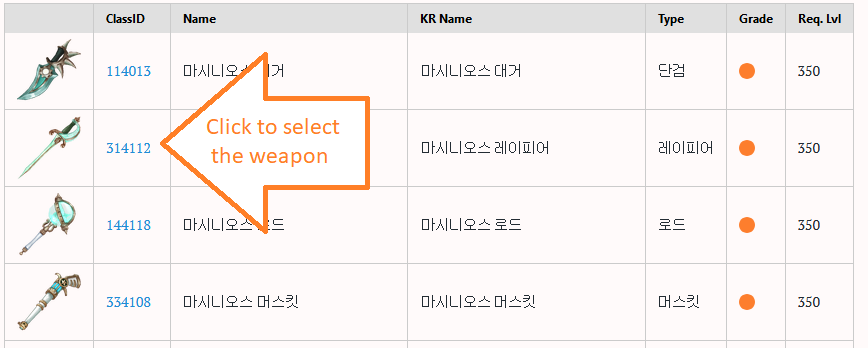
Select a weapon and this page will open. Maces have physical and magic attack value so both will be shown. Select your anvil level and trans level and view the damage increase on the item:

Armour stats
Leather Armour <<< Click
Fietas Leather armour, 1 socket, lvl 350 red/orange
Physical def 382
Magic def 382
+57 STR
+46 evasion
+24 critical rate
Leather Pants <<< Click
Fietas Leather pants, 1 socket, lvl 350 red/orange
Physical def 382
Magic def 382
+57 STR
+46 evasion
+24 critical rate
Leather Boots <<< Click
Fietas Leather Boots, 1 socket, lvl 350 red/orange
Physical def 297
Magic def 297
+57 Dex
+24 critical rate
+1 movement speed
Leather Gloves <<< Click
Fietas Leather Gloves, 1 socket, lvl 350 red/orange
Physical def 297
Magic def 297
+57 Dex
+24 critical rate
+98 Critical attack damage
.Cloth Armour <<< Click
Laitas Cloth Robe, 1 socket, lvl 350 red/orange
Physical def 382
Magic def 764
+57 INT
+288 Magic def
+586 SP
.Cloth Pants <<< Click
Laitas Cloth Pants, 1 socket, lvl 350 red/orange
Physical def 382
Magic def 764
+57 SPR
+288 Magic def
+586 SP
.Cloth Boots <<< Click
Laitas Cloth Boots, 1 socket, lvl 350 red/orange
Physical def 297
Magic def 594
+57 SPR
+1 movement speed
+46 SP recovery
.Cloth Gloves <<< Click
Laitas Cloth Gloves, 1 socket, lvl 350 red/orange
Physical def 297
Magic def 594
+57 INT
+78 Magic attack
+242 Magic amplification
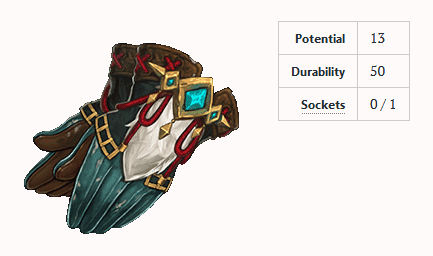
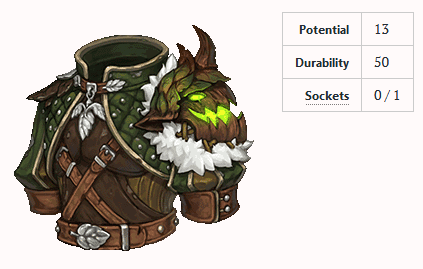
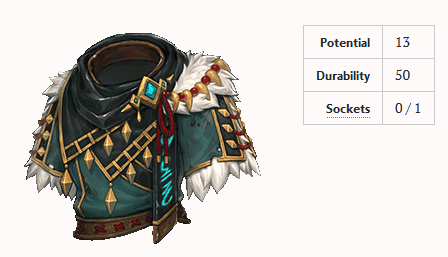
Plate Armour <<< Click
Ausra Plate Armour, 1 socket, lvl 350 red/orange
Physical def 764
Magic def 382
+57 CON
+288 Physical def
+1764 HP
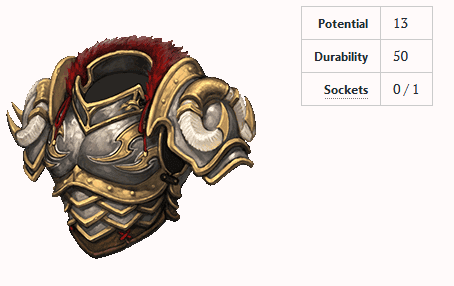
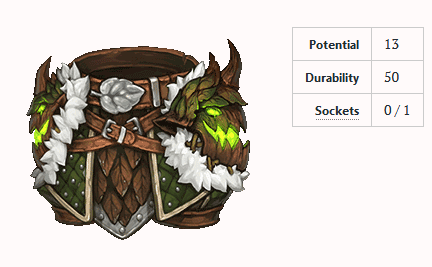
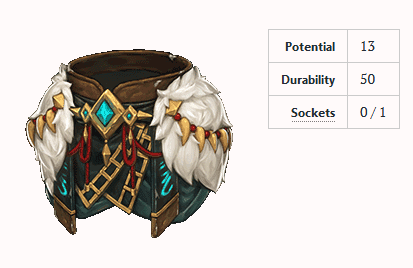
Plate Pants <<< Click
Ausra Plate Pants, 1 socket, lvl 350 red/orange
Physical def 764
Magic def 382
+57 CON
+288 Physical def
+1764 HP
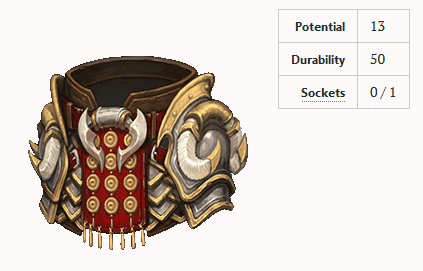
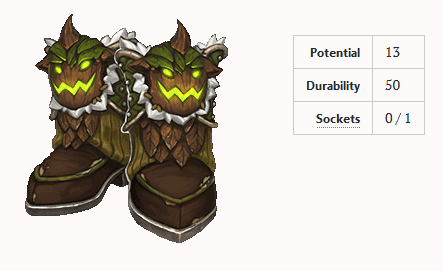
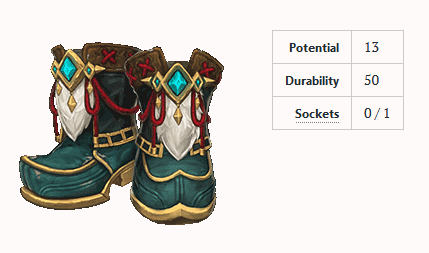
Plate Boots <<< Clicks
Ausra Plate Boots, 1 socket, lvl 350 red/orange
Physical def 594
Magic def 297
+57 STR
+1 movement speed
+46 HP recovery
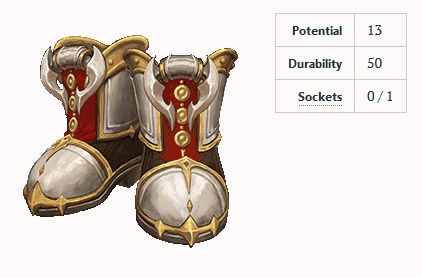
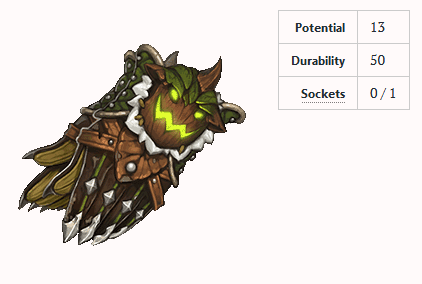
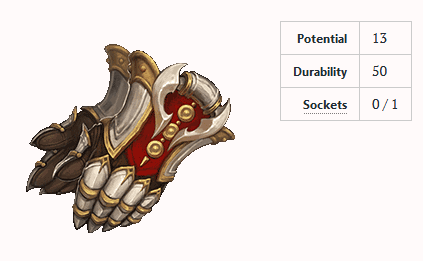
Plate Gloves <<< Click
Ausra Plate Gloves, 1 socket, lvl 350 red/orange
Physical def 594
Magic def 297
+1 AoE attack ratio
+57 STR
+46 Block penetration
If you prefer to view it in pastebin format, click here: https://pastebin.com/kj1vrmXD
Marquinhos Materials
Common items required are:
.2x Practonium
.30x Sierra Dust / red dust
.150x Nuclea Dust / white dust
.the correct recipe
.amount of mob drop materials
Practonium
Option 1: Mishekan quest for free practonium for lvl 317+ character click here
Option 2: Practonium Recipe questline for Guildmembers here
Option 3: Unique Raid 330+ (First Refuge) can give you 1x practonium as a cube reward
Option 4: Guild Raid (level 14 Guild Boss Demon Lord Hauberk) has a chance to drop multiple practoniums more info about guilds here
Note: the Mishekan quest reward has been changed. Open the reward box to instantly receive: 1 practonium, 20 mithril ores, and 20 Keistas Restoration potions.
Dust / Powder
Dust is received by disassembly(special destruction) of equips.
-Orange equips will give you Sierra Dust (red dust). Unique raid cube reward will also give Sierra dust.
-Blue and Purple equips will give you Nuclea dust (white dust).
You can disassemble equips at the Blacksmith NPC. It is very easy, just select an item and press ‘disassemble’. You will destroy the item and receive your dust.
View image of red dust click here

View image of white dust click here

Recipe from challenge mode -> unique raid
You must enter challenge mode to get 4 keys(portal warp stone recipes to craft warp stones) to enter the new 330 raid. Kill mobs on any level 100+ map, excluding Hunting Ground maps. You may enter challenge modes up to -80 levels, and up to +30 levels (compared to your own character’s level). Keep in mind you get a big exp penalty after a difference of 30 levels, so joining a much lower level challenge mode is charity to help lower level players.
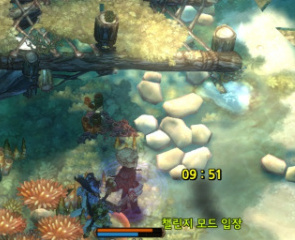
Sometimes a special Purple/Pink glowing mob will appear. If you kill it, it will turn into a challenge mode portal. Make a party and enter the portal to start the challenge mode. Each character must press enter themselves. The challenge mode ‘dungeon’ is created on the map you are at. Mobs will spawn near and they will automatically go to you to attack you.
Everyone can enter the portal. So if you feel generous, shout your portal to share it (include map name, and map level). Players on the same map will see a big cross ( X cross) when they press M to view the minimap. The ‘X’ indicates the location of the challenge mode portal.
Challenge mode entry = 1x per day, per character. After you enter, you will immediately receive a debuff on your character. Debuff = cannot enter challenge mode again. The debuff will end at daily dungeon reset time.
After killing purple mob: image of a challenge mode portal timer (10 minutes until it disappears), note the portal is supposed to show but sometimes it is invisible:
Challenge mode tip:
When you interact with the portal, do NOT press ‘yes enter’. Instead, keep the dialogue box open and move to another better spot on the map. Then press OK enter on that spot. Challenge mode will start on your new location! Find a location for easy mobbing.
Challenge mode portal after entrance
Enter the portal to start challenge mode (possible stages: 1->2->3->4->5->6->7).
Each stage = kill mobs until the challenge bar is completely filled, and afterwards defeat a boss with time limit => clear 1 stage. Each stage has a 10 min time limit, make sure to have sufficient DPS!
Once you kill a boss, two portals will appear.
1 portal = CONTINUE, and other portal = QUIT&Receive rewards.
If you do not decide, the challenge mode will consider it ‘quit’ automatically.
If you continue and fail, you will receive 0 rewards.
During challenge mode, each individual choice is considered party-choice. If 1 person picks NO first, then the mode will quit.
If you are bugged/stuck/disconnected, you will be able to re-enter challenge mode. A message will pop-up when you select your character:

You will get 1 of the following rewards from cube (cannot be rerolled):
Challenge mode rewards (I have added the drop % chance):
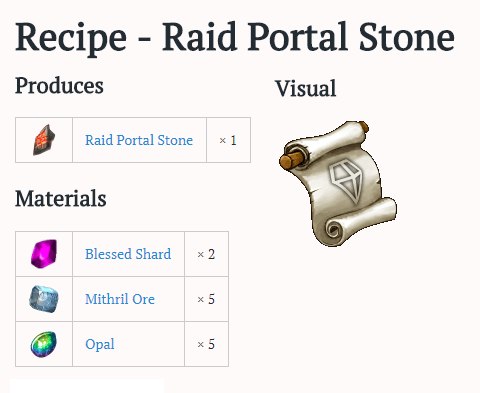
Warp portal stones recipe (need to craft 4 to enter Unique Raid, lvl 330+) 21.09 %
Instanced Dungeon Multiply Token 1.09 %
Silver anvil (cannot be traded) 2.00 %
1 Old enchantment card (cannot be traded) 1.64%
5x blessed shards 2.36 %
3x Hair costume enchant scrolls (cannot be traded) 2.36 %
1 Attribute point voucher for 500 points 2.18 %
1 Attribute point voucher for 1’000 points 0.18 %
3x Yellow Caro Antenna 2.73%
3x Green Charog Horn 4.91 %
3x Kugheri Lyoni Horn 4.18 %
3x Kugheri Zymbani’s Sword 5.64 %
3x Kugheri Zeffi’s Ornament 4.73 %
3x Yellow Leafnut Tail 6.18%
3x Mourningbird Tail 3.45 %
3x Namu’s Tail 4.91 %
1 Diamond 3.09 %
1 Sapphire 4.55 %
1 Ruby 4.18 %
1 Bloodstone 4.36 %
1 Obsidian 4.73 %
1 Peridot 4.00 %
1 Portium 5.45 %
Opal and Zircon added to the drop items of Lv 200/300 Challenge Cube (the drop rate of other items remains unaltered). patch note link here
Challenge mode stage 6 + 7 cubes :
Shining Lv 300 Challenge Cube added as a reward for Lv 300+ Challenge Mode Stages 6 and above (Cube x1 for Stage 6, Cube x2 for Stage 7).
- The new Shining Lv 300 Challenge Cube drops Lv 350 Unique equipment materials, Hero’s Retribution/Aegis Potions, Practonium and others.
Many thanks to Feedery from KR forum for drop rate test. With 550 cubes.
Image of Challenge mode Rainbow cube:

Official Challenge mode recap:
- The Challenge Mode is a new game mode that allows you to fight powerful monsters for unidentified equipment and other reward items.
- This mode can be entered once per day, per character, with each entry being counted as soon as you start the first stage.
[How to Enter]- After defeating a certain number of monsters on a field of level 100 or above, you will come across a monster surrounded by purple light.
- Defeating the purple light monster opens a portal to the Challenge Mode.
- The portal remains open for 10 minutes, and anyone can enter it.
- Premade party members will enter the same map if they access the portal, but if at least one party member is already at Stage 2 or higher, the others will not be able to enter directly to the same stage.
[How to Play]- Inside the Challenge Mode, your goal is to defeat monsters and charge the Challenge Level gauge.
- When the gauge is fully charged, a boss monster appears.
- After defeating the boss monster, you will see two portals: Close and Step Up.
- Choose Close to exit the Challenge Mode and receive your stage reward.
- Choose Step Up if you want to continue onto the next stage and defeat more monsters for additional rewards.
- There are 5 stages in total, each lasting a maximum of 10 minutes.
- Every stage increases your Looting Chance by 100 and provides more reward cubes when completed, but higher stages also mean more powerful monsters.
- If all party members become incapable of combat or you don’t complete the stage under 10 minutes, you fail the Challenge Mode.
[Important]- If your character and the Challenge Mode are 30 or more levels apart, you will not be able to enter it.
- The Challenge Mode does not open inside Hunting Grounds.
- Reward cubes can be transferred via Team Storage but cannot be reopened.
Unique Raid (for level 330+)
The entrance is towards the southwest of the teleport statue on the map Nobreer Forest.
It is possible to use Soul Resurrect crystals inside this mode!
Special/ Unique raid (lvl 330) is named ‘First Refuge’.
Entry = unlimited amounts per day. Entry requires 4 portal warp stones for token users. Non-token users must pay 6 stones to enter. Each party member must bring their own stones, you cannot enter without stones!
Each next entry will consume +1 stone (4 stones -> 5 stones -> 6 stones, …). The count resets each day.
Note: the stones will be consumed once the boss dies, however you still need stones to enter.
It is possible to use ‘carry tactic’. 1 party + 1 strong carry —> carry leaves before boss dies to keep stones, carry join new party without consuming stones, repeat.
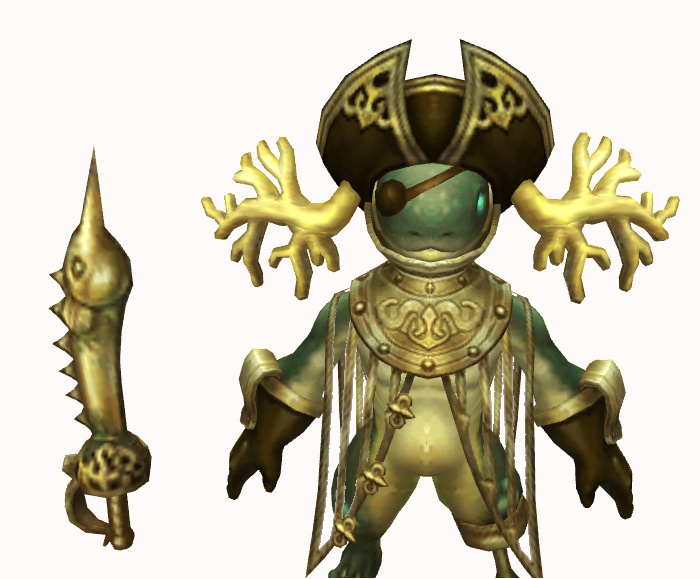
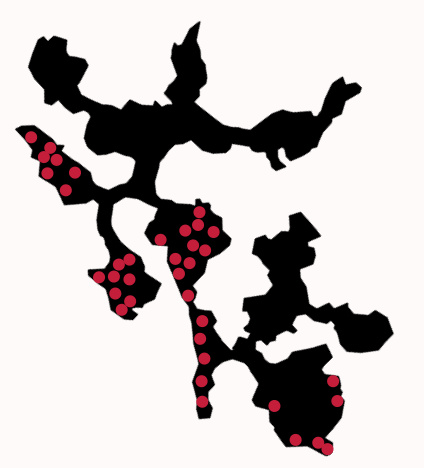
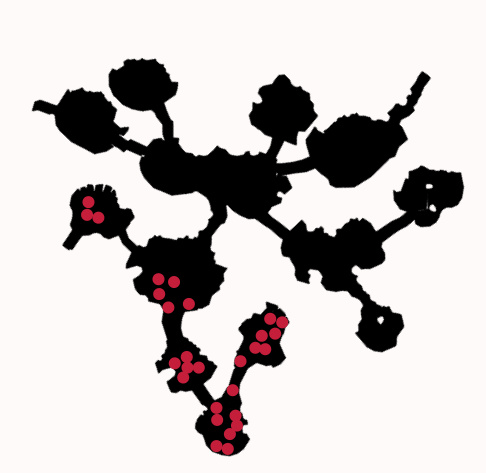
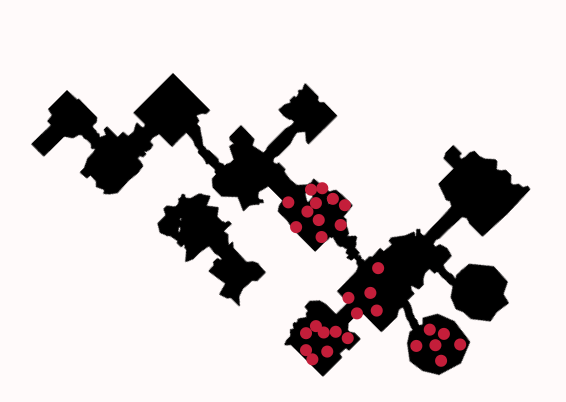
Clear Raid
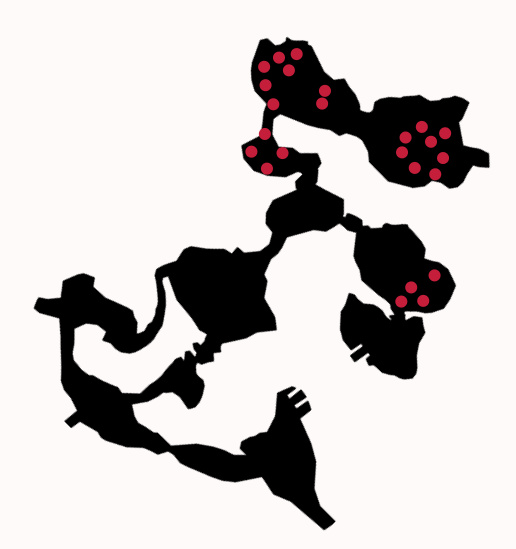
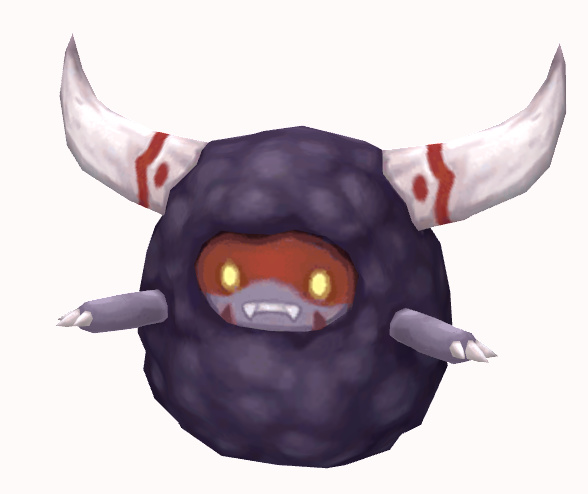
Kill all mobs to open each next map segment. There are some poison pool traps, you can easily see the traps so avoid it. The final segment is the boss. Kill the giant raidboss Special Kucurry to clear this Raid.
After you beat the boss, you get 1 cube. Open the cube to get 1 of the rewards:
Unique Raid Drops (from final bosscube, cannot be rerolled):
- 1 Practonium
- Random amount of Sierra Dust (red dust) (amount does not exceed 50)
- Recipe for a level 350 red/orange Mashinios Weapon or a level 350 red/orange armour
- kugheri balzermancer legendary card
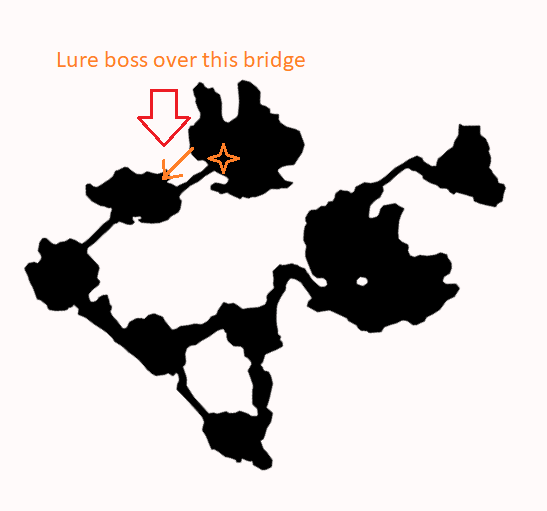
Tips vs the Boss:
When you start, try to lure the boss away from its original location. Original location contains Poison Pool traps. Lure the boss over the bridge. This unique raid - first refuge mode does not have a short time limit, so take your time to safely defeat the boss.
-When the boss becomes a red colour, it means the boss has activated Kucurry Revenged 7 fold. If you attack it, you will get damage reflected and will likely die.
-Boss can use reversi on your heal tiles and then steal your tiles to heal.
Some vids:
Bong at challenge mode: https://www.youtube.com/watch?v=H6P9KDJ-ddU
Inje Kang duo raid : here
Unique Raid Final Boss solo: here
Official Unique Raid recap:
- This dungeon does not give Silver or EXP. Instead, you can complete it for Lv 350 Unique equipment recipes and materials.
[How to Enter]- You can enter the dungeon through the First Shelter entrance tower in Nobreer Forest.
- The dungeon has no daily entry limit, but each entry consumes at least 6 Raid Portal Stones, an item which you can obtain in the new Challenge Mode.
- Every additional entry made on the same day adds +1 Raid Portal Stone to the entry fee.
- Token users get a discount of 2 Stones per entry.
- Daily entries reset at 6 AM (server time).
[Rewards]- First Shelter Cubes obtained from this dungeon drop recipes and materials used to craft Lv 350 Unique equipment items.
[Important]- Instance Clear Vouchers, Multiply Tokens and Instanced Dungeon Reset Vouchers will not work with this dungeon.
- Prodigious Kucarry Balzermancer monsters appearing inside this dungeon cannot be reincarnated.
Material Locations
Please use http://toscamp.com/map/map4.1.php?lang=en to find maps easily (once they are updated)!
I just realized English Tos map does not show the maps yet. I will show the maps:
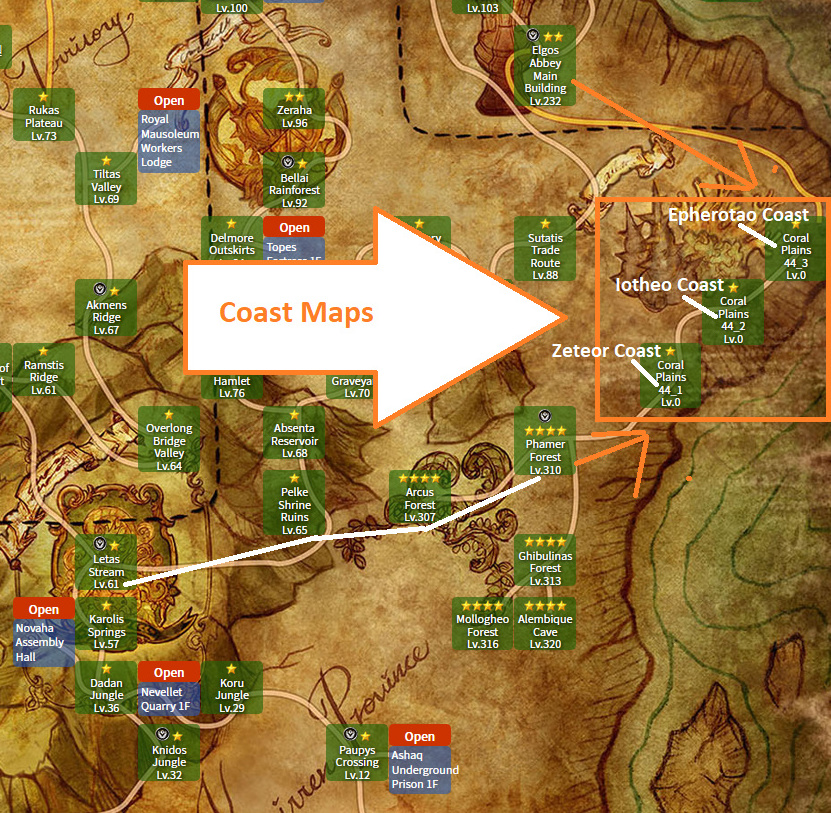
Coast maps (mobs drop needed materials!)
The coast maps are on the ‘Orsha’ town side, near the other coast maps. Some players do not have the phamer forest teleport statue, so they will have to travel from Gateway of the Great King (most players have this warp point).
To get there quickly, you could go to (Gateway of the great King ->Letas Stream -> Pelkine shrine ruins -> arcus forest ->) phamer forest -> zeteor coast.
To enter epherotao coast quickly, warp to Elgos Abbey Main Building and move 1 map to reach Epherotao coast.
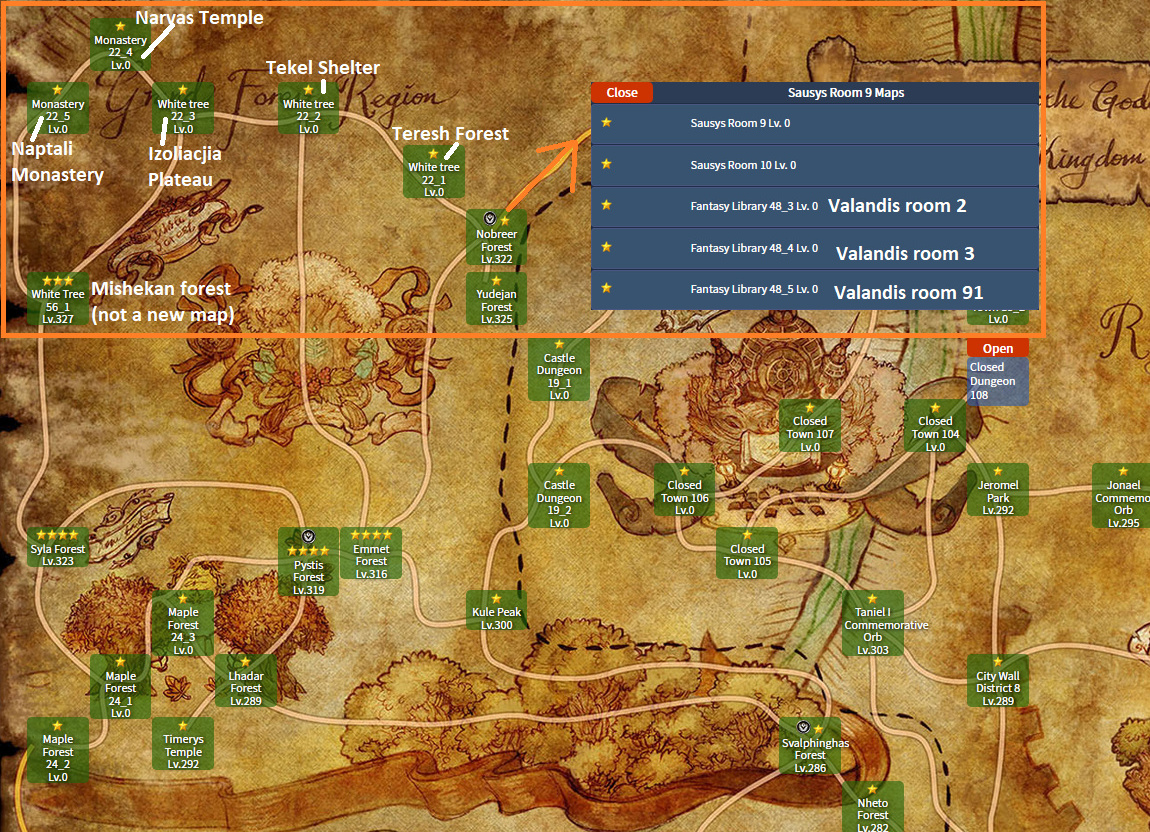
New ‘Forest & Temple’ maps (mobs drop needed materials!)
To get to Sausys room and Valandis room, you must teleport to Nobreer Forest and move 1 map.
To get to the new Forests and temples, you must teleport to Nobreer forest too and move.
There is a teleport warp statue at Izoliacjia Plateau.
There is a zemyna statue (+1 stat point) at Tekel Shelter.
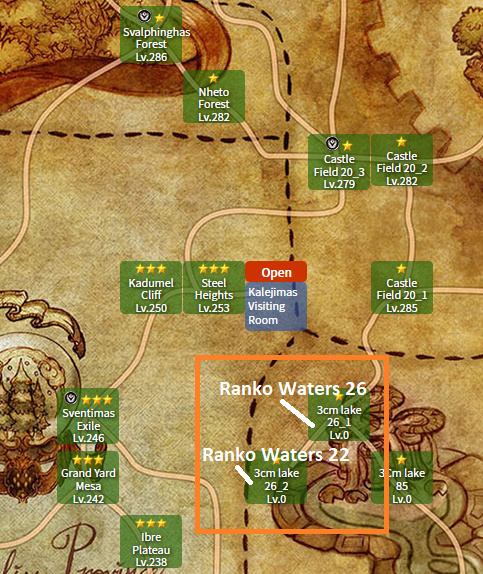
Remaining new maps (no useful materials)
.New ‘water shrine ruins’ maps do not have mobs which drop any useful material.
There is a teleport warp statue at Ranko waters 26.
There is a zemyna statue at Ranko waters 22 (+1 stat point).
.New ‘Hunting grounds Nazar(ene) tower / star tower’.
To get there, go to Dina Bee Farm and enter the Hunting grounds teleport point to go to Natar Watchtower. Move 1 map to reach the level 340-350 hunting grounds. No ‘material’ mobs here. There is a zemyna statue (+1 stat point).
About prices of materials
When buying, you should not pay more than 50’000 silver per material. The droprate is very high (2.0%).
If the demand is very high, try to settle for 100~120k max if you are very desperate for materials.
Don’t waste your silvers!
When this patch was released on Ktos, material prices were very high too. Players would waste silvers and buy for 100k+ per material. Then after a week of farming, the materials would flood market and prices dropped below 100k per material. The droprate is high and the spawn is high.
Save silvers to buy the recipe.
Mob Spawn Locations on each map
Epherotao Coast - Sword & 2-Handed Sword

This map does not have a warp statue.
Sword: 107x sword of the skipper
2H Sword: 193x sword of the skipper
Mob: Varle Skipper
HP: 194’040
Spawn amount: 37
View item Click here

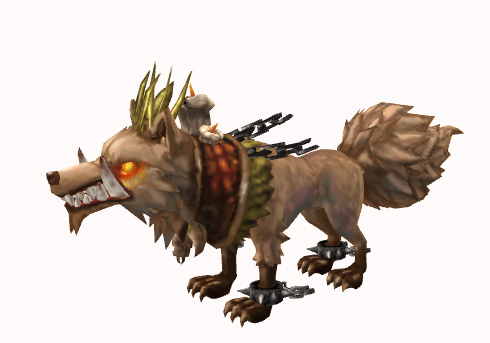
Epherotao Coast - Mace & 2-Handed Mace
Mace: 107x Handle of the Helmman
2H Mace: 193x Handle of the Helmman
Mob: Varle Helmman
HP: 195’123
Spawn amount: 37
View item click here

View Varle Helmman mob click here
Mobs are Melee and Physical. Kite them if you are a ranged character.
Example of farming these mobs, video click here
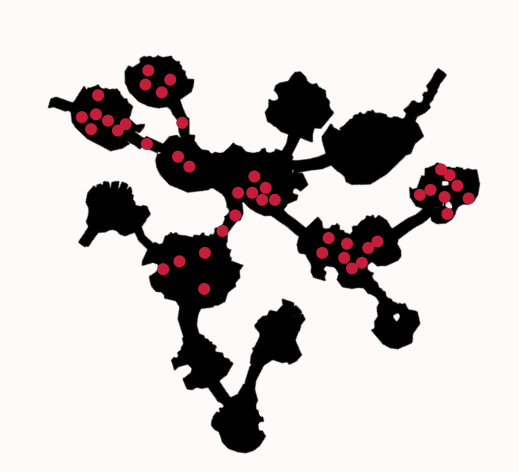
Zeteor Coast - Rod & Staff
This map does not have a warp statue.
Rod: 107x Nimrah Damsel’s broken crystal
Staff: 193x Nimrah Damsel’s broken crystal
Mob: Nimrah Damsel
HP: 99’235
Spawn amount: 46
View item click here

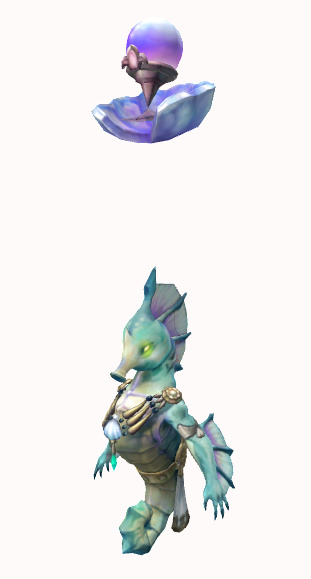
The mob is quite easy, it is flying and magic. The magic attacks can be dodged by moving around because they are NOT homing magic attacks.
Video example farming Nimrah Damsel mobs click here
Another vid here
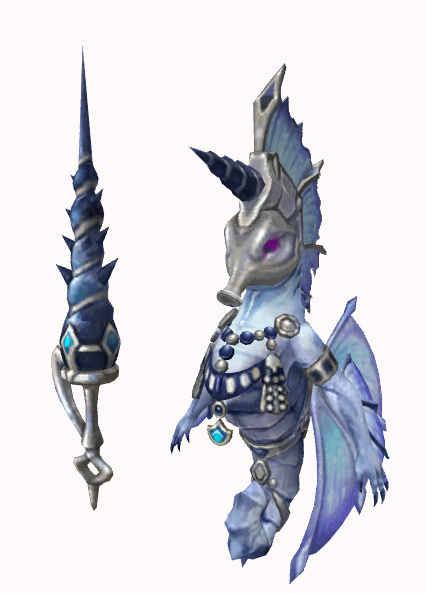
Iotheo Coast - Spear & Pike
This map does not have a warp statue.
Spear: 107x Nimra Lancer’s Spear
Pike: 193x Nimra Lancer’s Spear
Mob: Nimrah Lancer
HP: 153’446
Spawn amount: 43
View item click here
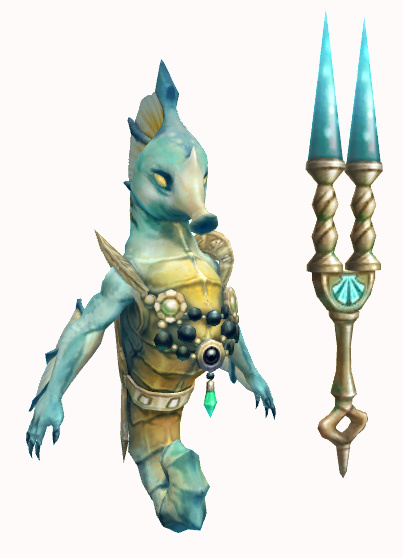
Iotheo Coast - Rapier & Dagger
Rapier: 107x Nimrah Soldier’s Broken Rapier
Dagger: 86x Nimrah Soldier’s Broken Rapier
Mob: Nimra Soldier
HP: 192’885
Spawn amount: 28
View item click here

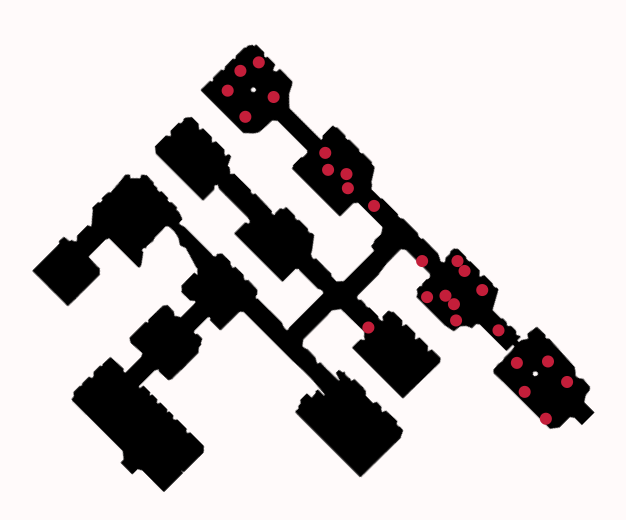
Iotheo Coast - Musket & Cannon
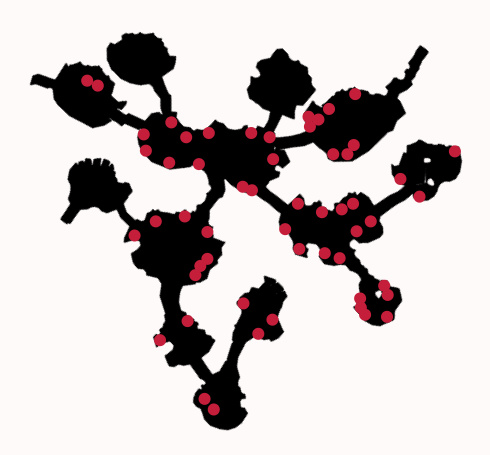
Rifle: 193x Varle Gunner’s Cannon Decoration
Cannon: 86x Varle Gunner’s Cannon Decoration
Mob: Varle Gunner
HP: 191’232
Spawn amount: 55
View item click here
View Varle Gunner mob click here
Varle Gunner canNOT move, it is an immobile mob. However it uses Physical Ranged homing attacks on you when you are in range.
Vid farming at the coast map here
Sausys Room 10 - Bow & Crossbow
This map does not have a warp statue.
Bow: 193x Horn of the Lunar Angel
Crossbow: 107x Horn of the Lunar Angel
Mob: Lunar Angel
HP: 141’363
Spawn amount: 20
View item click here


Lunar Angels are Flying mobs.
Very short part of vid, farming some angels click here
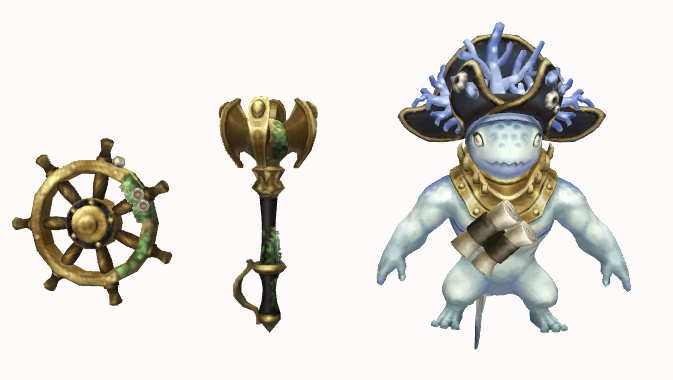
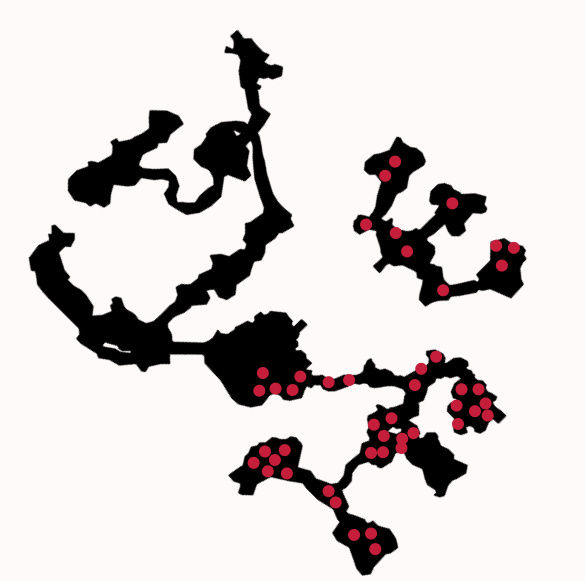
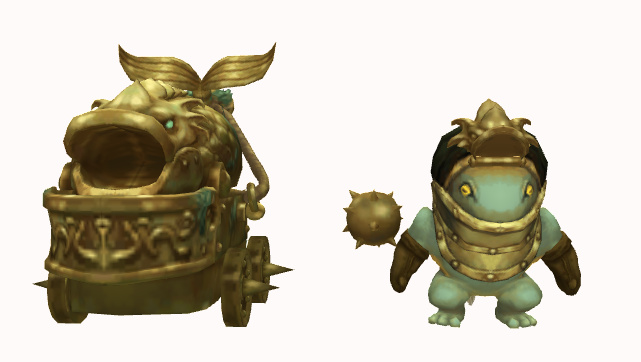
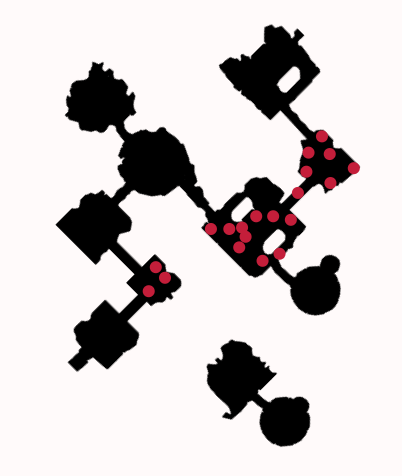
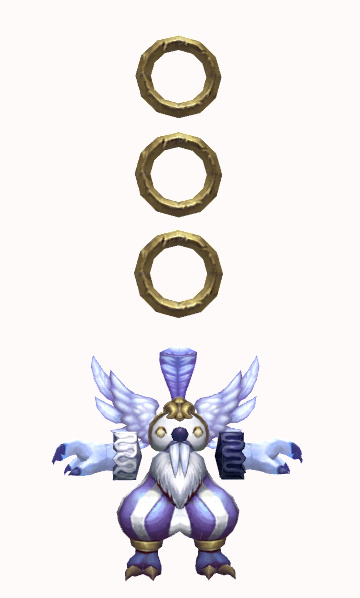
Narvas Temple - Pistol & Shield
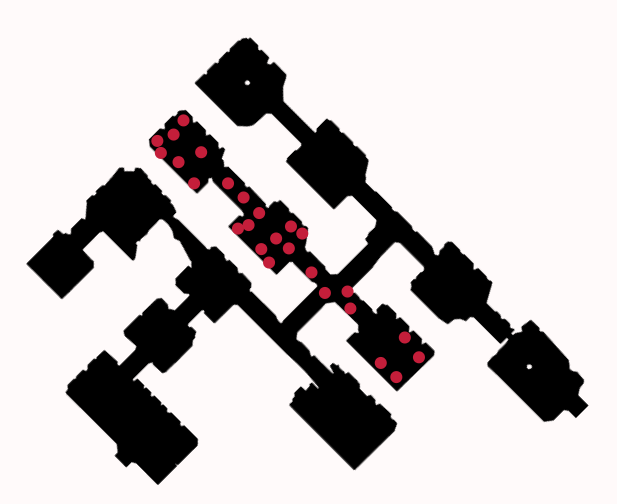
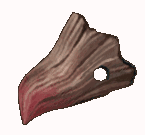
Pistol: 86x Swollen Beak
Shield: 86x Swollen Beak
Mob: Boor
HP: 169’920
Spawn amount: 26
View item click here
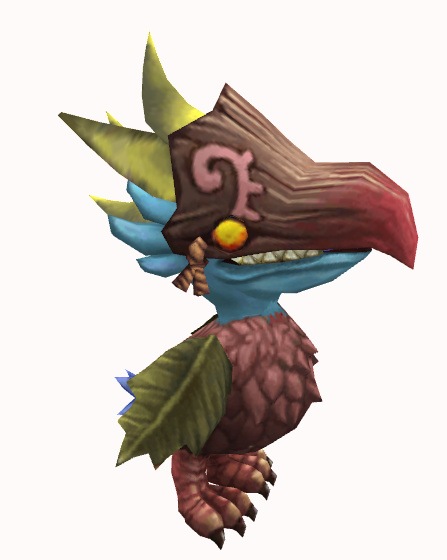
The bird (Boor) is melee, physical and ground-type. Its attacks inflict knockback and will cancel your skills.
Narvas Temple - Leather Armour set
This map does not have a warp statue.
Leather: each piece of leather armour needs: 43x Nook Leather
Mob: Nook
HP: 168’220
Spawn: 25
View item click here
View Nook mob click here
Valandis Room 91 - Cloth armour set
This map does not have a warp statue
Cloth: each piece of cloth armour needs: 43x Creto Feather
Mob: Creto
HP: 146’580
Spawn: 30
Location: Valandis Room 91
View item click here

Tekel Shelter - Plate armour set
This map does not have a warp statue.
Plate: Each piece of Plate armour needs: 43x Yakyak Horn
Mob: Yakyak
HP: 146’160
Spawn: 24
View item click here

View Yakyak mob click here
The Yakyak is a flying mob. It is melee and Physical, easy to kite.
Video of killing yakyaks here


