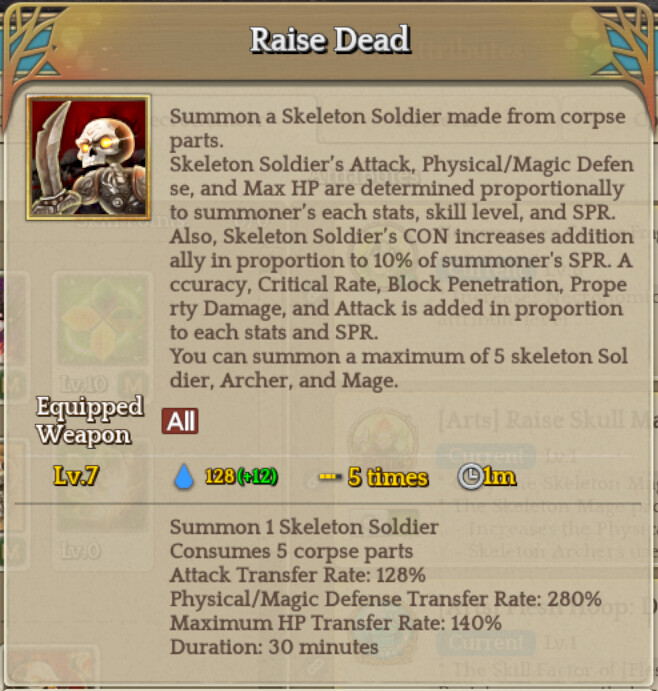
Hi all,
I’ve decided to write up a bit of a summoner build guide.
I will expand on the guide over time as needed when questions arise.
(Last Update: September 2024)
About Me
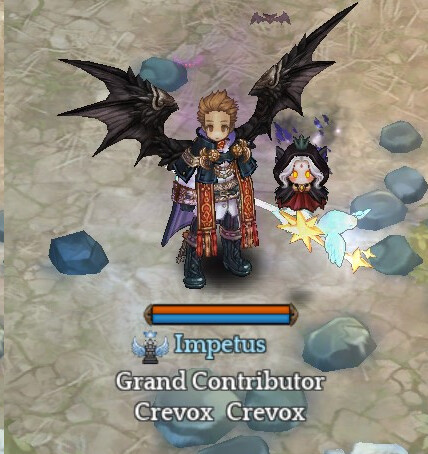
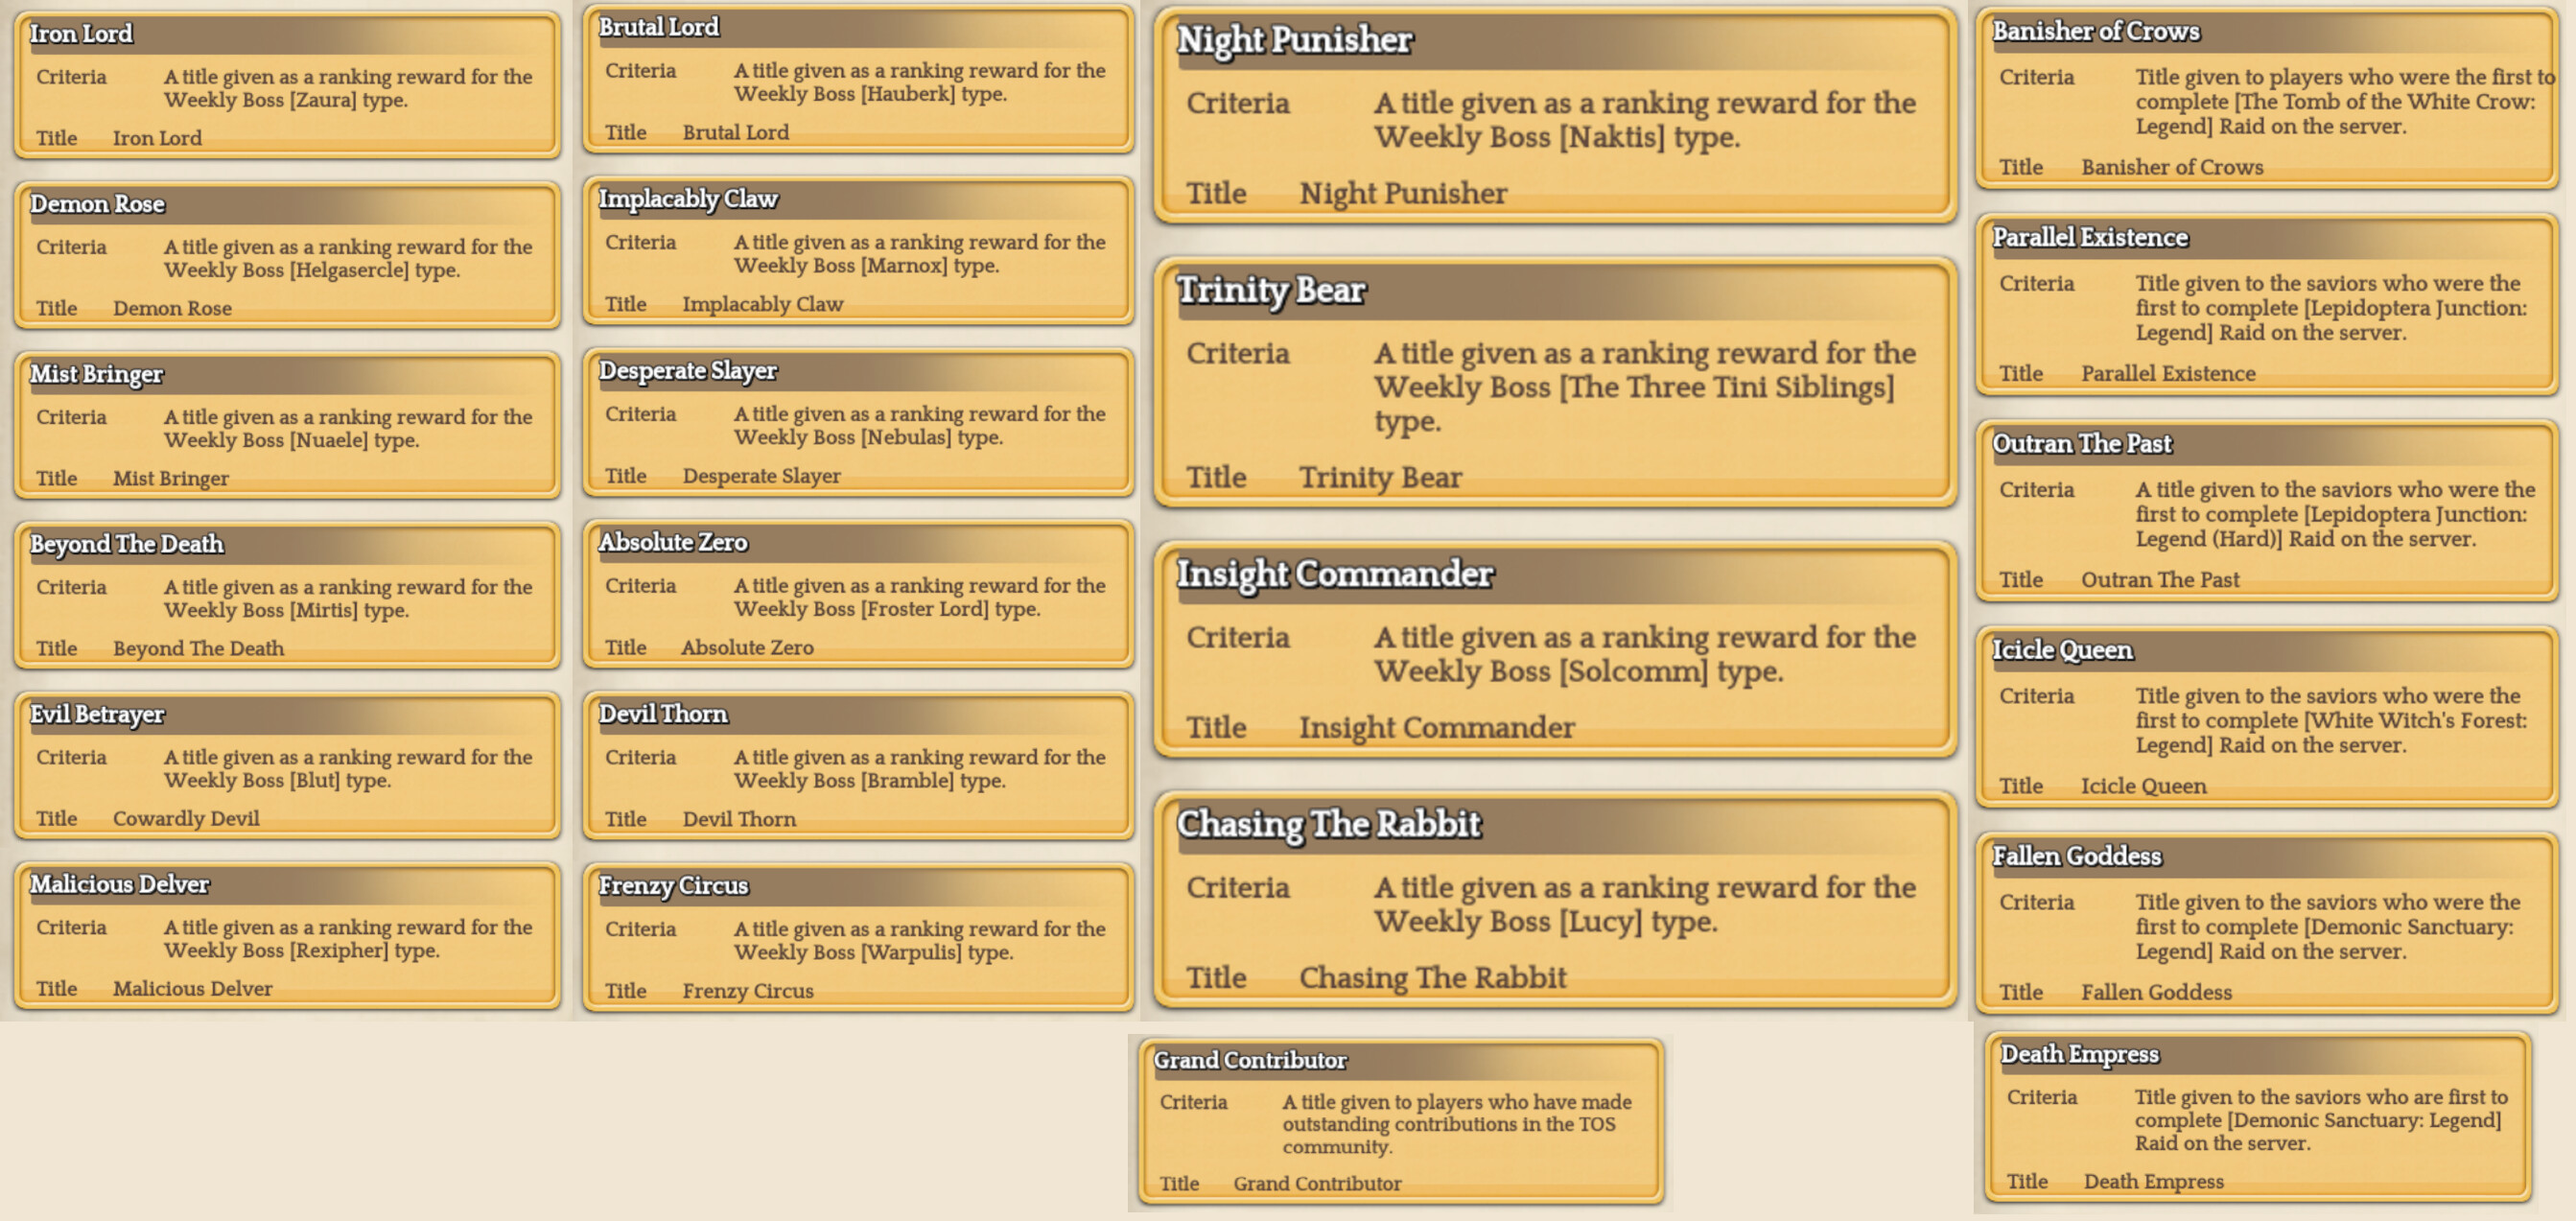
I’m Crevox, and I’ve been playing summoner since the game’s beta. I have 6/7 of the game’s server first raid titles, and every title for ranking 1st place on the game’s different weekly boss raids. This was all accomplished only using summoner. Needless to say, I have a pretty good idea of what I’m doing with the build.
Extremely Short TL;DR version of guide
Updated/New Link:
https://itos.gihyeonofsoul.com/planner/?d={2001}055001{2006}f110b55a{2009}a5050a555
You can choose any DPS Wizard class as your final class. The best option is Illusionist, but this may be difficult to unlock as it requires TP or purchasing the unlock voucher from the market. Chronomancer can also be used simply for the skill Pass, which reduces the cooldown of your skills.
-All stat points allocated into INT.
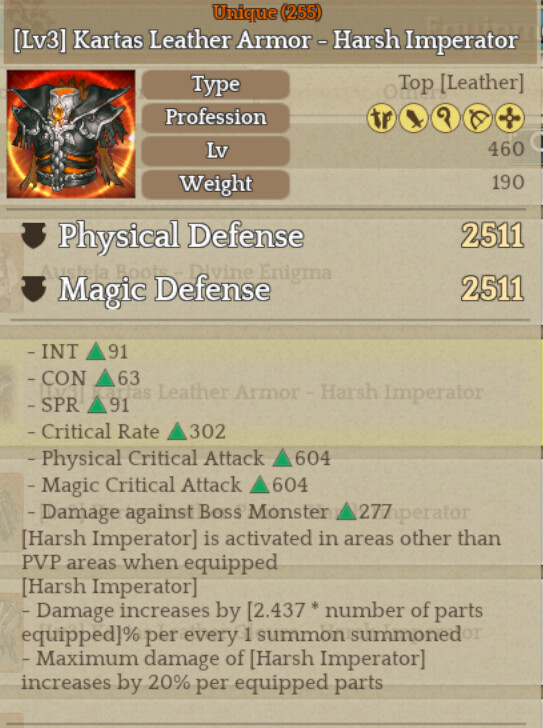
-Use leather armor with INT+SPR+Crit.
-Use staff + trinket x2. Do not use rods or daggers.
-Use Zaura Card x2 for AoE, Ignas Card x2 for bossing, Giltine Card if you have her for bossing.
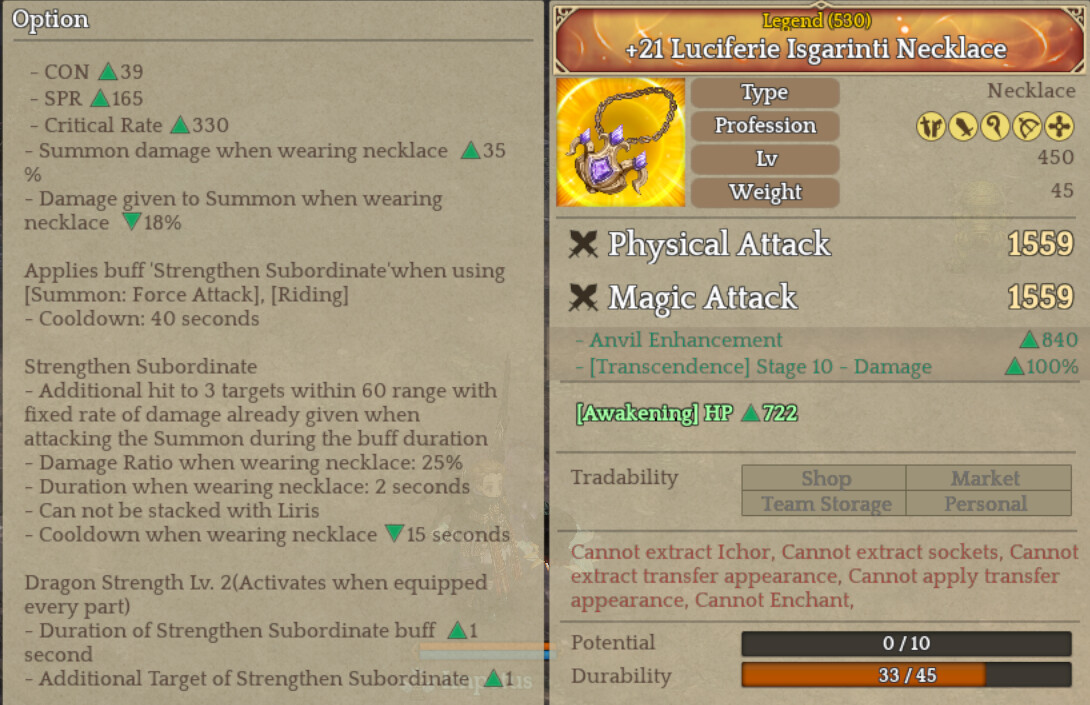
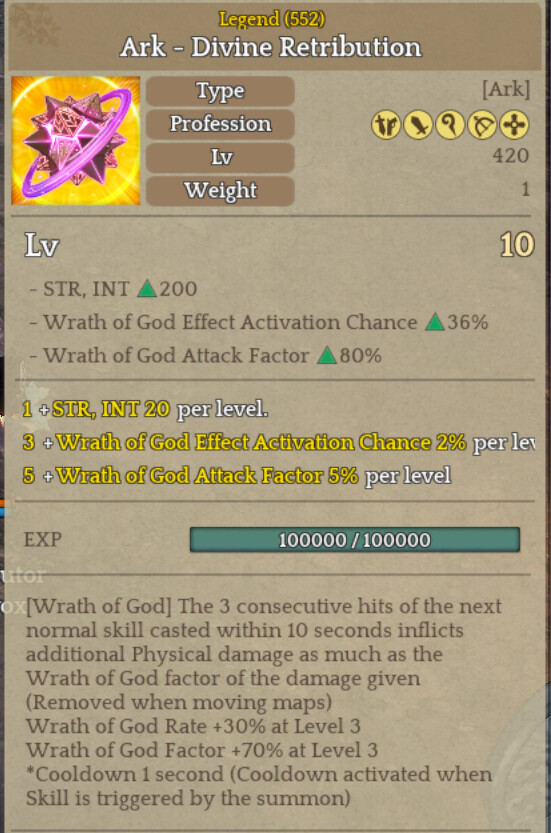
-Luciferie Isgarinti accessories with Divine Retribution Ark, Nebiltis Triukas/Pyktis accessories at endgame.
-Use monster race black gems for relic.
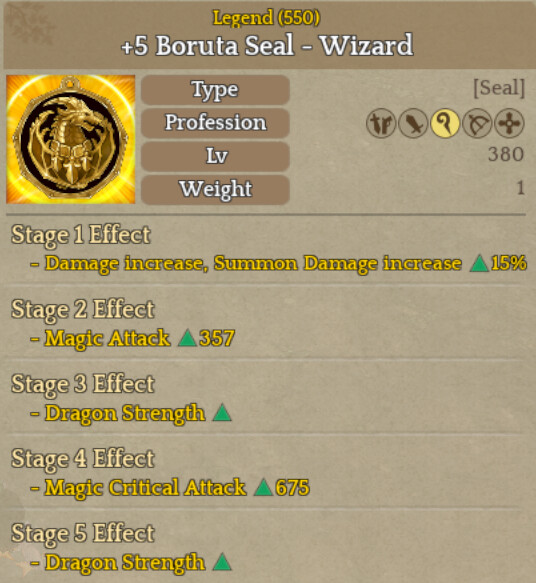
-Red cards = race cards, Blue cards = Zaura/Nuaele, Green cards = Rozalija or Lucia, Purple cards = Gazing Golem, Legend card = Froster Lord/Boruta → Giltine → Slogutis.
So what is summoner?
Summoner generally refers to the build that makes use of Sorcerer and Necromancer, the game’s two Wizard classes with purple icons. This indicates that their main method of dealing damage and play is through summons.
In general, I would rate the build to have a high difficulty level to play optimally in end-game content. It can certainly be played in all levels of content with relative ease, but if you want to push its optimization and damage to the highest level, it’s going to take some practice and work. It is also generally considered a more expensive build to play than most due to specific equipment requirements that are different than other builds, and will be more difficult to start out with if you’re a new player. That said, it’s not impossible, and will work just fine, but it’s going to take more work than other classes.
We’ll go into the full description of items you need and such, but I want to give a quick comment about the gameplay style. A lot of people go into the summoner build expecting to have an army of summons that do all the work for you while you either afk or do nothing. This is not the type of gameplay that this game’s summoner offers. You will need to actively work with your summons to debuff monsters and support them, while constantly summoning new creatures and controlling your existing ones to deal damage. Playing a more passive style will greatly reduce the amount of damage you get out of your character and make things a lot harder for you.
First, lets cover the main stats you need, as this will be an important explanation of how summons work before we get into explaining each class.
Main Stats
Summoner is a build focused on dealing damage. It uses Magic Attack, which means its main damage scales with INT, as INT increases your Magic Attack. All summons gain a portion of your MATK stat upon creation, and this is the main stat that determines how much damage they deal. This makes it very important to have a very high INT stat.
However, summons also gain damage with your SPR stat (Spirit), which makes SPR extremely important for summoner as well. This is sort of a special case in the game, as most classes use SPR as a secondary stat for SP and Magic Critical Attack.
How SPR works
The main function of SPR is increasing your summon’s damage. The way it does this is it scales the Skill Factor of all skills used by summons. Every summon in this game attacks by using skills, just like players, and even their generic auto attacks are considered skills. Like players, their skills have a Skill Factor, which is what you see on most class skills. This is a percentage of damage dealt from their ATK stat. A quick example is that if the summon had 100 ATK and used a skill that has 500% skill factor, they would deal 500 damage. SPR will raise this 500% to be higher, so that the summon will deal more damage.
In general, this makes SPR and INT scale together in tandem. You need both. ATK will determine the base damage dealt, while SPR will scale their damage with the skills they use. This makes summoner fairly gear reliant, because it doesn’t just need one stat: without both, summons will do poor damage.
However, this is also another factor to this. SPR will also control how much of your stats will get transferred to your summons upon creation. These stats are your ATK, DEF, HP, Accuracy, Evasion, Critical Rate, Critical Resistance, Block, and Block Penetration. For everything except ATK/DEF/HP, this is hard capped at 100% transfer rate. This means that if you have 5000 Critical Rate, any summon you create will gain +5000 Critical Rate. This allows you to enable your summons to critically hit enemies, have enough accuracy to not miss, etc. The amount of SPR you need increases based on your level, and they gain this much (this formula provided by IMC):
(SPR / Char level * 4)%
In general, you don’t really need to worry about the formula. As you are leveling up, you will generally have a hard time reaching 100% transfer rate, so just get as much SPR as you can. Once you’re in at least starter end-game gear and have thousands of SPR, you will reach 100% transfer rate very easily. It does mean that as you are leveling, summons will feel a bit weaker than they should, at least until you get to max level.
Which stat is more important? INT or SPR?
I would say they are both equally important. They both scale different aspects of your damage. If one stat gets too low, the other becomes more powerful, and vica versa. Whenever possible, you want to get both stats on equipment and items. If you have to make a decision, in most cases, SPR will be more important, but INT can also be more important depending on buffs, debuffs, the enemy you are fighting etc.
Overall, just try to gear as much stats as possible and don’t sweat the details.
 Sorcerer
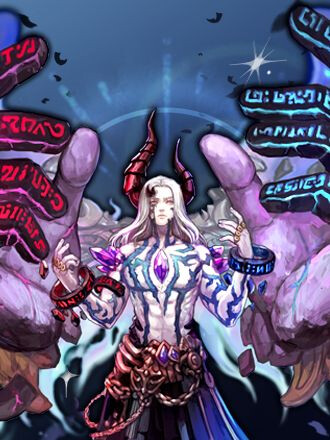
Sorcerer is the pillar of the summoner build. Its gameplay style revolves around summoning demon boss monsters to fight for you, while you sometimes control them to use their powerful skills at opportune moments. You can control which demon boss monster you summon by putting cards in the Sorcerer’s grimoire UI, which is exclusive to this class.
This class is very powerful, but is a bit tricky to play and has a high difficulty level to manage its nuances correctly. Let’s take a look at each skill.
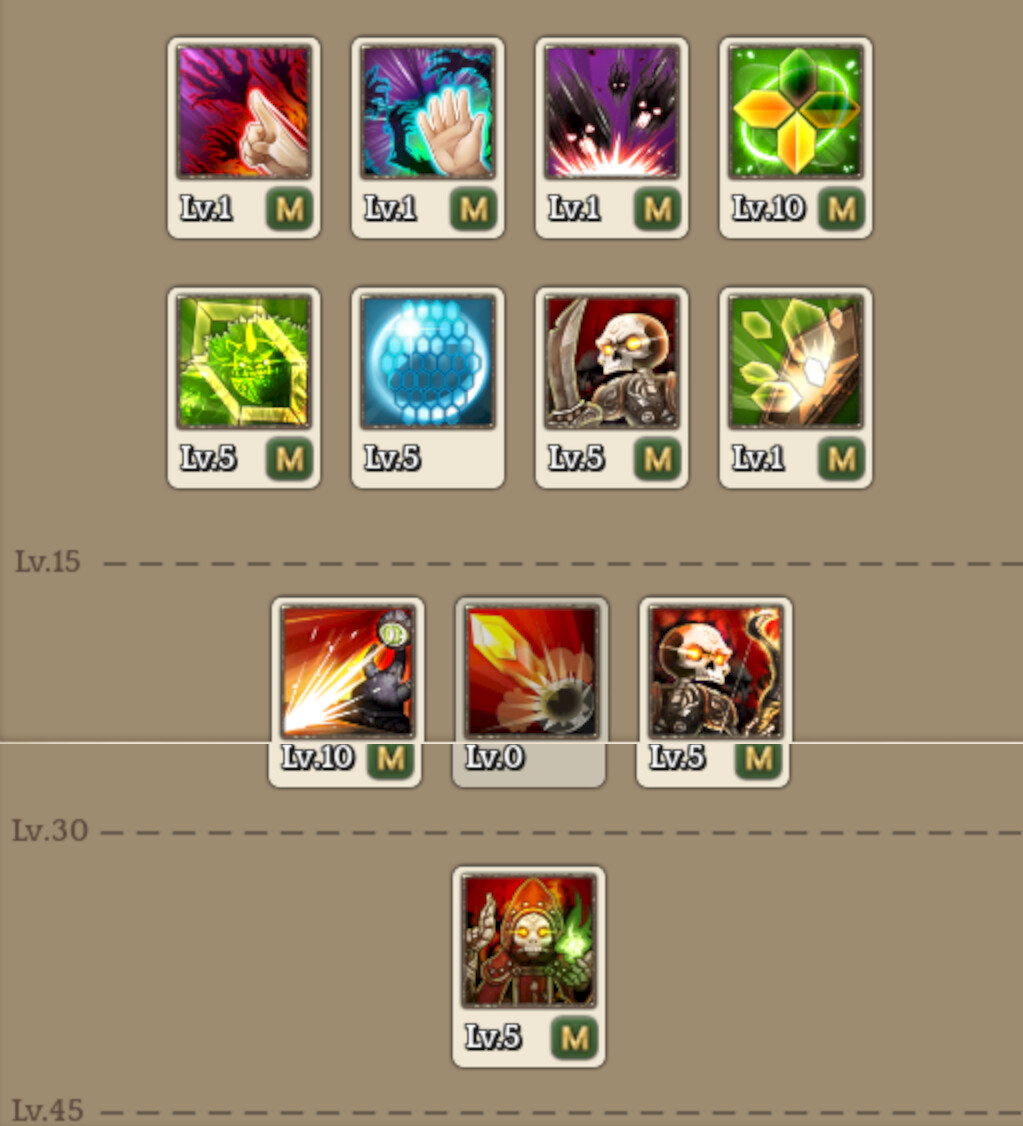
Summoning
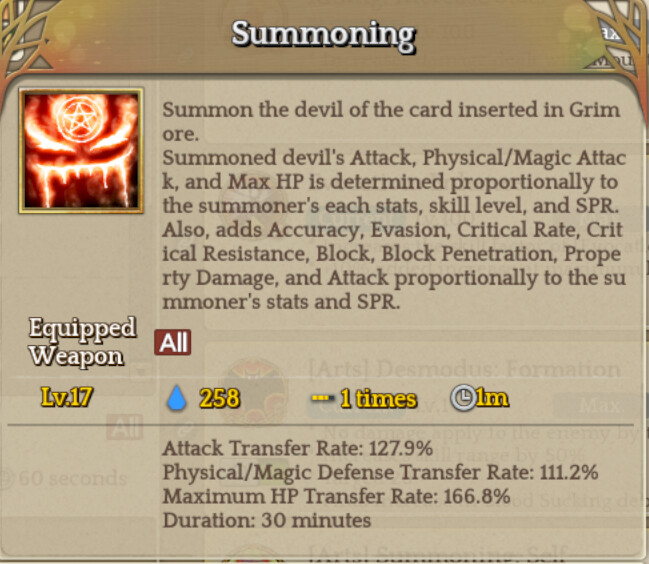
This is the most important skill of the entire class, and also, the entire build.
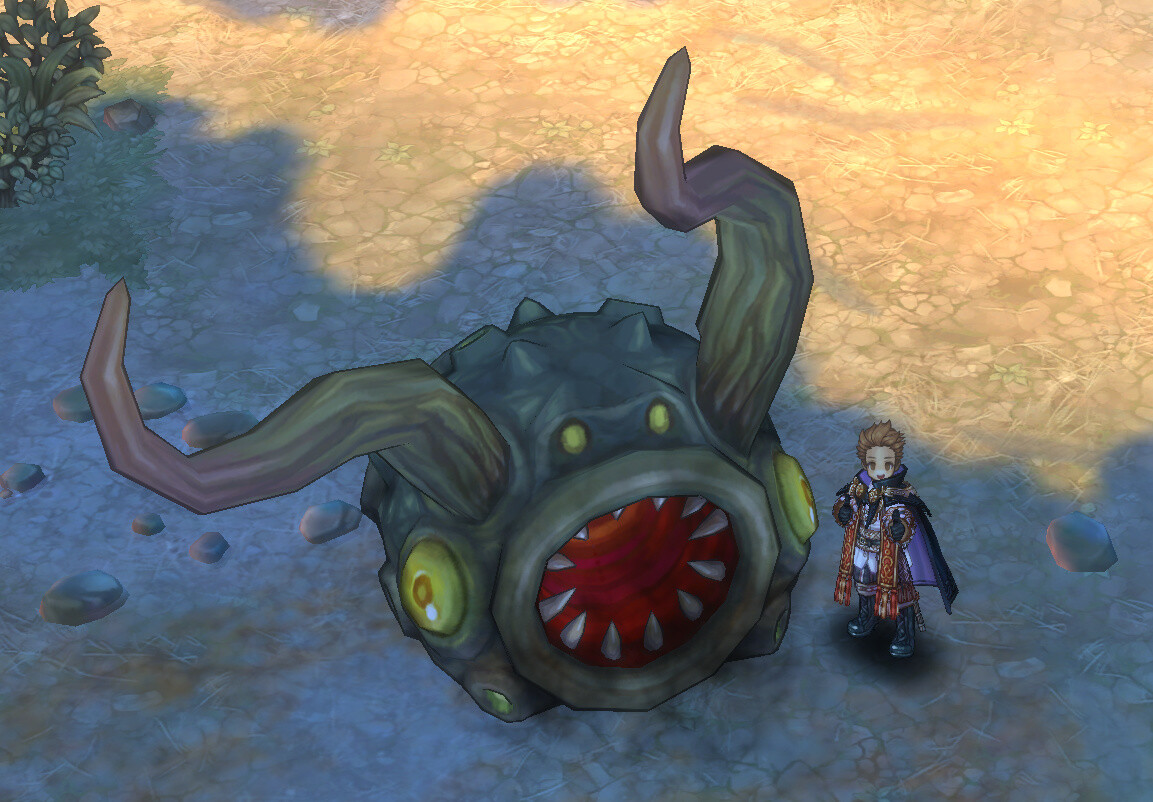
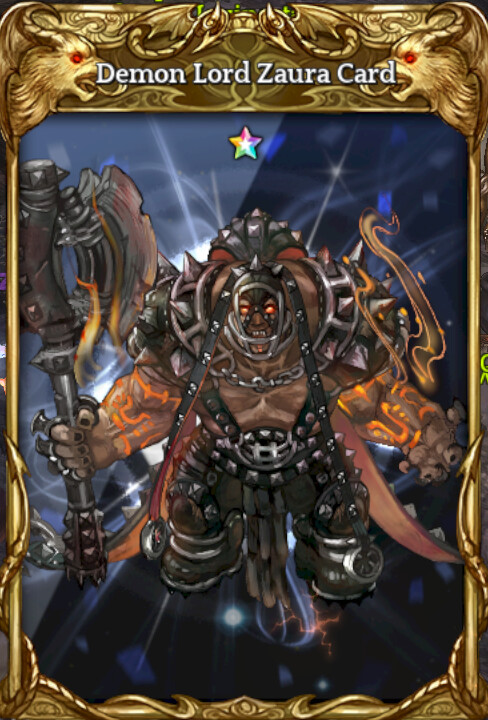
When used, this skill summons the boss demon out of the card in the first slot of your grimoire. For example, this is the Demon Lord Zaura Card.
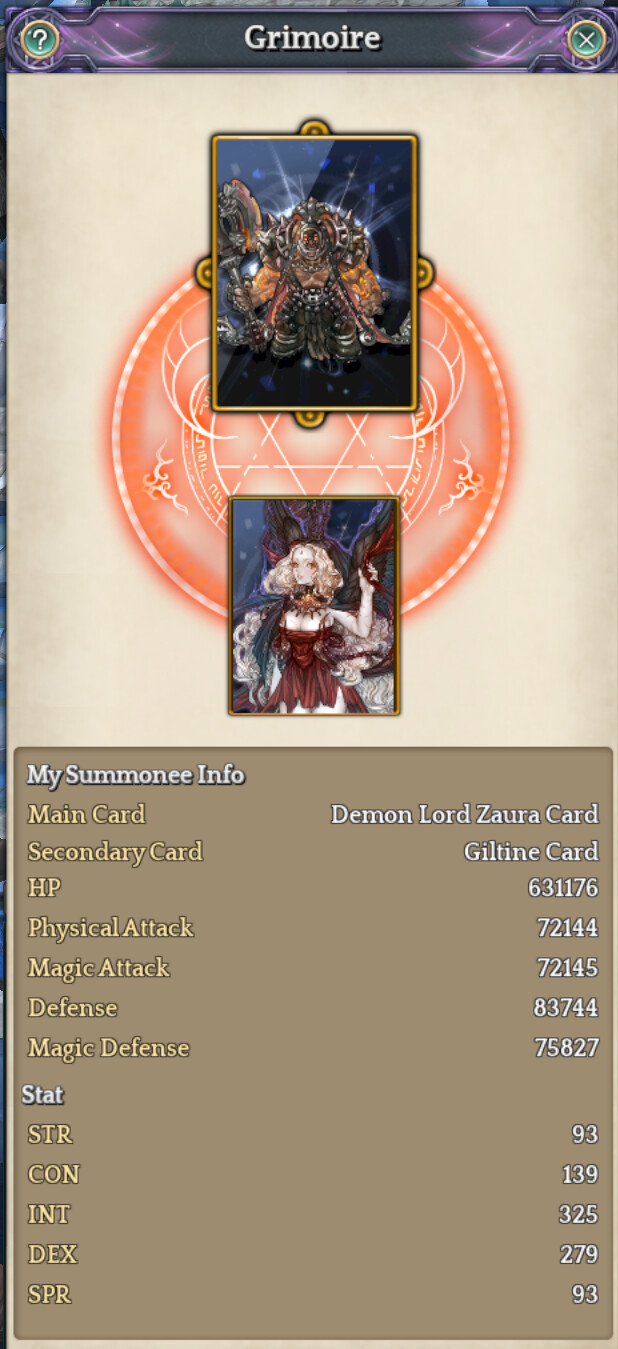
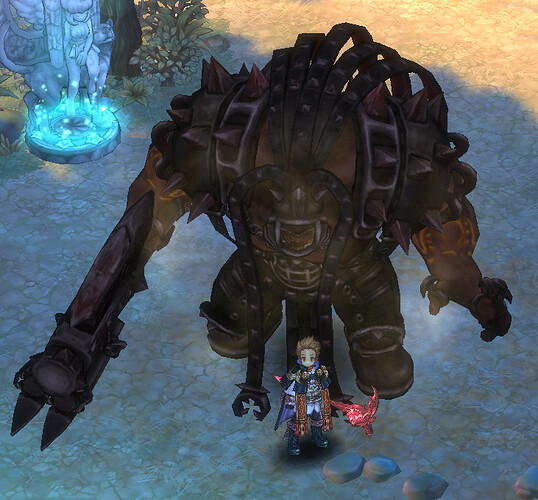
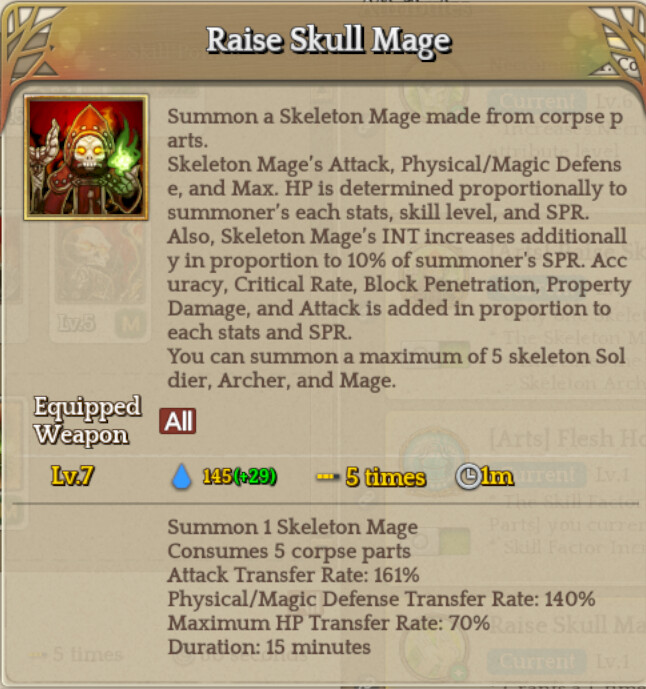
The skill level scales the ATK, DEF, HP, and size of the summoned demon. Their stats are almost all based off of your stats, gaining a percentage of each upon summon. At skill level 15, this is 100% of your ATK/DEF and 150% of your HP, but you can exceed skill level 15 through various means, reaching a hard cap of level 18. This makes their stats even higher than yours. Keep in mind that the same rules about SPR I described above apply for this summon, and you will need to get as much SPR as you can so that the stats will all transfer in full value.
By default, the summon will follow you and attack any enemies that you come near with a basic auto attack. Some summons attack faster than others, and every summon has its own Skill Factors on their skills that determine how much damage they deal. Every summon also has access to 2+ other skills as well, but they won’t use these without your command. Every summon in the game will completely stop attacking enemies if you do not attack any enemies yourself for 1 minute.
How to use summon skills
Summons can either use their skills automatically, or you can command them to use them through the skill Riding.
To have summons use skills automatically, use the art Summoning: Self. This disables Riding, but makes summons use all their skills without any input from you. Note that they will use their skills in no specific order and at complete random. Whenever they attack, they pick any given skill that is not on cooldown (even their auto attack) and use it; there is no priority. There is a Riding attribute called Mount: Increased Stats that provides +50% damage dealt while riding a summon, and with this art enabled, it will always be active, so you won’t lose that damage bonus.

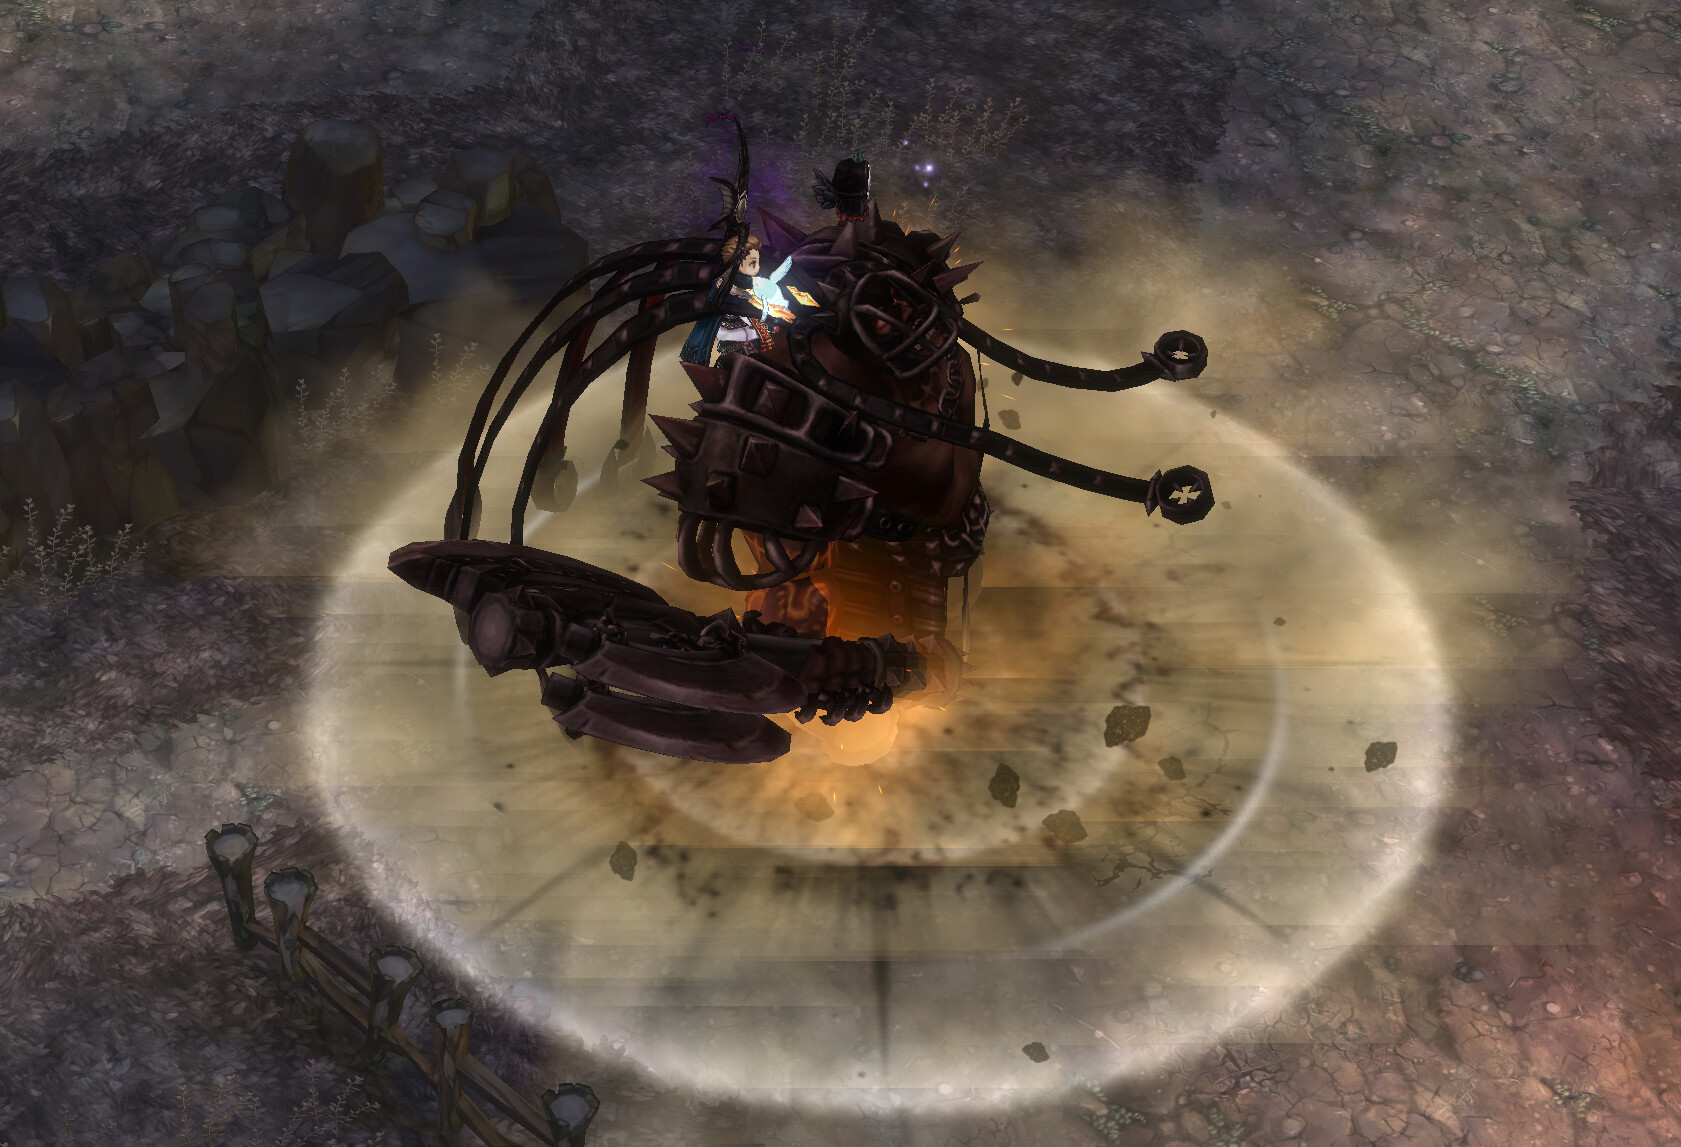
To use the skills on command, you need to use the skill Riding.
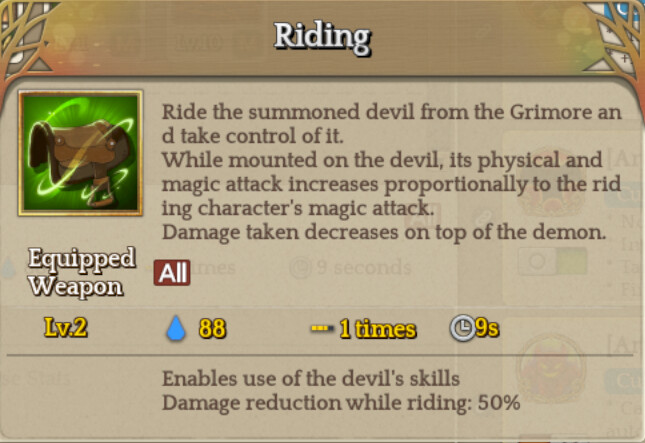
Riding will disable use of all of your skills and mount you on top of the demon, giving you full direct control of its movement and skills. It will also make you take half damage if you are hit while riding the demon. It will change your hotbar to their skills, with one extra button to dismount:

Each skill has its own cooldown based on the demon and Skill Factor. While riding the demon, it will also gain an additional 20% of your MATK, and this does not occur when using the art. This makes Riding the demon always stronger than having it use its skills automatically, and also gives you full direct timing and control.
Riding is better if you are bossing and concerned with timing and getting the most damage out of your summon. The art is better if you are doing something simple like Challenge Mode and just want to kill a bunch of monsters quickly.
Which demon card should I use?
There are many different demon cards in the game that can be summoned. However, most of them are extremely weak and only summonable for fun. In a certain patch, IMC decided to buff a very specific list of demons to be usable in combat and deal real damage, while all the rest are very weak.
Templeshooter
Gorkas
Netherbovine
Froster Lord
Ignas
Marnox
Zaura
Nuaele
Rexipher
Abataras
Merregina of Despair
Giltine
Slogutis
If you are playing a sorcerer, I highly advise you use at least one of these cards and not others. All of them are viable, but the strongest at this moment are Zaura, Ignas, and Giltine. For some demons, they have a legendary version of their card and a regular version. They are the same in power, but the legendary version will summon a larger version that shines golden. It is purely cosmetic. Also, the stars (card level) has no effect on the power of the summon, so you can leave it at level 1.
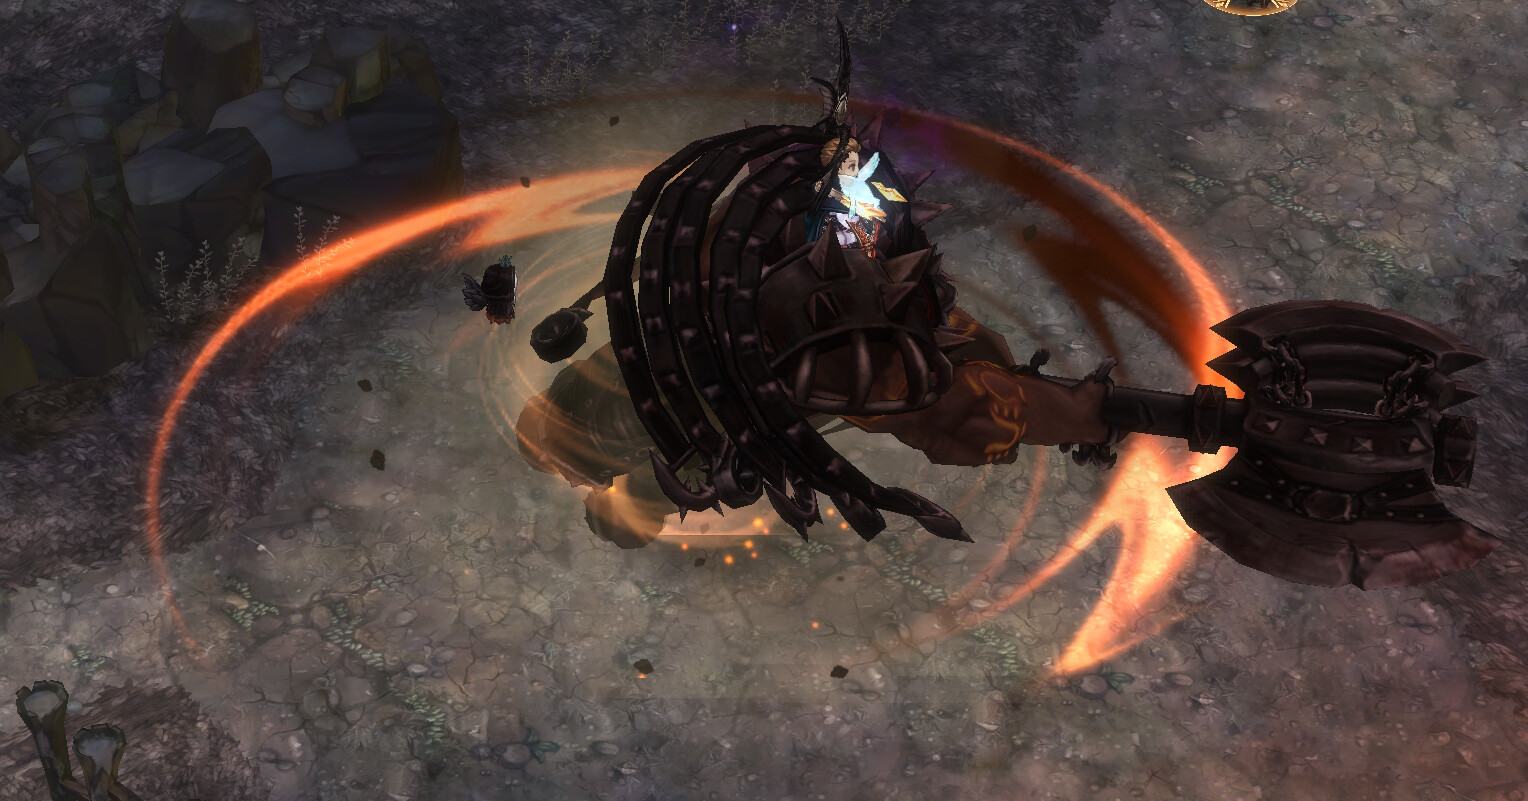
Zaura
Zaura is primarily used for his extremely strong area of effect skills. He deals high damage in a wide area and is great for taking out many monsters at once. While he does okay damage against bosses, other summons are better. You will want to use him for general farming, Challenge Mode, etc. All of his attacks have 50 AoE Attack Ratio, which is very high and it will cause him to hit many enemies at once. He purely does Physical damage to enemies.
You can obtain the Zaura Card very rarely from blue monster card albums. You can obtain the legendary version of his card (Demon Lord Zaura Card) from Weekly Boss Raid cubes. You can obtain either one from the player market as well.
Skills
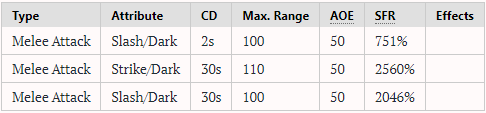
Skill 1

This is Zaura’s auto attack. It is a pretty standard axe swing every 2 seconds. The damage on it is relatively high compared to most auto attacks. Despite the animation, he only hits monsters in a cone directly in front of him. It is decent filler damage, nothing else.
Skill 2
Zaura roars, dealing damage to everything nearby him in a large circle. This skill does strike damage, which means it will do more damage to plate armored enemies. It hits 3 times, and has a slightly larger range than skill 3. It does about the same total damage, but it executes a bit slower.
Skill 3
Zaura spins his axe in a cyclone. This hits monsters in a wide circle around him. The damage is very high and it hits a total of 4 times. It does slash damage, which means it does more damage to cloth armored enemies. This skill executes quicker, but has slightly less range than skill 2. It does about the same total damage.
Zaura can use his skills on auto without much problem. If you want to use Riding with him for tougher enemies, I advise using skill 3 first because it executes faster. This matters for combining timing with buffs like the Isgarinti set.
Ignas
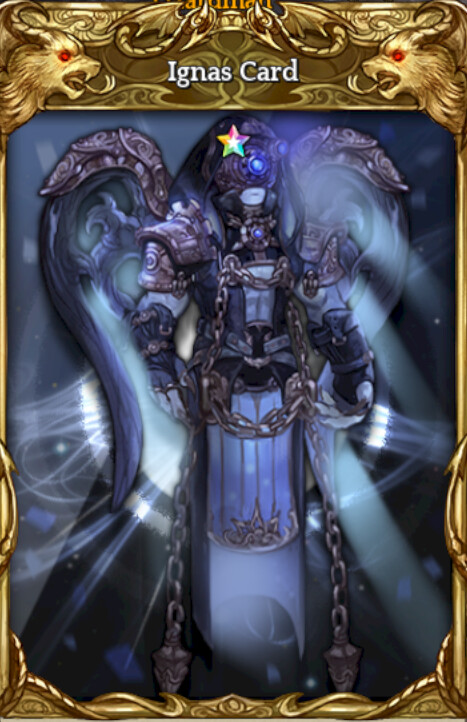
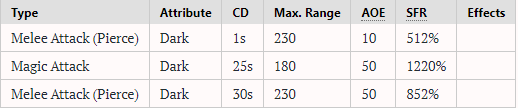
Ignas is primarily used for fighting boss monsters. His attacks hit in a smaller area but deal much more focused, high damage. They also execute very quickly with a moderate cooldown. Ignas has 1 magic attack skill, and 1 physical attack skill.
You can obtain the Ignas Card from the Mercenary Badge Shop at the cost of 50,000 badges. You can also purchase him from the market.
Skills
Skill 1

Ignas pulls back his bow, and fires an arrow forward. This is his auto attack.
This skill executes relatively quickly and hits in a straight line in front of Ignas. It only has 10 AoE Attack Ratio, which means it is a poor choice for dealing damage to a large number of enemies, but it does decent damage.
Skill 2
Ignas pulls back his bow, and fires multiple arrows into air. These rain down on nearby enemies and also randomly on the ground in the area. This skill deals magic damage.
This skill does not do a very large number of hits. He will directly fire arrows at nearby monsters, deciding which monsters immediately upon beginning to execute the skill, even if they move away. Each monster can only be targeted by a set number of arrows, and if there aren’t enough enemies, the others will land randomly on the ground around him. This means you can deal more damage to a single enemy if there are multiple enemies on top of each other, because the arrows hit in an area upon landing.
This skill executes slower than skill 3, but each individual hit does more damage. Overall, it does less damage than skill 3.
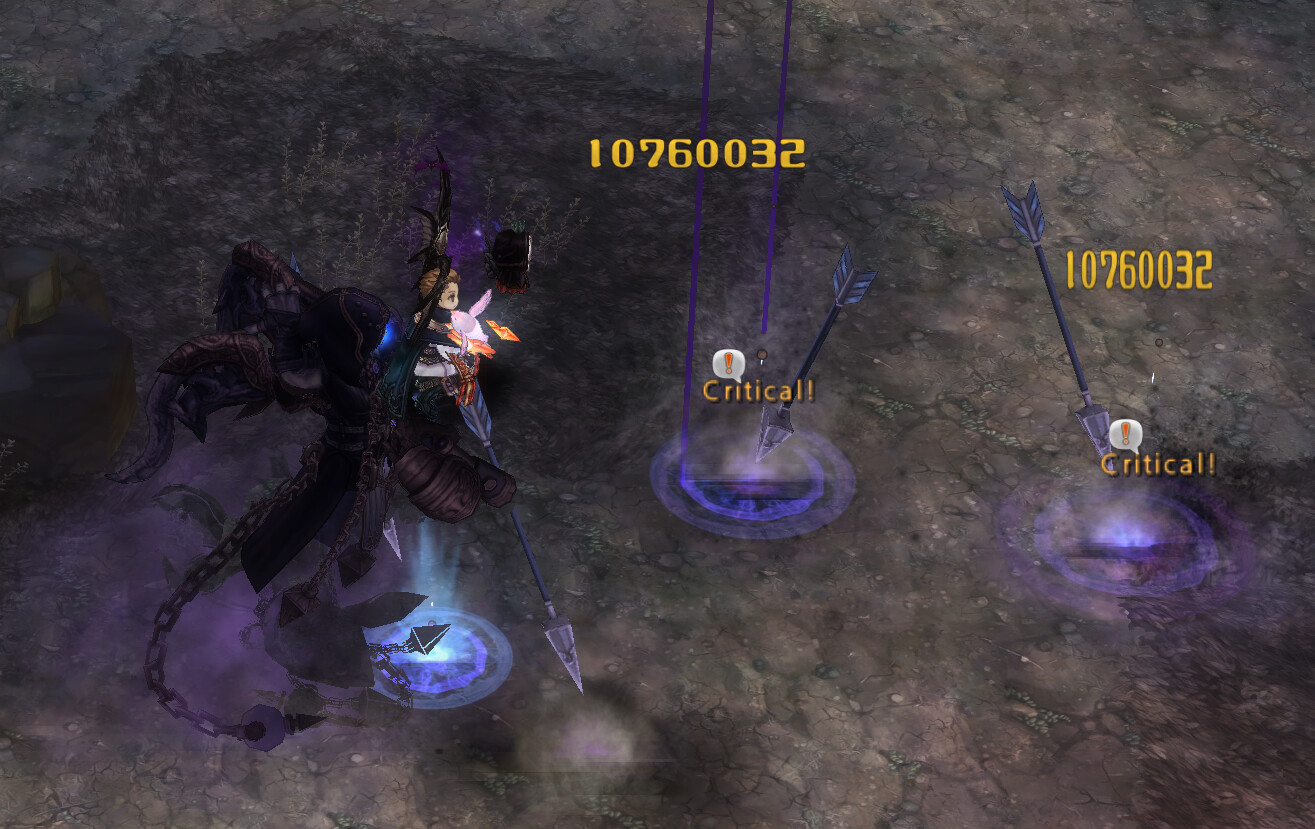
Skill 3
Upon use, Ignas immediately fires arrows down at the ground directly in front of him, creating many explosions in the shape seen above. He will also backslide slightly after use, moving him backwards away from his target area. This skill deals physical damage.
Each individual patch of fire is actually its own hitbox, and they hit multiple times each. This makes it excellent for dealing damage to enemies that are large in size (bosses), but weak against small enemies because they won’t be hit many times. It also knocks back any regular enemies and sends them flying, making it awful for use in AoE situations.
Because of the size of the area, you will want to position yourself while Riding with Ignas right in front of the boss monster to maximize damage. This skill does very high damage to bosses, and executes extremely quickly. This also makes Ignas a poor choice to use with automatic skill usage, because he won’t make any effort to position himself correctly to deal full damage with this skill. His auto attack is ranged as well, so a lot of times he will stay at range and simply shoot the ground and miss with this skill if he is not manually controlled.
In general, you want to ride him, use skill 3, then use skill 2. Stay mounted for the full duration of both skills so he gains the damage benefits from Riding until they deal all of their hits. Skill 3 executes faster and does more damage, so it is more important to use first right after getting him into position. It also has a longer cooldown, so using it first will line up the cooldowns between skills 2 and 3.
Giltine
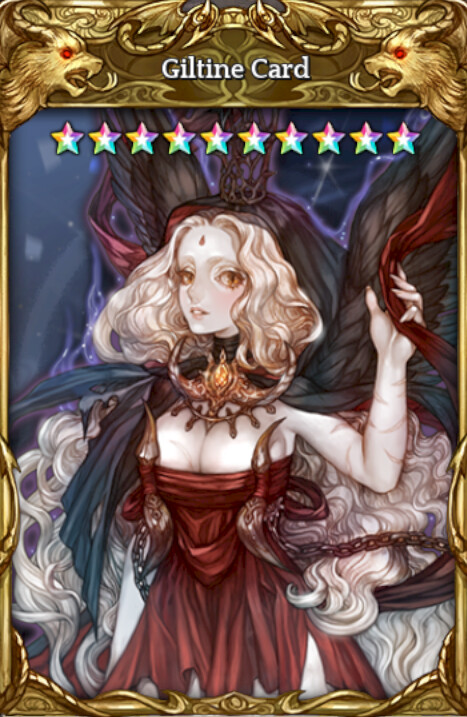
I’m going to include Giltine in my guide, but know that this card is extremely difficult to obtain, and most players will never have one unless IMC eases the requirements.
Giltine is primarily used for fighting boss monsters, but has decent AoE ability as well. She can be used in almost all cases, but Zaura is still better for AoE damage. She deals purely magic damage.
Giltine and Ignas were about the same on damage output, but recent changes have made Giltine better than Ignas for fighting bosses. Because you cannot equip Giltine Card for the +80% boss damage at the same time as summoning her, it is better to use Ignas summon and equip Giltine Card to your character rather than summon her. It’s only viable to use her as a summon if you have two Giltine Cards, which is very unreasonable. IMC needs to change it so that we can use one card for both purposes or create character-bound duplicates.
You can obtain the Giltine Card by combining Glimpse of Chaos x10 with a level 10 Boruta Card and any other level 10 legend card. This means you need two level 10 legend cards and one of them has to be a Boruta. Glimpse of Chaos is about a 2% drop rate from the party version of the Demonic Sanctuary raid (against Giltine). All of these items are extremely expensive.
Skills
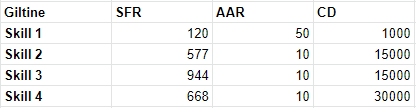
Skill 1
Giltine swings her scythe forward, dealing damage to enemies in front. It deals magic damage despite being a scythe swing.
This attack executes extremely quickly and has a low cooldown, but the damage is extremely poor. The attack speed of it doesn’t make up for how weak it is. It does have 50 AoE Attack Ratio, which means it can easily hit many monsters, but don’t expect it to do too much. The Skill Factor on it is just far too poor to actually do decent damage in end-game content. It is a filler attack and nothing else.
Skill 2
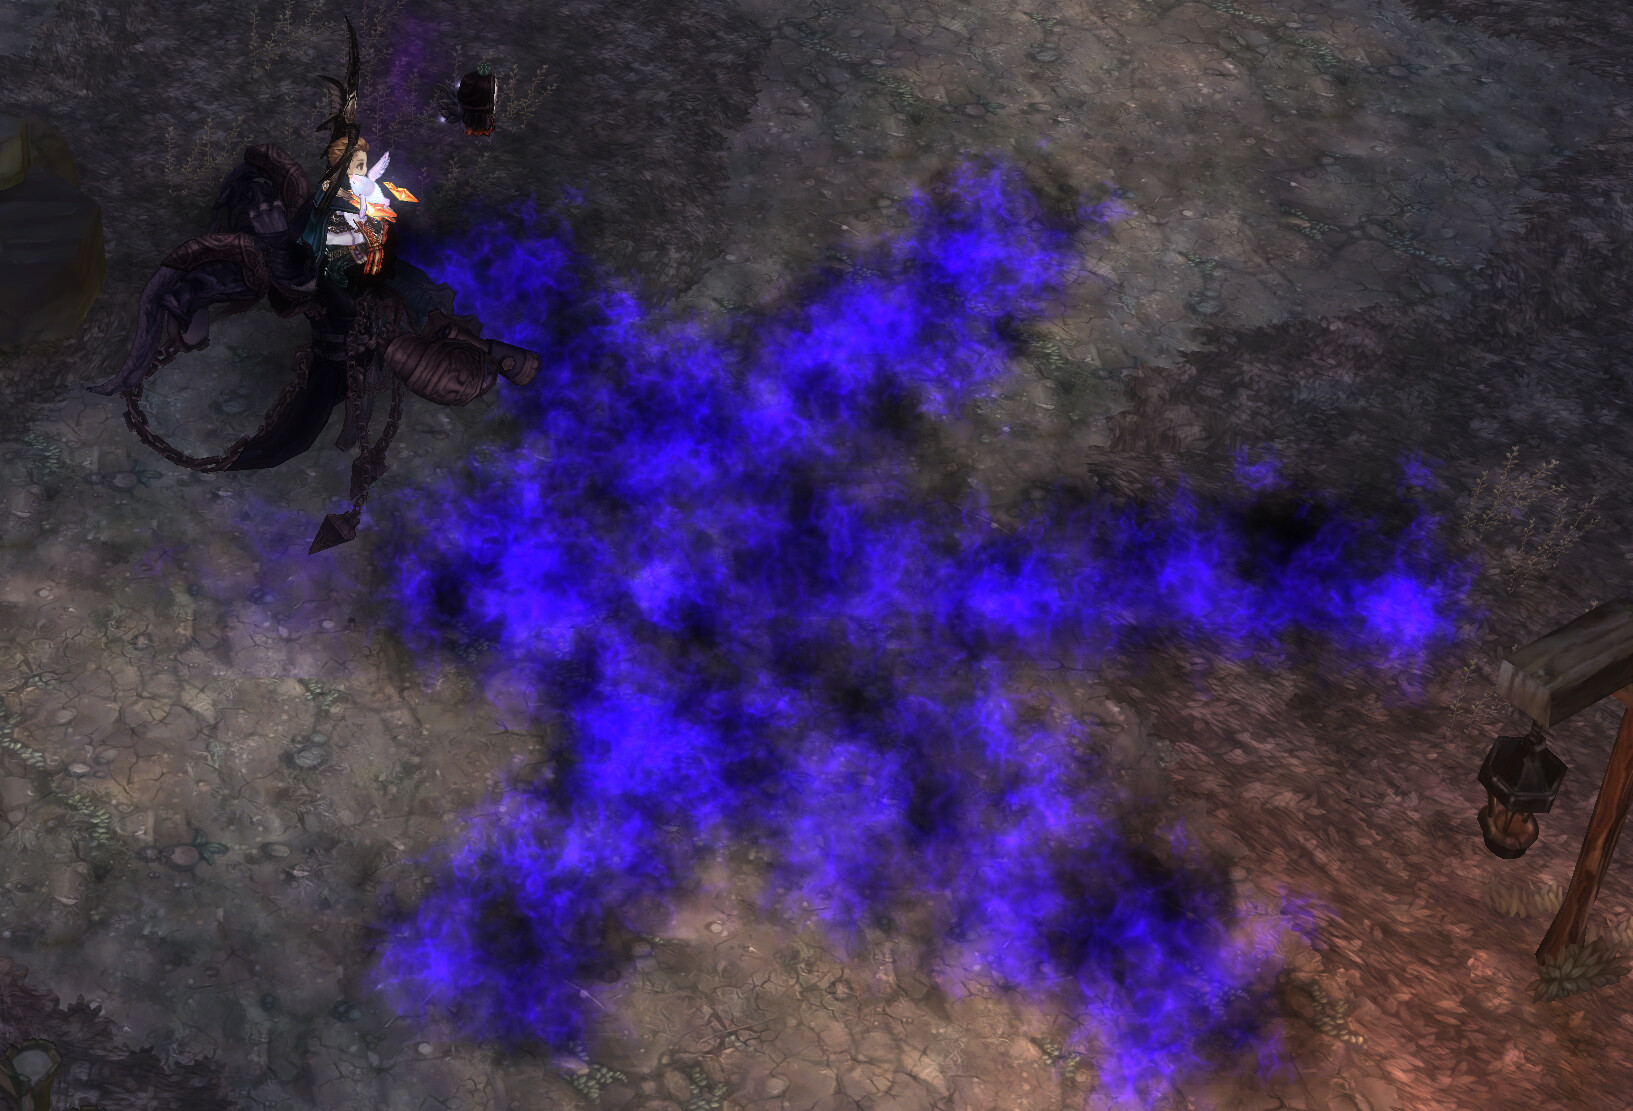
Giltine sits down in the air and crosses her legs, while spinning her scythe above her head. She shoots out a 3 way dark attack that goes along the ground quickly, which then returns to her underneath her, going behind her and hitting enemies behind.
Each projectile repeatedly deals damage while it is inside the hitbox of enemies, making it hit many times against larger enemies. Like Ignas, it requires positioning Giltine right in front of boss monsters to optimize the damage dealt. Against smaller enemies, it only has 10 AoE Attack Ratio, but each projectile hits on its own, so it can still deal decent damage to many enemies.
Skill 3
Giltine rises into the air, then sends down 9 bolts of lightning at nearby enemies. Afterward, 4 black mortar projectiles fly out and also hit nearby enemies or random areas on the ground nearby.
The lightning will randomly strike any enemies in range. If there is only 1 target in range, all 9 bolts will go directly into that target. The same then occurs for the 4 mortars sent out afterward. The area effect of the lightning is very small, so the only way any individual bolt it will hit more than 1 target is if they are directly on top of each other. The mortar has a bit larger explosion radius. Either way, again, the skill only has 10 AoE Attack Ratio, so it will have a hard time hitting more than 1 enemy with each bolt regardless.
This skill also does very high damage to a single target and executes very quickly.
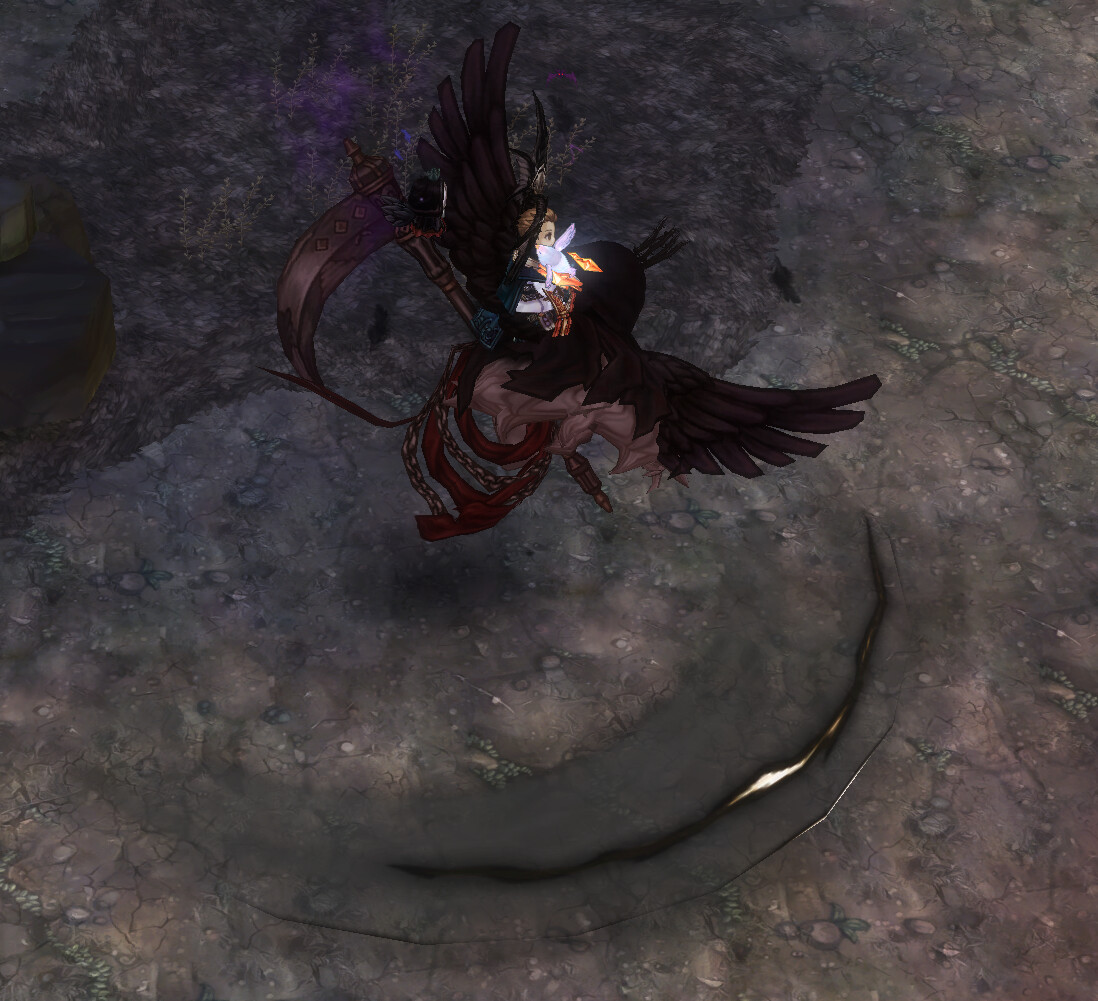
Skill 4
Giltine instantly dashes forward with her scythe, striking enemies along the way.
This skill is weak. It will generally only hit once, but against bosses it can hit more than once due to their large hit box. It’s still worth using while riding when you can, as long as the movement doesn’t bother you, but if Giltine is being used on auto, this skill is obnoxious. She will randomly use it and will cause her to waste a lot of time dashing, and then moving back to where she was. On top of that, if she uses this skill followed by skill 2, sometimes she will aim skill 2 in the complete wrong direction. Honestly, it would be better if this skill didn’t exist, but it does, and it’s at least somewhat neat.
Generally you want to ride, use skill 2, then skill 3. Because skill 2 is reliant on positioning, you’ll want to use that first. It’s important to note that both skill 2 and 3 have extremely low cooldowns at only 15 seconds. In a general rotation (covered later), you will want to resummon your demon in order to reset their cooldowns, but generally you never have to with Giltine due to the low cooldowns. This makes her a higher DPS option and also easier to use (comfy).
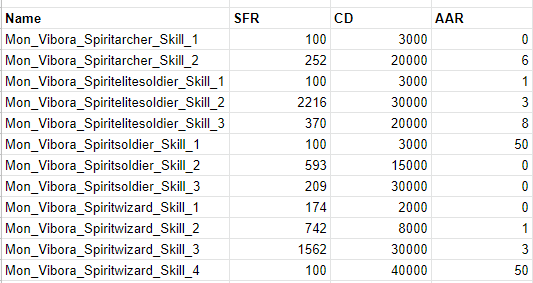
Demon God Slogutis
Giltine was the strongest damage card to equip for all classes until they added the Abyssal Observer raid, and added the new Slogutis Card to the game.
You can make a Slogutis Card by combining:
-Ring of Chaos x20 (very rare drop from the raid)
-Giltine Card
-Lvl 10 Legend Card
Slogutis boosts damage dealt by +100%, making it higher than Giltine’s 80%. Also, he CAN be summoned by Sorcerer. However, the card is harder to obtain than Giltine, and it even deletes your Giltine Card to make it.
Skill 1
SFR: 500%
Cooldown: 1s
AoE Attack Ratio: 99
Skill 2
SFR: 894%
Cooldown: 30s
AoE Attack Ratio: 99
Skill 3
SFR: 745%
Cooldown: 15s
AoE Attack Ratio: 99
Skill 4
SFR: 650%
Cooldown: 15s
AoE Attack Ratio: 99
Morph
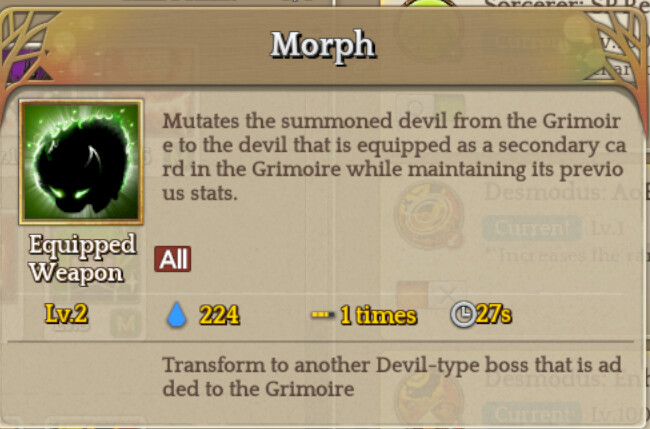
Morph is another skill that summons a boss demon.
If you already have a boss demon summoned through Summoning, it will change the currently summoned demon to the one in the second slot of your grimoire. When Summoning or Morph is used, all the cooldowns of your summoned demon are reset. This makes it a very good idea to simply use 2 of the same demon in your grimoire (2x Zaura, 2x Ignas, etc) and use Morph as a skill to reset your demon’s cooldowns, regardless if you’re using Riding or not. Completely ignore the skill’s description about “previous stats”; it means nothing and is old. This skill is simply a lower cooldown way to switch your demon (Summoning 60s, Morph 30s). There is no stat difference between a demon created through Summoning or Morph.
It’s important to note that you cannot use Morph twice consecutively. If a demon has already been “Morphed” once, even if it’s the same demon, you can’t use it again until you’ve used Summoning. This was a nerf / “bug fix” they did recently. Also note that you do need two copies of a demon’s card if you want to use it in both slots of the grimoire; one card won’t work.
Summoning: Overwork
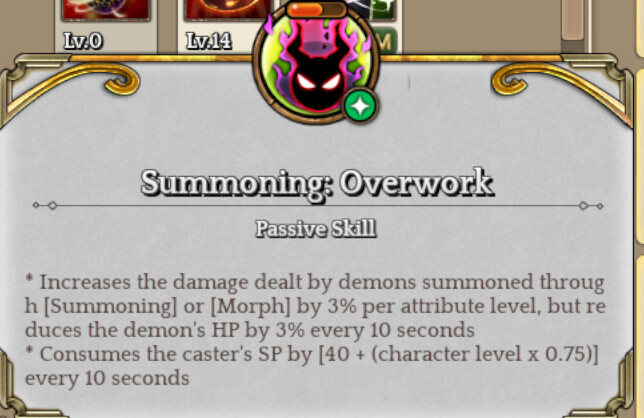
It’s important I mention this attribute for Summoning (also works on Morph). This causes your summoned demon to deal 30% more damage at all times, but causes it to lose HP every 10 seconds, and you to lose SP every 10 seconds.
The damage increase is decent. It ends up being less than 30% because it is not a final damage modifier and is additive. The HP drain on your summon is completely negated by Summon Salamion (the next skill), and your SP regeneration should cover the SP loss with sufficient SPR and Summon Servant. If you’re having a hard time maintaining your SP early on, don’t feel bad about turning off this attribute if needed. It’s a decent damage boost, but it’s not the end of the world to disable it. You can also use SP potions to help with the drain.
Summon Salamion

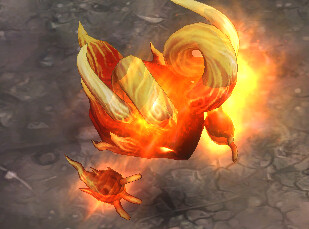
Salamion is a little red summon that does fire damage on hit. He does very little damage.
However, he has an attribute called Summon Salamion: Heat. This makes it so that every 10 seconds, he will heal all nearby summons for a large amount of HP. This amount is based on his max HP and his skill level. This allows him to be a “healer” summon, keeping all of your summons alive. It completely negates the HP loss from the Overwork attribute and will keep them alive through almost all content as long as your DEF and HP stats are decent.
Summon Familiar
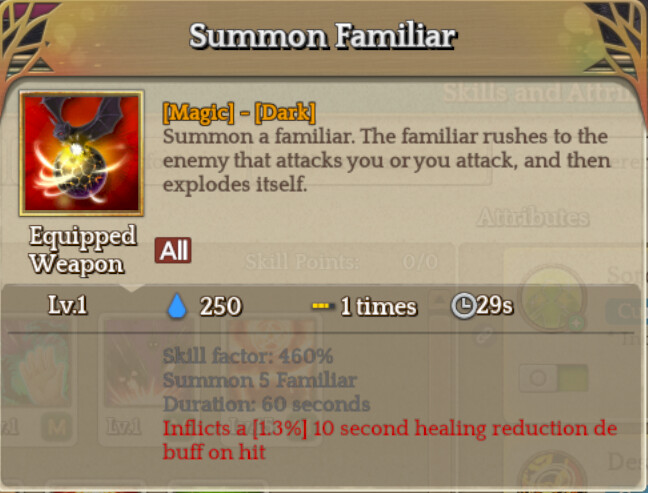
This skill summons 5 bats. These bats will follow you. The next time you attack an enemy with a skill, they will one by one fly into the enemy and explode, dealing damage to that target.
These are not real “summons.” They do not use your SPR stat and do not inherit your stats in any way. They are basically a damage spell that uses your MATK directly. The cooldown of the skill scales with skill level (a rare thing in Tree of Savior) along with the Skill Factor. If you don’t have enough skill points to max the skill, this makes it have a long cooldown.
Skill points are too tight, and even at max level, these bats don’t do good damage. On top of that, their AI is glitchy and they will often times stand around and do nothing. This skill is generally ignored, and I do not use it.
Update: They have rebalanced this skill and raised the damage significantly. I haven’t tested it, but it is worth looking into to see if it will do good damage now.
Summon Servant
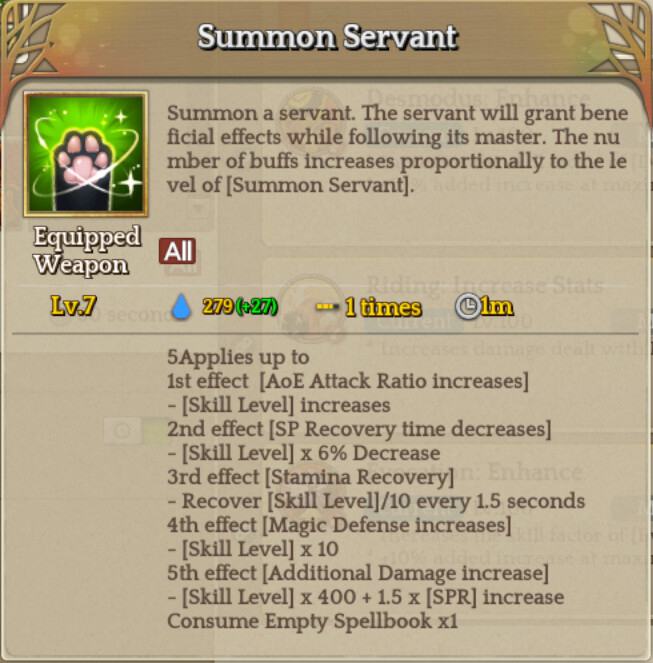
This skill summons a small cat. It will then provide up to 5 different buffs to you and your party, each lasting 30 minutes.
AoE Attack Ratio: Provides +1 per skill level. This is a large source of this stat and one of the few buffs that provide it. An excellent support skill.
SP Recovery time decrease: Decreases SP recovery by 6% per skill level. This greatly decreases the time for your SP regen to trigger, making your SP regen faster. It is the largest source of it in the game and greatly helps deal with SP.
Stamina Recovery: Causes stamina to regen separately from the standard regeneration, even if dashing or doing any other actions. It regens a decimal amount (not whole numbers) every time it ticks, so it will just gradually restore stamina over time. A very useful buff.
Magic Defense Increase: Provides +10 Magic Defense per level. This is close to useless as the amount it gives is just too low. It was never, ever changed since it was introduced.
Additional Damage Increase: This increases the “Additional Damage” stat. I won’t get into what this stat does, but it’s the only buff that you can give out that provides the stat. A very small damage increase in general, but useful to builds that stack the stat.
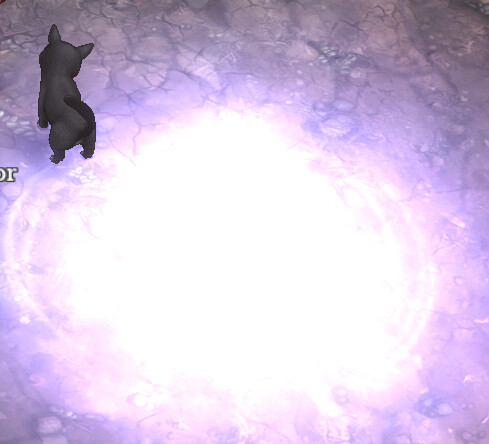
Desmodus
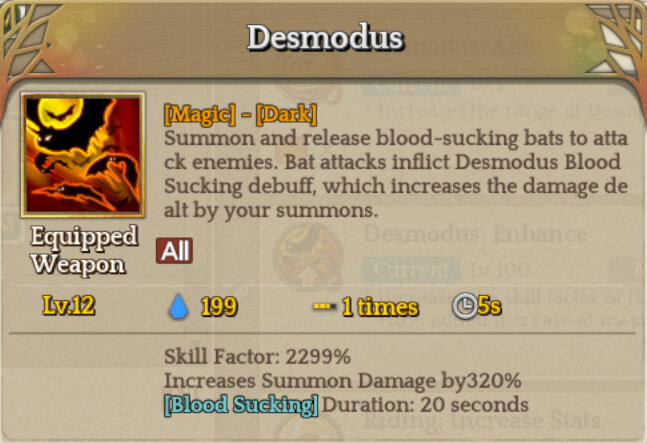
This skill describes it as a summon, but in reality it’s simply a projectile that fires forward. The projectile inflicts a debuff to enemies, causing them to take more than quadruple final damage from all of your Sorcerer summons. There is an equivalent skill in the Necromancer skill tree known as Gather Corpse, but this skill is more potent.
This skill is mandatory. It greatly increases the damage of your summons, and must be maintained at all times on any enemy you fight. The duration is 20 seconds, and with a cooldown of only 5 seconds, this is not difficult, but it’s something you must constantly do when engaged in combat. This is part of what makes summoner an active playstyle. IMC made it like this to counteract anyone trying to play summoner with a more passive/afk style.
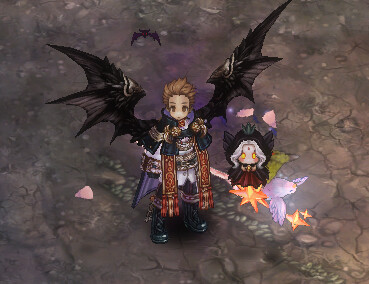
The art for the skill called Desmodus: Formation (pictured above) changes it to not deal any damage, but makes the debuff increase summon damage even further, and makes it easier to use because the bat becomes larger. You should always have this on, because summon damage makes up more than 95% of your total damage output, and the damage of the skill isn’t good enough to justify disabling the art.
Keep in mind that this skill was changed with a recent update in that the debuff from it no longer works on Necromancer summons. You must use Gather Corpse for that and have both it and Desmodus on monsters simultaneously.
IMC has updated the skill’s damage without the art to be much higher now, so it may be worth looking into trying it without the art, but you will lose summon damage by doing so.
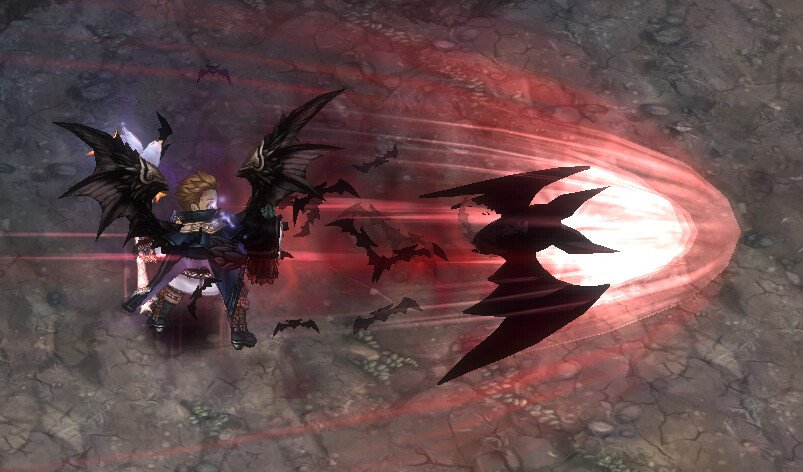
Evocation
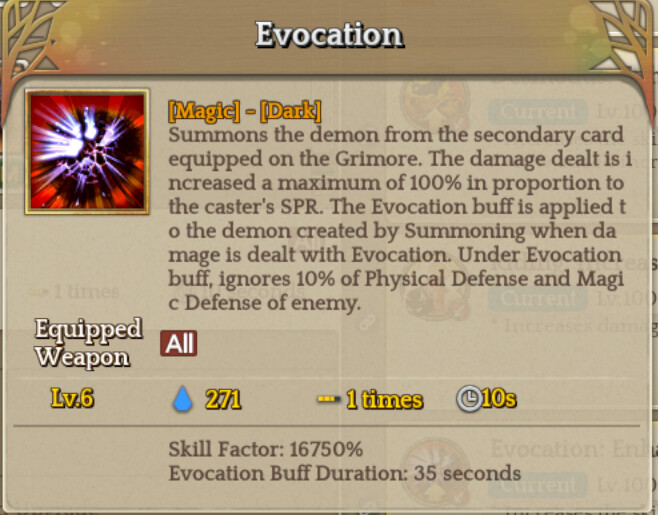
This skill summons a copy of the demon in the second slot of your grimoire. It appears and instantly explodes, dealing damage to enemies nearby. The damage increases a bit based on your SPR. Afterwards, it gives you a buff that causes your summoned boss demon to ignore 10% of the defense of enemies. You can maintain this buff forever as long as you are using the skill often enough.
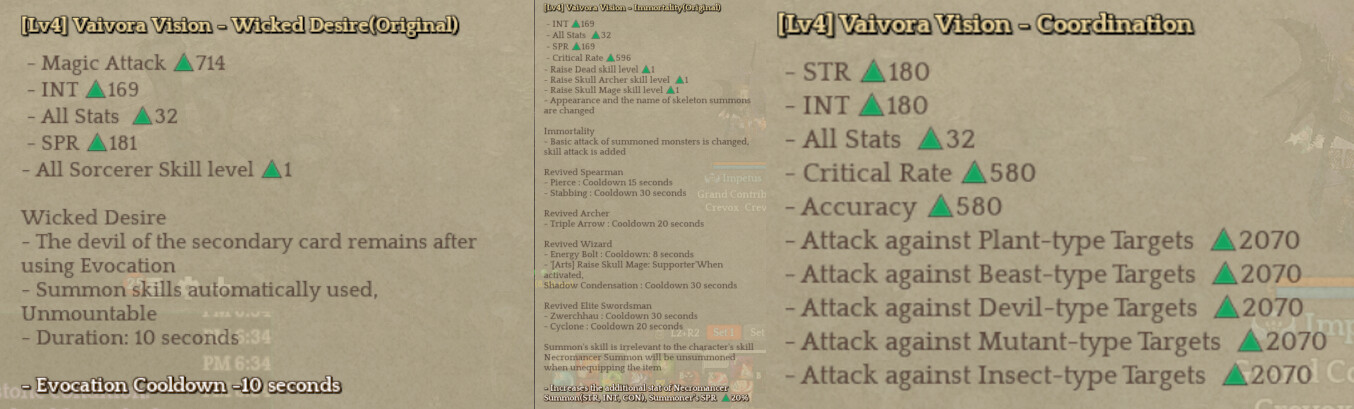
The damage of the skill is decent with a very large area of effect, and the buff is good too. However, this skill really shines once you have the Sorcerer Vaivora weapon known as Wicked Desire.
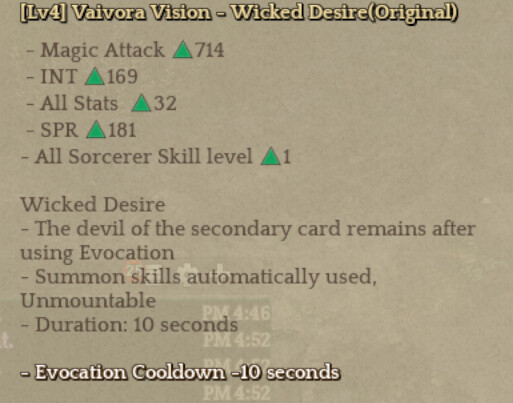
While equipped, this causes your second demon to stay alive and fight for 10 seconds instead of instantly exploding. This allows you to have two summoned demons at once.
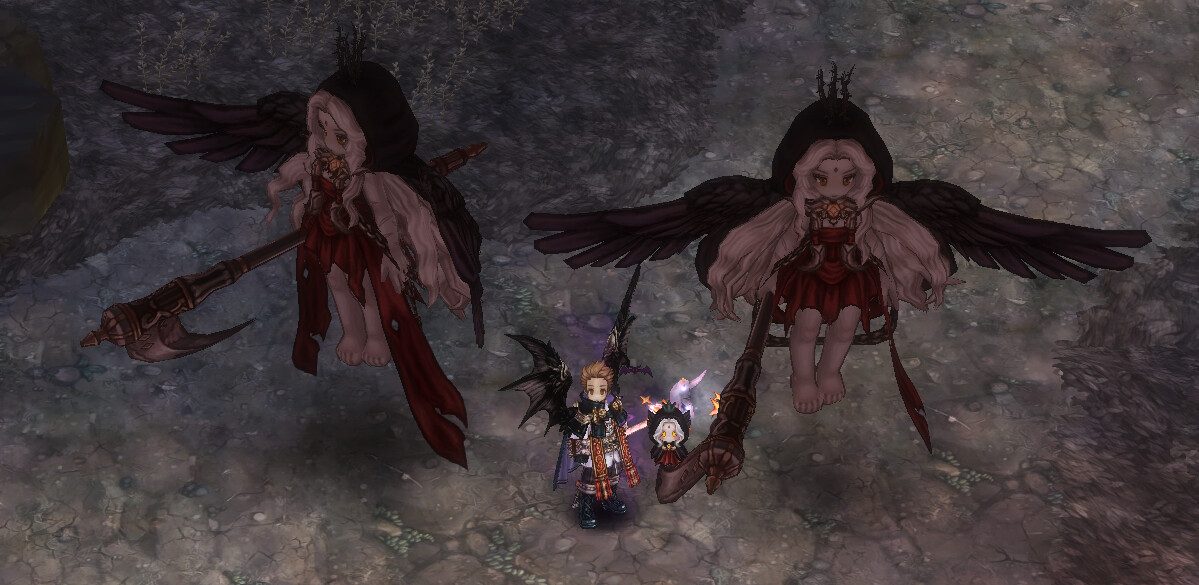
The second demon is just as strong as your summoned demon with the exception of Riding: Increase Stats. Your Evocation demon can’t get that attribute, and you also can’t ride it for the 20% ATK gain. Otherwise, it functions identically to the Summon: Self attribute, and will use its skills randomly until 10 seconds pass, after which it dies.
It’s important to note that it will always use an actual skill (not auto attack) as its first skill upon being summoned, but after that, it’s completely random. Ideally your demon will use all of its skills before disappearing, but with very bad luck, it’s possible for it to simply auto attack until the duration expires. With the level 4 version of the Vaivora, it also halves the cooldown of Evocation, allowing you to maintain the second demon indefinitely by resummoning it every 10 seconds. Overall, this is a very powerful Vaivora and skill.
Lastly, despite some demon skills like Zaura’s having a 30 second cooldown, every Evocation demon summoned has its cooldowns reset. So, despite their cooldowns being 30 seconds, they only technically have a 10 second cooldown due to Evocation’s low cooldown.
 Necromancer