Tree of Savior Forum

Re:Build Guide To All Wizard Classes (Post EP11)

Class Guide - Part 4

9. Elementalist

image Elementalistimage image
Elementalists are scholars of magic that study how the elements that make up this world are moved by the will of the Goddesses. Their ultimate goal is to emulate this divine power to understand and gain control over the 4 basic elements that make up the material world. Elementalists are masters of the elements. They have powerful offensive spells but require some time to recuperate after each cast, so support from party members is recommended.

Elementalist Attributes

image Elementalist: Resistance
Not really sure how significant this is but just add since it doesn’t cost much
image Fire Property: Amplify
Get this. This benefits Pyromancers even more

image Ice Property: Slow
Not that important if you do not have Cryomancer. But it isn’t expensive so just add

Elementalist Skills

image Electrocute (0-15/15)

Skill Description

Cooldown: 10s
Overheat: 1
Release a surge of electricity to attack enemies in front of you. Electrocute’s number of targets is doubled if used within the range of Storm Calling.
.
This skill is very weak if you do not add it higher because it hits very few enemies. It does 8 instead of 4 hits if it hits a lot of enemies. It is a good filler skill, but the problem is that Elementalist’s skill points are quite limited so not all builds will be able to add Electrocute much. Taoist however benefit more from Electrocute because of “Taoist’s Storm Calling” that not only increases the damage of Lightning Property attacks, it also doubles the number of targets that can be hit by Electrocute. Hence, you not need to add Electrocute too high if you are always going to pair it with Storm Calling. Adding it higher do increases it damage unlike because whereby it only increases the number of targets.

Skill Attributes

image Electrocute: Enhance
Because of its short cooldown, you will use this often and hence worth it to add.

image Hail (1-15/15)

Skill Description

Cooldown: 40s
Overheat: 1
Drop chunks of ice to continuously inflict damage on enemies. Increases critical damage against enemies under the effect of [Freeze].

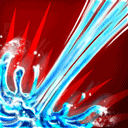
Hail is much stronger now with a shorter cooldown and higher damage, hitting around 18-24 times depending on how many pieces of ice falls on the enemy. Damage dealt to enemies under [Freeze] debuff is increased by [skill level] x 2% when attack lands as a critical hit. It also now does additional damage depending on the size of the enemy (Small: 150%, Medium: 100%, Large: 50%). Hail is now a pretty good AOE skill. However, due to the skill point constrains of Elementalist, it depends on players whether they want to max this skill for AOE damage, or leave it at 1 just to freeze targets. It can freeze bosses like CM and Saalus bosses.

Skill Attributes

image Hail: Enhance
Definitely add this high if you are using this skill for damage.

image Hail: Freeze
Gives you a 25% chance (maxed) to [Freeze] enemies. Max this for higher chance of [Freeze]

image Storm Dust (0-15)

Skill Description

Cooldown: 20s
Overheat: 1
Creates a sand storm at the target area. Enemies within the skill’s range takes continuous Earth property damage

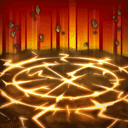
Depending on your build, some may want to max this some may not. Builds with Pyromancer should definitely max this for Storm Dust + Fireball. Others can opt to max this or other skills depending on preferences. The skill by itself has good AOE and damage with a medium cooldown.

Skill Attributes

image Storm Dust: Enhance
Add this for sure if you are using it as one of your main DPS skills.

image Storm Dust: Second Storm
Max this for additional damage.

image Storm Dust: Slow
Can be useful to add

image Fire Claw (1-15/15)

Skill Description

Cooldown: 15s
Overheat: 2
Send out a wave of fire all around to attack your enemies.

This skill is very strong when aimed properly or when it hit single targets like bosses. It does multiple hits per cast, has a short cooldown and even have 2 overheat, making it a very strong single target DPS skill. Definitely max this if you want to take down bosses easier.

Skill Attributes

image Fire Claw: Enhance
Add this high since it is one of your main single target damaging skills

image Elemental Essence (10/10)

Skill Description

Cooldown: 20s
Overheat: 1
Grants a buff that increases the damage bonus of property attacks when attacking an enemy’s weakness.

Gives you additional damage when enemy is weak to that property attack, up to 100%. This buff is good and has 100% uptime. The downside is that the duration is 20s so you would need to keep recasting it if you want to have its effects

Skill Atrributes

image Elemental Essence: Balance
This attribute makes it such that it reduces the penalties received by enemies at the expense of reducing the Elemental Essence damage increasing effects. Get it.
image Stone Curse (0-10/10)

Skill Description

Cooldown: 1m
Overheat: 1
Temporarily petrifies an enemy. The petrified enemy takes additional damage from Fire and Psychokinesis property attacks and reduced damage from other properties.

Petrifies enemies, causing them to take +100% increased damage from Fire and Psychokinesis Property attacks. Take note that enemies under this debuff will take less damage from other property attacks so make sure you do not spam your other Property attack DPS skills when the target is petrified. This can petrify CM and Saalus bosses. Higher level increases the duration of the debuff.

Skill Attributes

image Stone Curse: Increased Petrification
Increase the number of targets that can be affected by skill, so max it.

image Meteor (5/5)

Skill Description

Cooldown: 40s
Overheat: 1
Drop a meteor on a targeted area to inflict damage on enemies.

I mentioned in other skills that it is up to the player which skills they want to max depending on what they prefer. For this case, there is no exception you must max this. The skill does very high burst damage and has a very big AOE. It does have a pretty long casting time but this can be minimized with “Wizard: Rod Mastery” or "Chronomancer’s Quick Cast". Using Pyromancer’s Flame Ground before casting Meteor allows Meteor to do 1.3x - 1.5x the original Meteor damage.

Skill Attributes

image Meteor: Enhance
Add this high. It is one of your best skills.

image Meteor: Flame Ground
Get this if you have Pyromancer.

Breakdown

  • Damage (5/5): It has one of the strongest skills in the Wizard tree. Meteor does huge burst AOE damage, while Fire Claw has very good single target damage

  • AOE (4/5): All the skill has good AOE, while Meteor has one of the biggest AOE among Wizard skills.

  • Support (2/5): Elementalist provides some CC with Hail and Stone Curse

  • Utility (1/5): No utility outside of PVE

Synergy

  • Pyromancer: Storm Dust + Fireball and Flame Ground + Meteor combos makes Pyromancer a very good pick for Elementalist. Stone Curse also increases the damage of Fire Property attacks.

  • Chronomancer: Elementalist benefit a lot from Quick Cast. Also, Pass is very useful for Elementalists as some of their skills such as Hail and Meteor have high cooldown

  • Taoist: Storm Calling combos well with Electrocute. Also, Tri Disaster Charm increase the damage of all Elementalist’s skills except Storm Dust.

Build Templates

Elementalist is one of the strongest damage dealing Wizard classes. It has high damage and big AOE to do very well against bosses and in CMs. Pyromancer + Elementalist is also one of the strongest pairs in the game. We are also seeing the rise of Chronomancer with Elementalist as a bossing build. Overall, Elementalist is in a good spot that can fit into many builds or do well enough as a standalone class.

10. Sage

image Sageimage image
Sages are mostly made up of either aged scholars or government officials who have gained magic powers over the years. In the case of the latter, it is presumed that Sages obtain their power from being continuously exposed to the Divine Tree while working in the government for years. Sages reach enlightenment through years of accumulated knowledge to manipulate space using magic. They specialize in manipulating the different dimensions or creating portals that can be used for traveling to known locations.

Sage Attributes

image Sage: Maestro of Dimension
Increases the damage against enemies under [Slow] or [Hold] debuff by 30% (maxed) when using non-property magic attacks. Max this if you have classes that provide such debuffs. These are the skills which induces [Slow] or have slow effects that will trigger the attribute.

  • Psychokino: Heavy Gravity, Gravity Pole
  • Chronomancer: Slow
  • Onmyoji: Greenwood Shikigami (when the skill ends, induce 5s debuff), Toyou (10% chance of inflicting [Hold])
Sage Skills

image Portal (1/15)

Skill Description

Cooldown: 0s
Overheat: 1
Portal Cooldown: 30m (level 1) - 16m (level 15)
Memorize your current location or create a portal for you or your party members to be able to use. If a location is being saved, it records the coordinates of your current position before going on cooldown, you must wait for the cooldown to end before you are then able to open a portal.

The main skill of Sage and that is to create portals to places. The skill itself has zero cooldown and you can go to a specific location and save the coordinates of that location. You and your party members will be able to use it (take note that portal duration is 15s regardless of level). Each portal when opened, will have their own separate “Portal Cooldown” which is dependent on the Portal skill level. You honestly don’t really need anything higher than 1 unless you really need that extra minutes of portal cooldown. With all the attributes, you can save up to 6 locations.

Skill Attributes

image Portal: Extra Slots
There are 3 of such attributes to learn so learn all 3 to increase your maximum number of slots that you can save to 6.

image Micro Dimension (15/15)

Skill Description

Cooldown: 15s
Overheat: 3
Distorts the space into a small size to deal damage to enemies.

It does good damage with a short cooldown and 3 overheat. Unlike other “single target” focused skills like Featherfoot’s Kundela Slash or Shadowmancer’s Shadow Thorn, it can be properly aimed and does more AOE than those skills. It however has a longer casting time and has a delay for the second hit from “Micro Dimension: After Effects” attribute. It does have an attribute that can duplicate ally installments but at this moment it is pretty useless.

Skill Attributes

image Micro Dimension: Enhance
Good to add because you will be using this pretty often due to its short cooldown.

image Micro Dimension: After Effects
Basically does an extra hit to targeted enemies and enemies around you (although it doesn’t really seem to hit enemies around you). Definitely add this since it essentially doubles your damage.

image Micro Dimension: Confusion
Personally I don’t find [Confusion] debuff to be that useful. You can choose to add this or don’t.

image Micro Dimension: Duplicate
Quite useless because there isn’t anything worth duplicating at this moment. You can duplicate Pyromancer’s Fireball but there isn’t a point since you can cast 5 of it anyway. Not worth the extra SP cost.

image Ultimate Dimension (1-15/15)

Skill Description

Cooldown: 20s
Overheat: 1
Distorts the space into a large size to deal damage to enemies.

This skill is pretty ok. Decent AOE and damage with short cooldown. It does inflict [Slow] which can trigger Sage: Maestro of Dimension. It has an attribute that increase the range of ally magic circles, but it is pretty useless at this moment.

Skill Attributes

image Ultimate Dimension: Enhance
It does have a short cooldown so it is worth it to add since you might use this fairly often.

image Ultimate Dimension: After Effects
Inflict [Slow] for 5s (maxed) that can help trigger Sage: Maestro of Dimension. Also does additional non-property attack. Max this.

image Ultimate Dimension: Enlarged Magic Circle
As mentioned previously, not worth it and a waste of SP.

image Blink (1/15)

Skill Description

Cooldown: 30s
Overheat: 2
Teleport yourself to a random location, leaving behind an apparition. The apparition remains for a period of time and receives damage from the monsters in your stead and moves along with your party members.

Creates an apparition mainly to draw aggro away from you. I don’t think you need that many points into this skill. Increasing the level of the skill will increase the duration of the apparition. You can add depending on how long you want it to last but your skill points allocation may be tight. Level 1 might just be enough for an emergency decoy.

Skill Attributes

image Blink: Duration
Max this since it is free 5s of duration

image Blink: Looming
You can choose to add this or not. It doubles threat value of your apparition but increase the skill cooldown by 10s.

image Missile Hole (1-10/10)

Skill Description

Cooldown: 45s
Duration: 1
For a period of time, grants an effect that can minimize damage from missile attacks and magic bullet attacks for you and your party members.

This buff is very good that grants you protection from missile and magic attacks for you and your party members. It was one of the best buffs pre-Re:Build but after Re:Build, the skill was severely nerfed to only last 10s at max level. You can add 1 just for the quick protection and movement speed buff, or max it to maximize the buff uses.

Skill Attributes

image Missile Hole: Escape
Increase your movement speed to 60 for 3s when you use Missile Hole. Add it for sure.

image Portal Shop (1/1)

Skill Description

Cooldown: 0s
Overheat: 1
Set up a Portal Shop. By learning the Portal skill, allies can move to locations that you have saved.

The reason why people get Sage despite its not very impressive damage or support options, and that is the ability to create Portal Shops. You need to save your location with the Portal skill before you can start selling the portal services. Even if you do not intend to use this to make money (well it doesn’t exactly make a lot money, doing CMs and farming earns you more), it is good to have 1 Sage just so you can set up your own Portal Shop just to allow your own characters to use them. This is because not always will you be able to find a Portal Shop that sells the location that you want, and having a Sage just for this purpose would greatly benefit your other sub-characters.

Skill Attributes

This skill has no attributes

image Dimension Compression (1-10/10)

Skill Description

Cooldown: 15s
Overheat: 1
Compresses the space around a single enemy, dealing damage. The longer the skill is charged, more damage is dealt. Nearby enemies are pulled in.

The useful thing about this skill is that it helps to gather mobs together. Although the cooldown is short, the damage isn’t that amazing for single target, considering the fact that there is a charging time included as well. It helps to gather mobs and pull nearby enemies, but it only really does damage to that specific targeted enemy. You can just put 1 for the mob gathering purpose, or max it to maximize the damage.

Skill Attributes

image Dimension Compression: Enhance
Only add this if you maxed the skill for damage.

image Dimension Compression: Aftermath
Grants 50% chance (maxed) to stun enemies with [Stun] for 4s. Not that significant but no harm adding.
image Hole of Darkness (1-5/5)

Skill Attributes

Cooldown: 50s
Overheat: 1
Summons a hole on the ground that deals Dark-property damage. When the hole dissipates, enemies within range receive damage.

Does pretty high damage with a medium AOE. It has an attribute that allows the skill to do more damage, at the expense of higher cooldown which I personally would not prefer getting. Also inflicts a [Blind] debuff for 15s which can benefit Warlock and Shadowmancer whose skills get more damage when enemies are inflicted by [Blind].

Skill Attributes

image Hole of Darkness: Enhance
Get this since the skill does good damage

image Hole of Darkness: Black Hole
Make enemies disappear and take 50% more damage when they reappear. Also increase skill cooldown by 10s. I personally would not take this due to the increased cooldown. Also, it makes targets disappear and I would not be able to hit them with my other skills.

Breakdown

  • Damage (3/5): The damage of the class isn’t bad but it isn’t on par with high DPS classes. Micro Dimension and Hole of Darkness has reasonably good damage.

  • AOE (3/5): Sage’s skills all have pretty medium sized AOE, but cannot compete with other large AOE classes.

  • Support (2/5): Missile Hole is a good short duration buff. Blink also helps to draw aggro away. This would have been much higher if Missile Hole has a higher buff duration of 100% buff uptime.

  • Utility (5/5): Being able to save locations and teleport party members is a huge plus. Also, it can set up Portal Shop to sell Portal services, or even use it for your own sub characters. Definitely one of the best utility classes.

Synergy

  • Psychokino: Heavy Gravity and Gravity Pole allows “Sage: Maestro of Dimension” to increase the damage of non-property skills on enemies inflicted by [Slow] by 30%. There is however, not many non-property skills to make full use of this attribute.

  • Chronomancer: Sage’s attribute “Sage: Maestro of Dimension” increase the damage of non-property skills on enemies inflicted by [Slow] by 30%. There is however, not many non-property skills to make full use of this attribute and Sage is generally not a very high damaging class to begin with.

  • Warlock/Shadowmancer: Hole of Darkness can inflict a 15s [Blind] which boosts most of Warlock and Shadowmancer’s skills by 30%, and allows Shadow Thorn to ignore 50% of enemy’s defense.

  • Onmyoji: Greenwood Shikigami can inflict [Slow] and Toyou has a 10% chance to inflict [Hold], which can trigger “Sage: Maestro of Dimension” to increase the damage of non-property skills on enemies inflicted by [Slow] by 30%. Howling White Tiger will get this 30% damage increase together with other Sage’s skills.

Build Templates

Although it does look like Sage have synergy with a lot of classes, it isn’t a popular pick in DPS or support. The synergies are not exactly very strong and Sage don’t really have the damage to make full use of the synergy. It also does not have very good support options despite being a “Green Icon” class. Most people pick Sage solely for Portal and Portal Shop. There are often much better choices with regards to DPS and support from the Wizard tree.


Class Guide - Part 5

11. Warlock

image Warlockimage image
People often wrongly assume that Warlocks harness the power of demons. But Warlocks are also children of the goddess, and as children often feel that they should not burden their parents, the Warlocks have a similar attitude. It is because of their unique and independent approach to spirituality that the Warlocks are an often misunderstood group. Warlocks are wizards who harness the power of evil spirits. They can summon evil spirits and command them to defeat monsters.

Warlock Attributes

image Warlock: Darkness
Extra damage for Dark-property attacks so max this. 20% (maxed) of your max Magic Attack as additional Dark Property damage

I did specifically test this and it was supposed to be 20%, but from my testing it only applies 10%. The attribute itself isn’t exactly “groundbreaking” but it is free damage anyways so just max it.

image Darkness Fear
Enemies attacked by “Masterma”, “Pole of Agony” and “Demon Scratch” receive [Fear] debuff. [Fear] causes target’s evaion/block and critical resistance -10%. The debuff isn’t that significant, and the extra SP consumption (50% more) is pretty high. You can get it but probably use it when fighting bosses. I wouldn’t recommend using it in CMs as it may drain your SP.

Warlock Skills

image Invocation (15/15)

Skill Description

Cooldown: 60s
Overheat: 1
Periodically summon evil spirits. The summoned spirits remain in the field to await your orders. Up to 10 spirits can be summoned. [Evil Sacrifice] can be used to target enemies for the spirits to attack.

It has 100% uptime (60s duration). The maximum number of spirits that can be on the field is 10. Unlike in the past, the spirits will not automatically explode when targets walk into them. You need to either use “Evil Sacrifice” or “Ghastly Trail” to move them, which will be further explained in their respective skill descriptions.

Skill Attributes

image Invocation: Enhance
Add this high. It really helps a lot in damage. The skill also has 100% uptime so it is really worth it.

image Invocation: Demon Spirit
Max this. This is expensive to max (level 10) so take it slowly. The demon spirits will appear red in colour.

image Evil Spirits: Darkness
50% chance (maxed) to cause [Blind] for 10s. This is very useful because targets afflicted with [Blind] gets 30% more damage from Warlock’s skills.

image Dark Theurge (1-3/15)

Skill Description

Cooldown: 20s
Overheat: 1
Summons evil spirits that attack at your bidding. [Evil Sacrifice] can be used to target enemies for the spirits to attack.

Summon 5 evil spirits surrounding you. You need to either use “Evil Sacrifice” or “Ghastly Trail” to move them, which will be further explained in their respective skill descriptions. This skill is useful because it instantly creates 5 evil spirits (normal ones) for you to use. You don’t really need that many points into this so just dump your spare points into this skill.

Skill Attributes

image Dark Theurge: Enhance
Take note that this attribute only affects spirits summoned by Dark Theurge and not Invocation.

image Dark Theurge: Tough Evil Spirit
Essentially doubles the damage when Evil Sacrifice is used for the spirits summoned by Dark Theurge. Add it.

image Evil Sacrifice (1/1)

Skill Description

Cooldown: 0s
Overheat: 1
Sacrifices nearby enemies to Evil Spirits. The Evil Spirits fly towards the enemies within range to damage them.

Whenever you use this skill, Evil Spirits that is summoned by Invocation and Dark Theurge will fly and attack nearby enemies. This skill is a must add to make use of the Evil Spirits. Use this to do damage to nearby enemies, or to apply [Blind] debuff so as to boost the damage of your Warlock skills. You cannot really control the targets of the spirits because it will automatically target the enemies nearest to the spirits.

Skill Attributes

This skill has no attributes

image Ghastly Trail (1/15)

Skill Description

Cooldown: 10s
Overheat: 1
Make the summoned Evil Spirits follow the summoner in a line. The increase in damage will continue for a 3 second duration after channeling ends.

Using this will cause the spirits to follow up while you continue to channel the skill. The skill is best used as a 1-click option. Use this skill and stop channeling it just to get the damage boost for your spirits (buff lasts 3s), and quickly use “Evil Sacrifice” to redirect the spirits.

Skill Attributes

This skill has no attributes

image Pole of Agony (10/10)

Skill Description

Cooldown: 30s
Overheat: 1
Summon a pillar of darkness that constantly inflicts pain on enemies who come in contact with it. Targets continue to receive momentary damage even after moving away from the pillar, but that damage weakens over time.

This skill does good damage overtime. It continues to do damage even after the target moves away from the skill. In fact, it is better for them to move away from the skill once it gets hit. The skill lasts for 6.6s but the additional damage lasts for 14s so the targets will overall get more hits if it does not stay in the skill. The skill don’t exactly “weakens over time” like in the skill description since the tick damage is the same when the target is in or out of the skill.

Skill Attributes

image Pole of Agony: Enhance
One of your best damaging skills so add this high.

image Mastema (10/10)

Skill Description

Cooldown: 30s
Overheat: 1
Lays a curse upon enemies. Enemies under [Stigma] debuff will attack the caster at higher priorities and summoned Evil Spirits will attack the enemies under debuff when using Evil Sacrifice. Enemies suffering from [Stigma] receive additional damage from Holy-property attacks.

The strongest skill in the Warlock tree. This skill together with its attributes does a lot of damage. It also has a medium AOE which is very good. The skill with “Masterma: Phantom Pain” attribute causes the target to receive 24 ticks of 33% of the skill factor after the initial hit, making it 900% of the skill factor. This skill causes [Stigma] debuff which counts as a [Curse] as well. Spirits summoned with Evil Sacrifice will now prioritize their attacks against targets under the [Stigma] debuff as well. Enemies receive more damage from Holy Property attacks, but the only Holy Property attack under the Wizard Tree is Runecaster’s Rune of Justice.

Skill Attributes

image Mastema: Enhance
Strongest skill in Warlock tree. Add this high.

image Mastema: Phantom Pain
This attribute is what makes Mastema strong, allowing it to do continuous damage proportional to your magic attack for 20s.

image Mastema: Reduced Threat
Not really useful

image Demon Scratch (5/5)

Skill Description

Cooldown: 20s
Overheat: 2
Create a magic circle in front of you that summons the demon’s arm. The summoned demon disappears after attacking forwards.

A good skill with short cooldown and 2 overheat that pulls targets towards you. This skill does more hits when the targets are of medium distance away from you. It does 1 hit only when the target is right in front of you. This skill is not only useful for damage, but also useful to pull targets towards you so that you can use your melee skills.

Skill Attributes

image Demon Scratch: Enhance
Add this high because you will use this skill often.

Breakdown

  • Damage (4/5): Pole of Agony and Mastema are 2 very good skills. Evil Sacrifice also has zero cooldown that allows you to spam whenever you want to.

  • AOE (3/5): Most of Warlock’s skills have good AOE, but not to the extent of other classes such as Elementalist and Onmyoji

  • Support (1/5): It does inflict [Curse] and [Blind], but it is more to aid your own damage rather than helping the party

  • Utility (1/5): No utility outside PVE

Synergy

  • Sorcerer: Salamion have a chance to inflict [Blind] to targets, which increases all of Warlock skills by 30%

  • Sage: Hole of Darkness can inflict a 15s [Blind] which boosts all of Warlock skills by 30%, and allows Shadow Thorn to ignore 50% of enemy’s defense.

  • Featherfoot: “Featherfoot: Witch Doctor” boosts Dark Property attacks to enemies inflicted with [Curse]. Mastema also now counts as a [Curse] that can help proc “Kundela Slash: Curses of Curses”

  • Shadowmancer: Shadow Condensation inflicts [Blind] which boosts all of Warlock skills by 30%. Shadowmancer also benefit from “Warlock: Darkness” (although not very significant).

  • Bokor: Bokor’s Hexing not only reduces enemies magic defence, but it also boost dark critical damage with “Hexing: Dark” attribute, boosting the power of Warlock’s skills even more. Bokor also benefit from “Warlock: Darkness” (although not very significant).

Build Templates

Warlock is a well-balanced dark mage. It has many synergies with various classes and can have a large variety of options to pair with Warlock. Despite that, we have yet to see a rise in dark classes as elemental classes still tend to be much more popular. Warlock do have a good range of skills that have high damage and moderate AOE making it a very good pick for a dark type mage.

12. Featherfoot

image Featherfootimage image
Magic and religion have parted ways and are currently two separate studies within the limits of the Kingdom. But for many nations outside the Kingdom’s borders, they are still treated as one, and the Featherfoot is one such an example. Since Medzio Diena, the Kingdom has recognized many foreign shamans as either clerics or magicians within its realm and have helped them assimilate into the Kingdom in order to better seek their assistance in times of need. Featherfoots are wizards who utilize the power of incantations. They can absorb an enemy’s life, or help allies by making enemies weak from a curse.

Featherfoot Attributes

image Featherfoot: Increased Recovery
You don’t really need it. It is also expensive to add, like really expensive.

image Featherfoot: Witch Doctor
An extremely good attribute that you must max. Gives you 50% more damage with Dark Property attack against enemies under [Curse]. Featherfoot’s skills are all Poison Property, so you need to pair Featherfoot with Dark Property classes such as Warlock/Shadowmancer/Bokor.

Take note that these are the skills that inflict Curse

  • Bone Pointing
  • Blood Curse
  • Enervation
  • Mastema (Warlock)
  • Hexing (Bokor)
Featherfoot Skills

image Blood Bath (1-5/15)

Skill Description

Cooldown: 30s
Overheat: 1
Causes Beast, Devil and Insect-type monsters or enemies under the [Curse] debuff to [Bleed]. Bathing in the blood from the targetted enemy recovers the caster’s HP.

Causes continuous hits when targets are affected by [Bleed]. This counts as one of the debuffs that can be used to trigger “Kundela Slash: Curses of Curses”. It can do high damage due to the continuous ticks but you most probably will not have that much skill points to really invest in it.

Skill Attributes

image Blood Bath: Enhance
You don’t really need this compared to other skills.

image Blood Sucking (1-5/15)

Skill Description

Cooldown: 50s
Overheat: 1
Drains and gains HP from Beast, Devil, Insect-type enemies and enemies under the [Curse] debuff.

The main purpose of this skill is not for damage, but to self-heal. You can easily heal to full HP with just a few hits of this skill. It will not hit additional enemies that was not hit by the first tick, meaning if any targets walk into the skill’s AOE when it was not hit before, it will still not get hit.

Skill Attributes

image Blood Sucking: Enhance
Don’t really need it since you only need the skill for self-heal

image Bone Pointing (1-5/15)

Skill Description

Cooldown: 45s
Overheat: 1
Summon a carved, pointed bone called a ‘Kundela’. The Kundela points towards enemies in range, cursing them with Lv 1. Hexing

The bone’s attack has an AOE ratio of 8.Take note that it applies a level 1 Hexing. If you use Bokor: Hexing that is higher than level 1, Bone Pointing’s Hexing will overwrite Bokor’s Hexing. Hence, do not use Bone Pointing this when you want to use Bokor’s Hexing on specific targets like bosses or else it will overwrite the stronger debuff.

Skill Attributes

image Bone Pointing: Enhance
Not needed at all. The bone does low damage.

image Ngadhundi (1-5/15)

Skill Description

Cooldown: 20s
Overheat: 1
Stabs an enemy with a cursed knife carved from a bone. An enemy stabbed by this bone fragment will be afflicted with [Decay].

It causes [Corruption], which allows Physical and Poison Property attacks to increase by 30% on afflicted targets. This is very useful for Featherfoot since all Featherfoot’s skills are Poison Property. It is also useful for parties since it boosts Physical attacks as well. The AOE is however very small. You only need this at level 1 for the [Corruption] debuff. Take note that Necromancer’s ability to spread [Greater Corruption] stacks with Ngadhundi’s normal [Corruption], hence your Featherfoot skills will do more damage with both types of Corruption status. You can increase the level of this skill to increase the duration of [Corruption] debuff.

Skill Attributes

image Ngadhundi: Enhance
Not needed since the skill’s damage isn’t high.

image Kurdaitcha (10/10)

Skill Description

Cooldown: 30s
Overheat: 1
Put on shoes made of mixed hair and blood. Walk while leaving bloody footprints on the ground, dealing damage and temporarily cursing any enemies who come into contact with it.

A very strong channeling skill. You channel this skill by walking around leaving bloody footprints and enemies who walk into the footprints will take damage. This skill is very strong because you can stack your footprints over one another and enemies who walk into them will take the damage of all the stacks of footprints. The skill description says that is curses but it doesn’t. Using this skill however lowers your movement speed when you channel it. Chronomancer’s Backmasking works on this skill.

Skill Attributes

image Kurdaitcha: Enhance
Definitely get this high, since it is one of your strongest attacking skills.

image Kurdaitcha: Increased Movement Speed
This skill increase your movement speed back to normal when using Kurdaitcha. However, it increases the skill cooldown by 10s so I wouldn’t recommend having it.

image Kundela Slash (10/10)

Skill Description

Cooldown: 20s
Overheat: 3
Use the Kundela to attack enemies. If the skill hits an Ice Wall, the wall releases ice fragments.

Your main Featherfoot skill. This skill does high damage with a short cooldown and 3 overheat. The maximum targets it can hit is 10. It also has a small AOE so it is mostly used as a single target skill. When using this on targets that are [Curse], it increases the damage of the skill by 100%. The strong point of this skill is the attribute “Kundela Slash: Curses of Curses” that allows the skill to hit multiple times when affected by 2 or more debuffs, up to a maximum of 3 hits. You should always try inflict the target with [Curse] and inflict 3 debuffs to get 3 hits on the skill, so that you can have 9 hits in total (plus the 100% bonus from [Curse])from the 3 overheat. [Curse] itself already counts as 1 debuff so you just need 2 more. Some of the debuffs that are easy to inflict are [Corruption], [Blind], [Fear], [Lethargy]. As you can see, this skill is very very strong. The only downside is the small AOE.

Skill Attributes

image Kundela Slash: Enhance
Add this high. One of your strongest DPS skills.

image Kundela Slash: Curses of Curses
The attribute that makes Kundela Slash so strong. Definitely add this.

image Levitation (1/1)

Skill Description

Cooldown: 1m
Overheat: 1
For a brief period of time, your character levitates. While levitating, you are immune to melee attacks but receive additional damage from missile attacks. When an Upper Level magic circle is beneath you, you levitate higher.

This skill makes you immune to melee attacks but receive additional damage from missile attacks. This skill can be very useful in CM when granting you immunity from melee targets. The main reason you want to use this is because of the attribute “Levitation: Cursed Blood”, that increases Featherfoot’s skills by 30% when maxed. New players will need to get used to aiming your skills when flying as you might misjudge the skills’ aiming. It does not have a 100% uptime sadly but the duration is 30s so you can be flying half the time. You cannot dash when you are using this skill.

Skill Attributes

image Levitation: Cursed Blood
Max this for 30% more damage with Featherfoot skills

image Blood Curse (10/10)

Skill Description

Cooldown: 35s
Overheat: 1
Sacrifices the caster’s own blood to deal additional damage to enemies and put them under [Cursed by Blood] debuff. Enemies under [Cursed by Blood] have their SP recovery reduced to 0 and heals the attacker’s HP when attacked. Casting Blood Curse while low on HP could make you incapable of combat. Blood Curse can only be used while in Levitation and additional damages from skill does not take into account the target’s defense.

The skill has a medium AOE (it looks very big but it isn’t actually that big). You can only use this skill when you are under Levitation. Using this skill will make u lose HP but you can easily heal it back by attacking enemies that are under [Cursed by Blood] debuff. Make sure you have skills prepared to heal back your HP, or use Blood Sucking to do so. It also counts as a [Curse] that boosts Kundela Slash damage.

Skill Attributes

image Blood Curse: Enhance
Get this as it is one of the better AOE that Featherfoot has.

image Blood Curse: Limit
HP consumption reduce to 40% but duration for [Curse of Blood] increases by 7s. This attribute has its pros and cons. The pros is that your HP reduction is less (lose 40% instead of 60%) and [Curse of Blood] lasts 7s more. The con is that the additional damage which is 40%/60% of max HP x 2 is less because you now lose 40% instead of 60%. I do prefer the attribute on when fighting bosses and high HP enemies, and the attribute off when enemies are low HP. It depends on you whether you want to on or off this attribute but you should still get it for versatility

image Blood Curse: Drop of Blood
Get it. It ensures that you will at least have 1 HP left when you use this skill.

image Enervation (5/5)

Skill Description

Cooldown: 30s
Overheat: 1
Temporarily inflicts a curse spell on enemies within range to cause additional damage when hit. The additional damage is calculated using the Featherfoot’s magic attack and Enervation skill factor

The debuff lasts for 30s, so it is 100% uptime. However, it only applies for 15 hits. You need to use multi-hit skills to make good use of this debuff as the skill factor is for per hit of attack that the target receive.

Skill Attributes

image Enervation: Enhance
Good to get it high but other Featherfoot skills like Kundela Slash and Kurdaitcha should be more of a priority.

Breakdown

  • Damage (5/5): Kundela Slash (with debuffs and [Curse]) and Kurdaitcha have very high damage, contributing to Featherfoot’s single target damaging potential.

  • AOE (2/5): Most Featherfoot skills have a small hit box. Enervation does a wide AOE debuff, while Blood Curse does huge AOE over a large group of enemies.

  • Support (2/5): Decay is a good debuff for party members. Also, Enervation is useful in making the multi hit skills of party members stronger. Blood Curse’s [Curse by Blood] debuff also allows party members to self-heal.

  • Utility (1/5): No utility outside PVE

Synergy

  • Chronomancer: Mainly for Pass, to reduce the cooldown of their main single target DPS skills. Additionally, Backmasking works for Featherfoot’s Kurdaitcha.

  • Necromancer: [Greater Corruption] from Necromancer boosts Poison Property damage by 30%, which boosts all of Featherfoot’s skills. Necromancer also provides easy debuff for Featherfoot to activate “Kundela Slasht: Curses of Curses” attribute. “Featherfoot: Witch Doctor” also boosts the damage of Skeleton Soldiers/Archers’ dark damage on cursed enemies.

  • Warlock/Shadowmancer: “Featherfoot: Witch Doctor” boosts Dark Property attacks to enemies inflicted with [Curse]. Mastema also now counts as a [Curse] that can help proc “Kundela Slash: Curses of Curses”.

  • Bokor: The curse from Bone Pointing allows Bokor to use Effigy. Also, Featherfoot “Witch Doctor” attribute increases the damage of dark property attacks on cursed enemies, which boosts Bokor’s Dark Property damage.

Build Templates

Featherfoot is a very good pick for single target focused builds. Kundela Slash and Kurdaitcha are really impressive when it comes to single target DPS. “Featherfoot: Witch Doctor” attribute also makes it a top pick for dark wizard due to the strong 50% boost on [Curse] enemies. It however, lacks a lot in AOE and only excel in single target damage.

Class Guide - Part 6

13. Runecaster

image Runecasterimageimage
[Available from the 2nd Advancement]
There were never many Rune Casters in the Siauliai and Orsha areas. But since the Millenary, Rune Casters have spread throughout the Kingdom. Still, most of them can be found in the Northern districts of the Kingdom. Rune Casters are wizards who use ancient symbols imbued with magic. Although it takes some time to draw energy from the symbols, they contain enormous power.

Runecaster Attributes

image Runecaster: Skilled Casting
You don’t need this to be very high. 1 stack will already reduce the casting time of Runecaster skills by a lot. Higher level on this skill just increase the duration which honestly is not that needed if you have the Rod Mastery or Chronomancer’s Quick Cast

Runecaster Skills

image Rune of Ice (1-15/15)

Skill Description

Cooldown: 15s
Overheat: 2
Throw an ice sphere to deal damage. Maximum Critical Chance is applied when the enemy Debuffed enemies attacked with Rune of Ice become frozen for 3 seconds.

This skill is a pretty good skill. It has good damage, low cooldown and 2 overheat. The downside is that the AOE is very very small. It also has a chance to freeze targets. The skill is a useful filler skill when all your other skills are on cooldown. You can now walk while charging the skill.

Skill Attributes

image Rune of Ice: Enhance
Get it since the skill does good damage. Do prioritise other Runecaster skills instead though.

image Rune of Giants (1/15)

Skill Description

Cooldown: 2m
Overheat: 1

Turn you or an ally into a giant. Giant players are considered Large-type and have their HP and defense increased. Limited usage of skills. If there is a Shoggoth among your summons when using this skill, the Shoggoth will also receive the effects of Rune of Giants for 30 seconds. Appiles a chance to cast Earthquake when performing jumping attacks while turned into a giant (Basic attack damage is applied when the caster has not learned the Earthquake skill).

Honestly, despite the changes made to this skill, it isn’t very useful in most builds or for damage. You can turn you or your ally into a giant, also increasing your max hp, defense and movement speed. The function to turn Shoggoth into Giant is not that useful. Using it has a chance (45% at maxed level) to trigger Earthquake skill. Despite all that, the skill is not that good for general use. This is because the skills that you can cast when in giant mode is very limited (Runecaster skills and some Chronomancer/Taoist skills). The “Earthquake Triggering” ability is also not good as the damage is not high to make it worth. Wizards do not have the means or tools available to be an auto-attacking class unlike Pre-Re:Build. However, it is still useful to add at least 1 point in the skill for exploration purposes. This skill can be useful for the movement speed when you are doing quests or exploring maps. The higher the skill level, the longer the duration of the buff.

Skill Attributes

This skill has no attributes

image Rune of Justice (15/15)

Skill Description

Cooldown: 30s
Overheat: 2
Charges a divine magic attack that is unleashed in a straight line.

The skill now has 2 overheat. It also has fairly good damage and a pretty long range. It is the only Holy Property attack that Wizard has, which does more damage when enemies are under [Stigma] debuff by Warlock. You can also walk while charging the skill.

Skill Attributes

image Rune of Justice: Enhance
Do get this attribute.

image Rune of Protection (1/10)

Skill Description

Cooldown: 1m
Overheat: 1
Applies an effect that reduces the damage you receive while casting skills

The damage reduction is a nice bonus. The best thing about this skill is the Rune of Protection: Endurance attribute that grants you immunity to knockback and knockdown. Personally, 1 point is sufficient just for the knockback/knockdown immunity since you can buff the damage reduction from the attribute.

Skill Attributes

image Rune of Protection: Enhance
Increase the damage reduction effects when you add this. You can invest in this if you have spare points. Do prioritise your damage dealing skills.

image Rune of Protection: Endurance
Definitely get this.

image Rune of Destruction: (10/10)

Skill Description

Cooldown: 30s
Overheat: 1
Inflicts powerful damage to enemies in a targeted area. The attacked enemies reflect magic on other enemies, dealing additional damage to them and reducing their magic defense.

The skill has a pretty decent AOE that reflects the damage to nearby enemies. The key highlight of the skill is not the damage, but the Magic Defense reduction. At maxed level, it reduces their Magic Defense by -50% for 10s. Use this skill before you use your main DPS skills to make full use of the short 10s defense reduction.

Skill Attributes

image Rune of Destruction: Enhance
The skill do pretty good damage so do add this.

image Rune of Rock (5/5)

Skill Description

Cooldown: 40s
Overheat: 1
Send five giant rocks falling from the sky to deal damage down below.

The highest damage and biggest AOE skill that Runecaster has. It summons 5 giant rocks that crashes down to targets over a very wide area. One of the best AOE skills that Wizards can have.

Skill Attributes

image Rune of Rock: Enhance
Get this high as it is a very strong skill.

Breakdown

  • Damage (4/5): Runecaster skills are pretty strong after the buff. Most of their skills do have high cooldown though.

  • AOE (4/5): Rune of Destruction and Rune of Justice has pretty decent AOE, while Rune of Rock has a very large AOE

  • Support (2/5): It does help provide Magic Defense reduction for party members but that’s about it. Rune of Giants can be used on allies but it restricts their skills

  • Utility (5/5): Being able to craft scrolls such as Enchant Fire (Pyromancer) and Pole of Agony (Warlock) allows it to have great utility. Also, Rune of Giants is useful for map exploration as it covers more distance than dash.

Synergy

  • Chronomancer: Due to the high casting time of Runecaster’s skill, Runecaster really benefit from Quick Cast. Furthermore, many of Chronomancer’s skills such as Slow and Pass can also be used in Giant Mode. Chronomancer’s Pass also greatly help Runecaster’s fairly high cooldown skills.

  • Pyromancer/Warlock: This synergy is not really for PVE purposes, but rather pairing Runecaster with these classes allow Runecaster to craft the scrolls that are demanded in the market, namely Enchant Fire and Pole of Agony.

Build Templates

Runecaster do not have a lot of synergy with other classes. However, it is great as a filler standalone class with good AOE and good damage. It also has the unique ability to craft scrolls for certain Wizard skills. When playing Runecaster, it is best to either have Chronomancr for Quick Cast or use a Rod instead of Staff for faster casting time since Runecaster suffer from long cast time for their skills

14. Shadowmancer

image Shadowmancerimage image
Shadowmancers began when a magician was inspired by the Sorcerers who materialized demonic spirits into our world. Currently, their ultimate goal is to capture the shadow of the eclipse to create a powerful wide-area magic spell. The Shadowmancer is a mage that is able to perform powerful attacks or hide in the shadows.

Shadowmancer Attributes

This class has no class attributes

Shadowmancer Skills

image Shadow Thorn (15/15)

Skill Description

Cooldown: 15s
Overheat: 4
Sharp thorns rise from within the shadow of an enemy, dealing damage. Applies [Blind] debuff to enemies for 3 seconds when hit. Shadow Thorn cannot be blocked or evaded.

The highest damage dealing skill Shadowmancer has. It is single target that hits enemies twice if they are grounded. It has high damage and has 4 overheat, thus making it a very strong skill to burst down mobs. Do take note that it applies [Blind] debuff to enemies for 3 seconds when hit, and this [Blind] debuff will overwrite another [Blind] debuff that has a longer duration. You can use this skill to also quickly inflict [Blind] if you need to, in order to boost your other skills that does more damage against [Blind] enemies (Shadow Conjuration/Shadow Thorn, most Warlock and Bokor skills).

Skill Attributes

image Shadow Thorn: Enhance
One of the best single target skills. Get this high.

image Shadow Thorn: Stepping Shadows
What makes the skill strong is this attribute that allows it to do 2 hits on grounded enemies.

image Shadow Conjuration (1-15/15)

Skill Description

Cooldown: 15s
Overheat: 2
Cast your shadow outwards, dealing damage to enemies within it.

The skill is ok. The damage is good and does extra 19 hits of tick damage, each doing 10% of the original damage on grounded enemies (so almost x3 the skill factor in total). It also has a very short cooldown and 2 overheat. The only drawback is that the AOE is pretty short and narrow and the extra hits only work on grounded enemies.

Skill Attributes

image Shadow Conjuration: Enhance
Get this. The skill is quite good.

image Shadow Conjuration: Shadow Trap
At maxed level, it allows the skill to do extra 19 hits, each doing 10% of the original skill’s damage on grounded enemies. Definitely max this.

image Shadow Pool (1/5)

Skill Description

Cooldown: 50s
Overheat: 1
Drift into the shadows and hide within the ground. Enemies cannot attack you while in this state.

The skill is very useful for escape or when you need a short movement speed boost. I do not think there is a need to add this too high and your skill points could be put to better use to increase your damage.

Skill Attributes

image Shadow Pool: Movement Speed
Max this for faster movement speed.

image Hallucination (1/15)

Skill Description

Cooldown: 1m
Overheat: 1
Summon a shadow that looks exactly like you to take damage in your place. The shadow’s HP is a set percentage of your maximum HP.

Increasing the skill level increases the HP of the summon. This skill is useful in helping you draw some aggro away (not that great in doing it though). However, the duration of the skill is only 20s so I wouldn’t put that much points into it. 1 is sufficient just for utility purposes.

Skill Attribute

image Hallucination: Enhance
Increases the HP of the summon. Not that useful.

image Shadow Condensation (10/10)

Skill Description

Cooldown: 30s
Overheat: 1
Draw shadows of your allies and enemies and compress them into orbs. The enemies who have had their shadows drawn are afflicted with [Blind] debuff and the orb explodes after 3 seconds.

The skill have a moderate AOE that can hit up to 5 times. Shadow beads are drawn from the targets and explode after 3s. The skill is good because it inflicts [Blind] on targets for 10s and classes such as Warlock and Shadowmancer can benefit from this debuff.

Skill Attributes

image Shadow Condensation: Enhance
The skill is pretty strong so do get this attribute.

image Shadow Fetter (0-10/10)

Skill Description

Cooldown: 25s
Overheat: 1
Nail the shadow of enemies to the ground to prevent them from moving.

This skill is very situational because it does not always have its uses. Unless you really find a need for it, you can skip it because of the tight skill points constraint.

Skill Attributes

This skill has no attributes

image Shadow Fetter (5/5)

Skill Description

Cooldown: 30s
Overheat: 1
Separates an enemy from their shadow. When the shadow is attacked, the enemy’s body receives part of the damage applied. This effect disappears when the shadow’s HP becomes 0. Damage is reduced to 25% if the target is a boss. When a player character is targetted, attacking the shadow using Shadowmancer skills will cause enemies to stagger and the shadow will disappear when the target comes into contact with the shadow.

Using this skill cast a duplicate shadow of the target. Any damage that is done to the shadow will be reflected on the original target (25% damage reflected if boss) This skill is very good especially for bosses. Despite the damage being reduced to 25% if target is boss, it is still very strong. The best way to use this skill is to use AOE skills that can hit both the boss and the shadow. Definitely max this for the highest damage ratio and longest duration of 15s (meaning you can have this half the time)

Skill Attributes

This skill has no attributes

Breakdown

  • Damage (4/5): Shadowmancers are mostly bossing and single target focused which do good damage.

  • AOE (2/5): Only Shadow Condensation has good AOE while Shadow Conjuration has a very narrow and short AOE

  • Support (4/5): Infernal Shadow is a very useful skill for bosses that helps the entire party do more damage. Shadow Fetter if necessary can be useful in pinning bosses down.

  • Utility (1/5): No utility outside of PVE

Synergy

  • Warlock: Shadow Condensation inflicts [Blind] which boosts all of Warlock skills by 30%. Shadowmancer also benefit from “Warlock: Darkness” (although not very significant).

  • Bokor: The natural synergy Bokor have is with other Dark property users. Shadowmancer benefit from the increase minimum critical rate of dark property skills debuff by Hexing. Effigy also helps to inflict [Blind] which boost Shadowmancer’s damage.

  • Featherfoot: “Featherfoot: Witch Doctor” boosts Dark Property attacks to enemies inflicted with [Curse].

Build Templates

Shadowmancer is generally best paired with his dark property buddies. Shadowmancer is more targetted to boss fights from Infernal Shadow and its high single target damage from Shadow Thorn, and do not really do that well in AOE based content like challenge modes.

15. Onmyoji

image Onmyojiimage image
The Onmyoji joined the Kingdom around 90 years ago during the Millenary. They had served the Kingdom for 50 years and declared themselves an independent group about 40 years ago. Though they still provide their services to the Kingdom, they are now acknowledged as an independent group much like the other clerics and wizards. The Onmyoji are able to summon divine spirits and use the magic of Yin and Yang in combat, which allows them to face a large number of opponents simultaneously.

Onmyoji Attributes

This class has no class attributes

Onmyoji Skills

image Fire Fox Shikigami (0-15/15)

Skill Description

Cooldown: 1m
Overheat: 1
Summon a Fire Fox Shikigami. The summoned Shikigami follows you while automatically attacking nearby enemies. Enemies attacking you will be targeted first by the Shikigami. Additional critical rate applies to your magic Fire-property attacks while the Shikigami is following you.

It is important to note that unless you are a Pyromancer or Psychokino, you do not need this skill at all. For Pyromancer, the skill gives you additional critical rate of +95% for Fire Property attacks at max level 15. For Psychokino, it adds extra Fire Property hits for Psychokino’s Gravity Pole, and increase the range of Psychokino’s Psychic Pressure (allows you to hit more Pyromancer’s Fireballs or Cryomancer’s Ice Wall). You do not need this skill if you do not play Pyromancer or Psychokino because the damage of the Fox summon itself isn’t amazing.

Skill Attributes

image Fire Fox Shikigami: Enhance
Not important since the summon does not do high damage

image Fire Fox Shikigami: Grown Fox
Not important since the summon does not do high damage. It however only have a max level of 1 so might as well add it. The big fox is cute.

image Fire Fox Shikigami: Fire Property
This attribute is what makes Onmyoji a great pair with Psychokino. It increases the range of Psychic Pressure, allowing it to **hit more of Pyromancer’s Fireballs and also allows Cryomancers to hit all 16 Ice Walls for the Psychic Pressure + Ice Wall combo. It also makes Gravity Pole a lot stronger than without the attribute.**The skill’s extra hits does 1.5x more than the normal hit and the entire skill does a total of 20 hits (40 hit in total), essentially making the skill 2.5x stronger.

image Greenwood Shikigami (1/15)

Skill Description

Cooldown: 35s
Overheat: 1
Summon a Tree Shikigami. The summoned Shikigami sprouts from the ground, dealing continuous damage and pulling in nearby enemies. Once fully grown, the Shikigami disappears, slowing down enemies around it. Enemies hit by the Shikigami have their Slow debuff extended by 5 seconds.

This skill is pretty good at CC as it has a slight suction effect. With “Greenwood Shikigami: Poison” attribute, the skill does an additional 9 hits of each hit of the skill factor, thus the total damage output is 200% of the total skill factor of the skill. However, Onmyoji does have pretty tight skill points constraints and other skills tend to be better due to their higher damage or shorter cooldown. Hence, 1 point is usually sufficient just for the suction effect. Take note that the 5s debuff when the skill end also triggers “Sage: Maestro of Dimension” attribute which increases damage of non-property magic by 30%

Skill Attributes

image Greenwood Shikigami: Enhance
Even though you may leave this at level 1, it does have pretty good damage overall and hence it is worth to add it. Do however prioritize other skills.

image Greenwood Shikigami: Poison
Gives the skill additional 9 hits so do max this.

image Howling White Tiger (1-15/15)

Skill Description

Cooldown: 15s
Overheat: 1
Release the roar of the White Tiger (Metal Shikigami) to instill fear in nearby enemies. Enemies affected by the roar receive damage and become struck with [Fear]. Damage increases by 50% on Plant-type enemies.

This skill has probably the bigger AOE in the entire game. It hits almost the entire screen. Coupled with its good damage and short cooldown, it is one of the best skills in the Onmyoji tree. The casting time is much faster than other Onmyoji skills. It also has an attribute that increases you and your party members movement speed by 10 for 10s when it is cast, which is very useful considering that you can use this skill every 15s. Take note that the higher the skill level, the more targets it can hit. Depending on your build, you can add some points or max it.

Skill Attributes

image Howling White Tiger: Enhance
Add this, especially if you the skill level is high. The short cooldown allows you to use the skill often hence you can get great value out of it

image Howling White Tiger: Ferocious
Increases damage to Beast Type enemies by 50% (maxed). Not that important at the start but you can eventually get it.

image Howling White Tiger: Virtuous Roar
The attribute that grants you and your party additional movement speed when you cast the skill. Get it

image Water Shikigami (0-15/15)

Skill Description

Cooldown: 20s
Overheat: 1
Invoke the power of the Water Shikigami to summon strong water currents and attack your enemies.

The skill has pretty large frontal AOE. It does good damage and have a short cooldown. However, depending on your build, you can choose not to get it or get it high. I do prefer to get it high since you can use this skill often.

Skill Attributes

image Water Shikigami: Enhance
Get this since the skill is pretty strong.

image Genbu Armor (0-10/10)

Skill Description

Cooldown: 20s
Overheat: 1
Use the armor of Genbu (Water Shikigami) to generate a protective field. Attacks received consume SP instead of HP. If you are low on SP, the protective field disappears. Does not stack with Magic Shield. SP does not restore naturally while the skill is in use. Chance of neutralizing Ice-property attacks

Generally people use this more for PVP. In PVE, it can deplete your SP pretty fast and considering that a lot of skills nowadays use a lot of SP, this skill isn’t a very popular pick for PVE focused builds. Even if you do max it, it is hard to keep casting it as it is hard to maintain the high SP that is required

Skill Attributes

image Genbu Armor: Flowing River
Reduce the SP consumption by 10% (maxed). Get this if you decide to add the skill

image Toyou: (1-10/10)

Skill Description

Cooldown: 20s
Overheat: 1
Invoke the power of the Earth Shikigami and unleash its force on the ground below your enemies, dealing damage. Knocked down enemies receive half the damage, but have a chance of being immobilized.

The skill has a very big AOE and short cooldown, doing a total of 5 hits. It however, only have a 50% hit chance against flying enemies with attribute. It does have a 10% chance to inflict [Hold] on fallen enemies which can trigger “Sage: Maestro of Dimension”, but the chance is very low so I wouldn’t depend on it.

Skill Attributes

image Toyou: Enhance
Get this as the skill is strong and has short cooldown.

image Toyou: Debris
Allows a 50% (maxed) chance per hit to hit flying enemies. Max this.

image Yin Yang Harmony (5/5)

Skill Description

Cooldown: 1m
Overheat: 1
Generates a strong energy from the harmony of Yin and Yang, which deals quick, alternating blows of Dark (Yin) and Holy (Yang) property damage. Casting of the skill cannot be interrupted, and the caster remains immune to knockback and knockdown while Yin and Yang are in harmony.

The strongest skill in the tree. It has a very large AOE and does high damage. It does around 40 x skill factor making it very strong. It however has a high cooldown. The skill has an attribute that boosts Holy and Dark Property attacks by 20% for a duration depending on the attribute level, hence giving it synergies with Dark-focused classes such as Warlock and Shadowmancer.

Skill Description

image Yin Yang Harmony: Enhance
Get this high as it is your strongest skill.

image Ying Yang Harmony: Mediator
Add this if you pair Onmyoji with classes that do Dark Property damage (20% more damage)The buff lasts longer as the attribute level is higher. At maxed level the buff lasts for 50s. This attribute is pretty expensive to max so do it when you have a lot more silver on hand to spare

Breakdown

  • Damage (4/5): The skill overall have many short cooldown skills that allows Onmyoji to do good damage. Yin Yang Harmony is also very strong despite its high cooldown

  • AOE (5/5): There is literally no other class in this game that has a bigger AOE than Onmyoji. Almost, if not all of their skills cover 1/2 to almost the entire screen

  • Support (2/5): It has fairly good crowd control with Greenwood Shikigami and also boost the movement speed of party members when using Howling White Tiger.

  • Utility (1/5): No utility outside of PVE

Synergy

  • Psychokino: The main draw is to use “Fire Fox Shikigami: Fire Property” to greatly boost the power of Gravity Pole. The increased range of Psychic Pressure do help if you also pair it with Pyromancer/Cryomancer.

  • Sage: Greenwood Shikigami and Toyou allows “Sage: Maestro of Dimension” to increase the damage of non-property skills on enemies inflicted by [Slow] by 30%. There is however, not many non-property skills to make full use of this attribute. Howling White Tiger do benefit from this.

  • Warlock/Shadowmancer/Bokor: Yin Yang Harmony grants a 20% damage boost for each second per attribute level and hence boosting the dark property skills of those 3 mentioned classes

Build Templates

Onmyoji has the best AOE in the game. It however do not do that well against bosses as the skills are suited for AOE combat such as Challenge Modes. Onmyoji also do have good synergy with various classes that makes it popular. If you are looking for a class to kill up the gaps in the AOE department, Onmyoji is a good choice to bet on.

Class Guide - Part 7

16. Taoist

image Taoistimage image
Taoists harness the power of faith obtained through years of training. They believe that through their training that humans can achieve greatness akin to that of the goddesses. The Kingdom has acknowledged and sanctioned them as an official part of the Kingdom’s clergy but where they come from such categorization means little. The Taoist class uses the power of Taoism. It is capable of using a talisman to attack enemies or help allies.

Taoist Attributes

This class has no class attributes

Taoist Skills

image Begone Demon (0/15)

Skill Description

Cooldown: 10s
Overheat: 1
Instantly activates the spell contained inside the installed charm. Creeping Death, Tri-Disaster and Upper Level explode to attack nearby enemies.

This skill is pretty redundant. It explodes all your charms which is bad. Creeping Death Charm would be better off continue being on the field to do extra tick damage, and Tri-Disaster Charm is better being left on the field for the bonus damage. You wouldn’t want to explode them because you would need to recast everything again.

Skill Attributes

image Begone Demon: Enhance
Not needed since the skill isn’t required.

image Creeping Death Charm (15/15)

Skill Description

Cooldown: 35s
Overheat: 3
Install a Creeping Death Charm that moves slowly forward. Creeping Death deals continuous damage to the targets coming in contact with it while moving. Deals additional damage when exploding via Begone Demon.

Probably the best singe target DPS skill in the entire Wizard tree. It installs a slowly moving charm that continuously do damage to enemies who touch it that hits a maximum of 60 hits. This skill is very strong especially when the target do not move and has a large size because they will be able to get hit by many of the tick damage. Furthermore, it has 3 overheat and the damage all stacks and does tremendous damage on a single target.

Skill Attributes

image Creeping Death Charm: Enhance
Definitely add this because it is your main single target DPS skill.

image Lightning Charm (1/1)

Skill Description

Cooldown: 30s
Overheat: 1
Activate a charm containing the power of lightning. Every Taoist skill you use gains a chance of additional Lightning-property attack

The activation rate of this skill is very very low (the activation rate isn’t mentioned in the skill description). If it does trigger, it does additional hit that is 50% of the original skill factor of the skill. Multi-hit Lightning Property skills like Creeping Death Charm has a better chance to proc the hit. The skill only require 1 skill point so just add it. It does have a troublesome casting time.

Skill Attributes

image Lightning Charm: Enhance
Because of how low the activation rate is, I wouldn’t recommend adding this.

image Upper Level (1/1)

Skill Description

Cooldown: 20s
Overheat: 3
Creates a magic circle, altering other magic circles in front of you to affect Flying-type enemies. Deals additional damage with Begone Demon.

This skill does have its uses only if you build needs it. It allows your magic circles to hit Flying-type enemies when they wouldn’t have otherwise without Upper Level.

Skill Attributes

This skill has no attributes

image Storm Calling (10/10)

Skill Description

Cooldown: 25s
Overheat: 1
Install a charm that calls upon a furious storm. It activates when coming in contact with an enemy, and the enemies within its range get attacked once, then receive additional damage from Lightning-property attacks.

This skill is very useful in boosting your Lightning Property attacks, allowing them to do 50% more damage. Make sure to cast this skill before casting your main DPS skills such as Creeping Death Charm and Eradication because it allows them to do 50% more damage which is quite significant. It also doubles the number of targets that can be hit by **Elementalist’s Electrocute.**The Storm duration is only 13s so be sure to cast your Lightning Property skills before the Storm ends.

Skill Attributes

image Storm Calling: Enhance
Not important because the skill itself do not do much damage. It is mainly used for the 50% bonus damage for Lightning Property attacks

image Storm Calling: Fog
I don’t really feel much difference with or without this attribute but there is no penalty in getting it anyways so why not.

image Tri-Disaster Charm (10/10)

Skill Description

Cooldown: 30s
Overheat: 1
Install a charm that increases vulnerability to Fire, Ice and Lightning properties. Enemies near the charm receive more damage from Fire, Ice and Lightning attacks. When the charm explodes, affected enemies receive damage of those three properties.

This skill is what makes Taoist pair well with other Elemental classes. Enemies in the charm’s AOE receive 50% more damage from Fire/Ice/Lightning Property attacks. This skill when used together with Storm Calling essentially doubles the damage of your Lightning Property Attacks. Each charm lasts for 120s and you can install multiple charms over the area, so this skill is very useful in CM whereby you can lay your charms all around to boost your damage. Take note that multiple charms do not stack, meaning the damage boost will not be addictive if charms are stacked on top of each other. Enemies will only receive the damage boost equivalent to 1 charm.

Skill Attributes

image Tri-Disaster Charm: Enhance
Boost your damage to even more than 50% depending on the attribute level so do try to get this high.

image Divine Punishment (0-3/10)

Skill Description

Cooldown: 50s
Overheat: 1
Deal damage to punish a single target. Damage increases proportionally to charging time.

The skill is quite strong but it has a high cooldown and long charging time. Due to skill points constraints, you won’t be able to add this skill to a level higher than 3. The AOE is not very wide.

Skill Attributes

image Divine Punishment: Enhance
Not a priority because it is often a high cooldown filler skill.

image Divine Punishment: Broad Strike
Do add this because it allows the skill to hit more than 1 target.

image Eradication (5/5)

Skill Description

Cooldown: 30s
Overheat: 1
Summon a group of talismans behind you and send them forward to attack your enemies.

This skill has good damage, 3 overheat and moderate cooldown. It does hit over a pretty wide AOE and is the better AOE skill that Taoist has.

Skill Attributes

image Eradication: Enhance
Get this because the skill is pretty strong.

Breakdown

  • Damage (5/5): Creeping Death Charm is a top-tier singe target DPS skill. Taoist also has buffs to further boost its already high damage.

  • AOE (2/5): Taoist do not have good AOE. Only Eradication has good AOE and Divine Punishment AOE isn’t very wide either.

  • Support (3/5): Tri Disaster Charm is really good in supporting parties with classes that do Fire/Ice/Lightning damage as the effects of the charm benefits the entire party.

  • Utility (1/5): No utility outside of PVE

Synergy

  • Pyromancer/Cryomancer: These 2 classes benefit most from Tri Disaster Charm since all of their skills are either all fire or ice property.

  • Elementalist: Meteor and Fire Claw benefit from Tri Disaster Charm, while Electrocute benefit from Storm Calling and Lightning Charm.

  • Chronomancer: This is mainly for bossing, whereby Pass can be used to reduce the cooldown of Taoist’s main DPS skills

Build Templates

Taoist is one of the strongest among the wizard tree. Creeping Death Charm probably has the highest single target DPS in the entire wizard tree and is thus a popular pick for people who lack a class to do single target DPS. Additionally, Tri Disaster Charm is a very strong skill that benefits Pyromancer and Cryomancer a lot, making those 2 popular pairings with Taoist.

17. Bokor

image Bokorimage image
Bokors are a kind of mediators between humans and deity. Because of this, they are considered both magicians and clerics. They have migrated to the Kingdom from their tribal society around 900 years ago during the Reign of King Melkhiel and today they are more recognized as clergy than wizards. Bokors use voodoo skills to raise the dead or curse their enemies to attack them from afar

Bokor Attributes

This class has no class attributes

Bokor Skills

image Hexing (1-15/15)

Skill Description

Cooldown: 10s
Overheat: 2
Curse an enemy to decrease their magic defense and prevent recovery.

This skill applies a [Hexing] debuff and reduces the magic defense of the target. The higher the skill level, the more the reduction in magic defense and the longer the debuff duration. I would recommend at least level 4 for 10s duration so as to have 100% uptime if required. You may also max it for longer duration and more magic defense reduction.

Skill Attributes

image Hexing: Dark
Increases the minimum critical rate of all Dark Property attacks by 10% (maxed). Definitely get this. It would be even more useful if you pair Bokor with other Dark classes such as Warlock and Shadowmancer.

image Effigy (1-15/15)

Skill Description

Cooldown: 5
Overheat: 3
Deals damage to enemies under [Hexing] from afar. Deals additional damage every third cast when used in succession.

It damages targets who are affected by [Hexing]. The third hit will be more powerful than the first 2 hits, doing 2.6x - 3.6x more. It can be used very often due to its short cooldown. Enemies who got debuffed with [Hexing] by Featherfoot’s Bone Pointing can also be affected by Effigy. It has a 50% chance (maxed attribute) to inflict [Blind] to targets for 5s as well, thus making it a good pair with Warlock and Shadowmancer who benefit from [Blind]. It also does 25% more damage to [Blind] enemies.

Skill Attributes

image Effigy: Enhance
Add this because it can be used very often with its short cooldown, thus having high DPS.

image Effigy: Blind
Add this if you pair with Warlock or Shadowmancer

image Zombify (1-15/15)

Skill Description

Cooldown: 25s
Overheat: 1
Applies a debuff to nearby enemies. Debuffed enemies return as zombies after they die. Zombie stats are based on those of the killed enemy. Zombie HP and STR increase according to the caster’s INT and SPR.

Apply [Zombify] debuff to enemies in the skill area and those enemies will turn into zombies after they die. Higher level Zombify results in stronger Zombies. You can either increase this skill to have stronger Zombies damage, or other skills to have stronger debuffs/skill damage. For reference, level 15 Zombies does about twice the damage of level 1 Zombies. The Zombify attributes for some reason feels like it has a higher than stated chance to proc, which will be further explained in the attributes section.

Skill Attributes

image Zombify: Large Zombie
You can get this to have a chance to summon large zombie when zombifying a large type monster. Large zombies are slower but do more damage. For some reason the chance of summoning a large zombie does seem much higher than normal.

image Zombify: Wheelchair Zombie
You can get a chance to summon wheelchair zombie. Wheelchair zombies do less damage but are faster. For some reason the chance of summoning a wheelchair zombie does seem much higher than normal.

image Mackangdal (0/10)

Skill Description

Cooldown: 50s
Overheat: 1
Throw a talisman to an ally that temporarily suppresses pain. You become invulnerable to any damage while the talisman is active, but receives the accumulated damage at once when the effect ends. You do not receive accumulated damage while using [Shadow Pool] or [Stop: Break Time].

For PVE purposes, you do not need this skill.

Skill Attributes

This skill has no attributes

image Bwa Kamiyan (1/10)

Skill Description

Cooldown: 10s
Overheat: 1
Instruct your summoned zombies to celebrate. The zombies will deal little damage to anything they touch. The zombies’ STR stat applies as additional damage.

This skill do not do much damage. However, it is great for crowd control as it paralyzes enemies when the Zombies touch them. A good way to use this is to gather mobs and use Bwa Kamiyan to circle around the entire group to paralyze them. The skill can be channeled for 10s so you essentially can perma-paralyze the mobs. The damage however isn’t high so only use this for CC purposes.

Skill Attributes

image Bwa Kamiyan: Enhance
Not required since you do not use this skill for damage purposes

image Bwa Kamiyan: Zombie Defense
Not really needed.

image Samediveve (5/5)

Skill Description

Cooldown: 50s
Overheat: 1
Plant a glyph on the ground symbolizing Baron Samedi, the loa of death. Increases the maximum HP and movement speed of you and your zombies nearby the glyph. Only half of the effect applies to you.

Boost your zombies HP and movement speed. Additionally, half of the skill effects applies to you as well. The duration for the skill effect when maxed is 90s so you will have 100% uptime with this skill although the glyph only lasts for 15s.

Skill Attributes

This skill has no attributes

image Damballa (5/5)

Skill Description

Cooldown: 10s
Overheat: 1
Detonates zombies near the targeted area and deals damage to nearby enemies.

This skill is really strong, like really strong. The skill factor in the skill description is for 1 zombie that explodes, and you can explode up to 8 of your maximum limit of zombies. Also, it only have a 10s cooldown which allows you to use it very often. Do note that you need to properly aim the skill circle at the area where your zombies are at to explode them. It also does 25% more damage to [Blind] enemies.

Skill Attributes

image Damballa: Enhance
I would recommend that you add this very high because the skill is just that good.

image Damballa: Chance of Zombification
Max this. Although it states that it has a 10% chance (maxed) of a new zombie emerging from using Damballa, my personal experience is that it almost always spawn new zombies for me.

image Damballa: Remove Knockdown
Get this. Damballa with knockdown only serves to spread mobs all over which is bad. for CM

Breakdown

  • Damage (4/5): Bokor has very high burst AOE from Damballa. Bokors also gets extra damage from their zombie summons, while also having ok single target DPS from Effigy.

  • AOE (3/5): Other than Damballa, Bokor skills do not have much AOE. However, the skill itself is very strong and has a very short cooldown which makes Bokor relatively good in the AOE department

  • Support (3/5): Bokor can support with [Hexing] debuff to lower magic defense of enemies for party. Bwa Kamiyan is also a good CC skill.

  • Utility (1/5): No utility outside of PVE

Synergy

  • Sorcerer: This is due to Desmodus’s [Vampirism] debuff that increases the damage of zombies. Salamion also heals zombies

  • Warlock/Shadowmancer: The natural synergy Bokor have is with other Dark property users. Both Warlock and Shadowmancer benefit from the increase minimum critical rate of dark property skills debuff by Hexing. Effigy also helps to inflict [Blind] which boost both classes’ damage. [Blind] synergy boost the damage of all 3 classes.

  • Featherfoot: Because Bone Pointing both allow Bokor to use Effigy, Featherfoot is also a great pick for Bokor. Note that Bone Pointing’s Hexing debuff is only lvl 1, so it is best to use Bokor’s Hexing instead on bosses, and Bone Pointing for groups of enemies.

Build Templates

Bokor is a strong class with really good damage. The summons are weaker but the actual Bokor skills are stronger than other summoner classes. Bokor easily pairs with other summoner classes and Dark Property damage classes.

Reserved for future use part 8

Misc

Link to my old guide

lack of pyro synergy with ff.

Pyro no longer have synergy with FF after EP11, that is if you are referring to Ngadhundi boosting Fire Property damage. As of EP11, Decay now increase poison and physical attack, which makes it even better for Featherfoot.

Aight that’s a lot of collapse.
I don’t think you need this one
image

Other than that keep up the good work

Make sense. I’ll probably remove the Attribute Description for the class itself, but still keep it for each skill. Does the collapse make it much neater to read? I was thinking it might be much easier to navigate rather than posting an enormous large wall of text and people would need to scroll through large chucks of text.

Yeah in my opinion it only needed the change I proposed, right now it’s perfect.

Hello and thank you for continuing to update this guide I’ll only have 2 additions to make :
-the corruption debuff from FF’s Ngadhundi only gives 10% more damage to poison attacks
-the Phantom Pain attribute on WL’s Mastema does 33% damage of its initial hit every second for 24 seconds, making it deal 900% of the skill factor

That’s all I can think of for now

I went to try it and yeah you’re right. I’ll put it in thanks for the heads up.

Also, thanks to this, I found out that [Corruption] and [Greater Corruption] stacks as my Featherfoot’s skills do even more damage with both debuffs (they don’t overwrite each other).

1 Like

Nice. Always good to know.

Havent read that much about incoming Buffs of shadowmance cause i dont use it, but now im leveling a WL - FF - SM , what buffs are you talking about in your post? (i know the blind duration will be 10s ) is there something else ?

and one more thing i dont know why my mates keep telling me to just put enervation to just 1 point. personally i maxed it, can you enlighten me as to how good it is in action havent really tried it to boss that can survive long.

The buffs can be seen here. It is mainly Shadowmancer and Runecaster buffs. I use google translate to interpret this so if I did not interpret it wrongly

  • Shadow Thorn can inflict [Blind] (not sure about this so I have to wait for the actual notes to be out)
  • Shadow Thorn damage increase (when you level up, lvl 1 damage unchanged)
  • Shadow Thorn ignore 25% instead of 50% def
  • Shadow Conjuration damage increase (when you level up, lvl 1 damage unchanged)
  • Shadow Condensation [Blind] duration increased to 10s like you mentioned
  • Infernal Shadow also cause [Blind]???

From what I read it is mostly things to make it easier to inflict [Blind] and damage increase from Shadow Thorn and Shadow Conjuration. I’m not sure how big the damage changes will be so we’ll need to see. I personally play a dark build for my sub which is Warlock - Shadowmancer - Bokor so I hope that future Shadowmancer and Bokor changes (slight changes in Bokor) can make it better because at this moment, this build clears CM5 mobs the slowest for me (I do better with my FF build/full summoner build/elemental builds). The changes are not that gamechanging, and Shadowmancer still lack AOE. They just probably buffed up Shadowmancer’s singe target capabilities.

I do think Enervation should be maxed. The skill points that you don’t put in Enervation isn’t going to make other skills much better anyways. The skill does damage when you hit an opponent, so it is best to use multihit skills after Enervation to trigger the damage. Maybe I’ll just share with you what I usually do. My build for Featherfoot is a Featherfoot - Warlock - Necromancer, so Skeleton summons continuous hits can help trigger Enervation. Some multihit skills which I use to trigger Enervation are skills like Magic Missile, Demon Scratch, Pole of Agony (a lot of hits), and also even Blood Sucking. It isn’t a very very strong skill, but your skill points would be better off here than in other skills.

ok thanks for that link…

as for enervation yeah good point, wouldnt want to up points on blood sucking as i just use it to fill up what enervation used. thanks, will test more if i can get more dmg out of other but i doubt since you tried everything already. Thanks will ask more questions once i understand the depth of dark class. TY.

tbh shadowmancer is pretty much useless in PvE, it is mostly a PvP class.

For now shadow wizard in PvE feels really underwhelming. Mostly because 95% of the endgame bosses are dark element, hence you deal -25% damage compared to any other class. I wish this game offers more varierty in endgame content.

well the chicken legend raid and unique raid is holy prop. boss thats why shadow wiz kinda got a little littleee little bit popular now…

What would you choose as X in Alchemist-X-Sage build to be able to level up the character solo up to the Sage class if you could only choose among Chronomancer, Necromancer, Featherfoot, Rune Caster or Shadowmancer (the only 5 classes that don’t appear in my other wizard builds)? I was about to choose Chronomancer, but this would mean going full support, which I don’t plan to (the char is basically just to make potions and portals). My initial idea was to choose Shadowmancer, but I’m not so sure anymore.