Introduction
There is a lot of equipment in the game that have random stats. This guide will tell you about the different types of equipment with random stats, when you should care about them, what they’re used for, and how you might go about changing these stats to suit your needs. This guide won’t discuss what stats you should get, as that differs from build to build.
Random Stat Basics
All random-stat equipment begin as unidentified equipment before acquiring their random stats, but different random-stat equipment are acquired through different means. Each class of equipment also has different ranges and uses, which means that for some equipment it is worth the investment to ‘reroll’ the stats while for others it is not. In this guide I will refer to changing the stats on an item as ‘rerolling’ because every method has some randomness involved, so it is akin to rolling dice. The main reason you’d want to reroll equipment is so that you can make ichors. You can read my guide on ichoring here. Ichoring allows you to take the stats from some equipment and give them to certain legend-grade equipment.

Image: Various places you can identify at. A player store (top left), the appraiser master in Fedimian (top right), the blacksmith in Klaipeda (bottom left), and the blacksmith in Orsha (bottom right).
An unidentified equipment cannot be equipped and has no random stats. To make it usable, you must visit a player appraiser shop, the appraiser master in Fedimian, or either blacksmith in Klaipeda or Orsha and pay a fee to have the equipment identified. When identified, the equipment will acquire a random number of stats, of random groups, of random types, with random values. Supposedly, people have better luck with player shops.
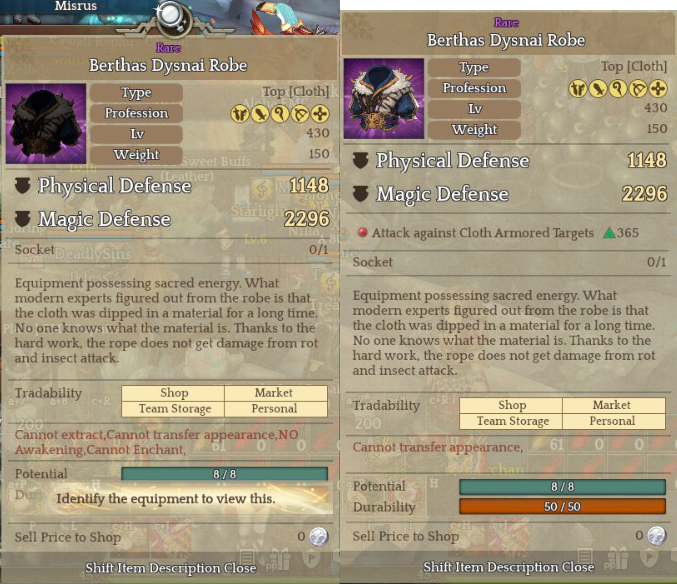
Image: Unidentified equipment (left) and a random-stat equipment after identification (right).
The number of stats that a random equipment has is often referred to as the ‘lines’ of stats that the equipment has. Armor and 1H weapons can have 1 – 4 lines, 2H weapons can have 3 – 6 lines, and trinkets can have 1 – 2 lines. Each line must be a different stat, and players often value having more lines. Each line is preceded by a colored orb indicating the stat group. There are four stat groups representing different types of stats: attack (red), defense (blue), support (purple), and main stats (green).
| Equipment Type | Minimum Number of Lines | Maximum Number of Lines |
|---|---|---|
| Trinket | 1 | 2 |
| Armor | 1 | 4 |
| Shield | 1 | 4 |
| 1H Weapon | 1 | 4 |
| Subweapon | 1 | 4 |
| 2H Weapon | 3 | 6 |
Equipment Classes
In this section I’ll discuss only the highest-level random-stat equipment. Unidentified equipment can appear very early on in your ToS career, but most of it is not worth your attention and can be passed over. Any equipment that you don’t want can be dismantled at a blacksmith in town and turned into powder that can be used for other things. At best, low-level random-stat equipment can be identified and worn temporarily while leveling, but you certainly should not waste resources rerolling that equipment.
Level 400 Savinose Equipment
The level 400 equipment go by several names. The weapons all are called Legva weapons while the armors are called Akmo (plate), Pilgriste (cloth), and Vymedzai (leather). Berthas, Primus, and Savinose are just descriptors telling you the rarity of the random-stat equipment. Berthas and Primus are rare and unique, respectively, while Savinose is the highest rarity, the legendary equipment.
Level 400 Savinose equipment are semi-endgame equipment crafted from Planium or often given out as rewards in events. Planium is a rare drop from the level 391 – 420 maps. Savi equipment have lower maximal rolls compared to the most recent Dysnai equipment, and thus aren’t really worth rerolling. However, this equipment may be worth acquiring if you are a new player, as legendary equipment have the highest attack/defenses of any equipment in their level tier. When a Savinose is first obtained, it is unidentified and thus requires identification to have stats and be used. If this is your first legendary set, it may be worth rerolling a little just to get an important stat, like CON.
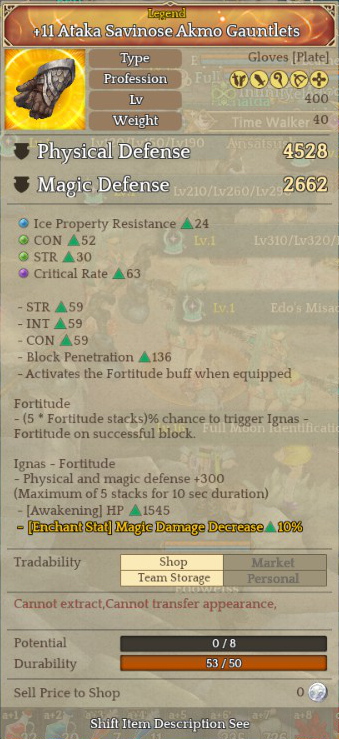
Image: A Savinose equipment. Note that it has a lot of extra stats besides its random stats due to various upgrades.
Level 400 Berthas/Primus Equipment
Berthas and Primus are unlike Savinose in that they are not crafted. Instead, they drop from fields as unidentified equipment. Berthas and Primus Legva equipment are not at all worth rerolling because their maximal stats are far lower than Dysnai equipment.
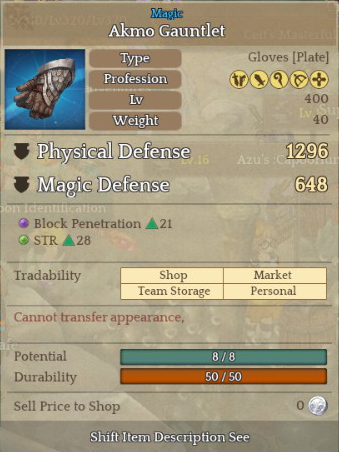
Image: A level-400 equipment.
Level 430 Berthas/Primus Dysnai Equipment
Berthas and Primus Dysnai equipment are the level 430-tier of random-stat equipment. Unlike previous level tiers, all armors and weapons bear the ‘Dysnai’ name. These were introduced with the Episode 12 update and have a much higher upper bound in stats compared to previous random-stat equipment. The stats on these are so high that rerolling any other equipment frankly looks like a waste of resources. Dysnai equipment are randomly dropped from mobs from the level 421+ maps, and can be obtained either through field farming or by clearing challenge modes. Berthas equipment can randomly roll values between 40% and 100% of the maximum value while Primus can roll values between 80% and 100% of the maximum value.
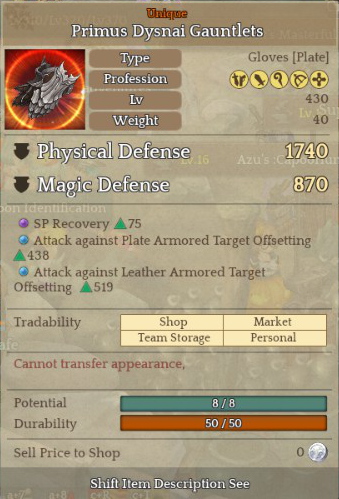
Image: A level-430 equipment.
| Item Rarity | Stat Range (Min~Max)% |
|---|---|
| Magic | 10 ~ 100% |
| Rare | 40 ~ 100% |
| Unique | 80 ~ 100% |
| Legend | 80 ~ 100% |
Table: The stat ranges described in this developer blog post.
What to Reroll
You might consider rerolling level 400 Savinose equipment a little bit if you are newer and you are in dire need of the stats, but otherwise the only other equipment that really should be rerolled are Dysnai equipment. You’d want to reroll level 400 Savinose quipment to use as-is, but the reason why you’d want to reroll Dysnai equipment to make as an ichor for Skiaclipse Varna equipment.
Types of Rerolling: Re-Identification and Magnifiers
There are two types of rerolling in the game. The first is re-identification, which costs nucle and sierra powder. The other uses magnifiers, which changes the stats of random-stat equipment in many different ways, depending on the magnifier used.
Re-Identification
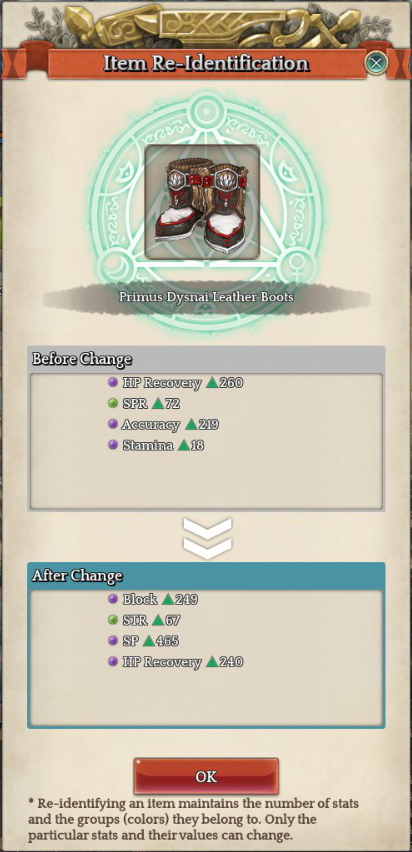
Item Re-identification semi-randomizes the stats based on the existing lines/groups. Re-identification does not change the number of lines, but changes the stat and/or value (though it can reroll into the exact same stat and value). When rerolling the stat, it will reroll within the group. For example, an attack stat will remain an attack stat. The group is indicated by the colored orb next to the stat line. Re-identification changes all lines at the same time.

Image: Talking with the appraiser master to re-identify.
Re-identification is performed at the appraiser master in Fedimian, or at a blacksmith at either Klaipeda or Orsha. It costs some amount of sierra powder and nucle powder, depending on the level and rarity of the equipment being re-identified. The cost goes up with level and rarity . We frequently have re-identification discount events, so consider planning around those!
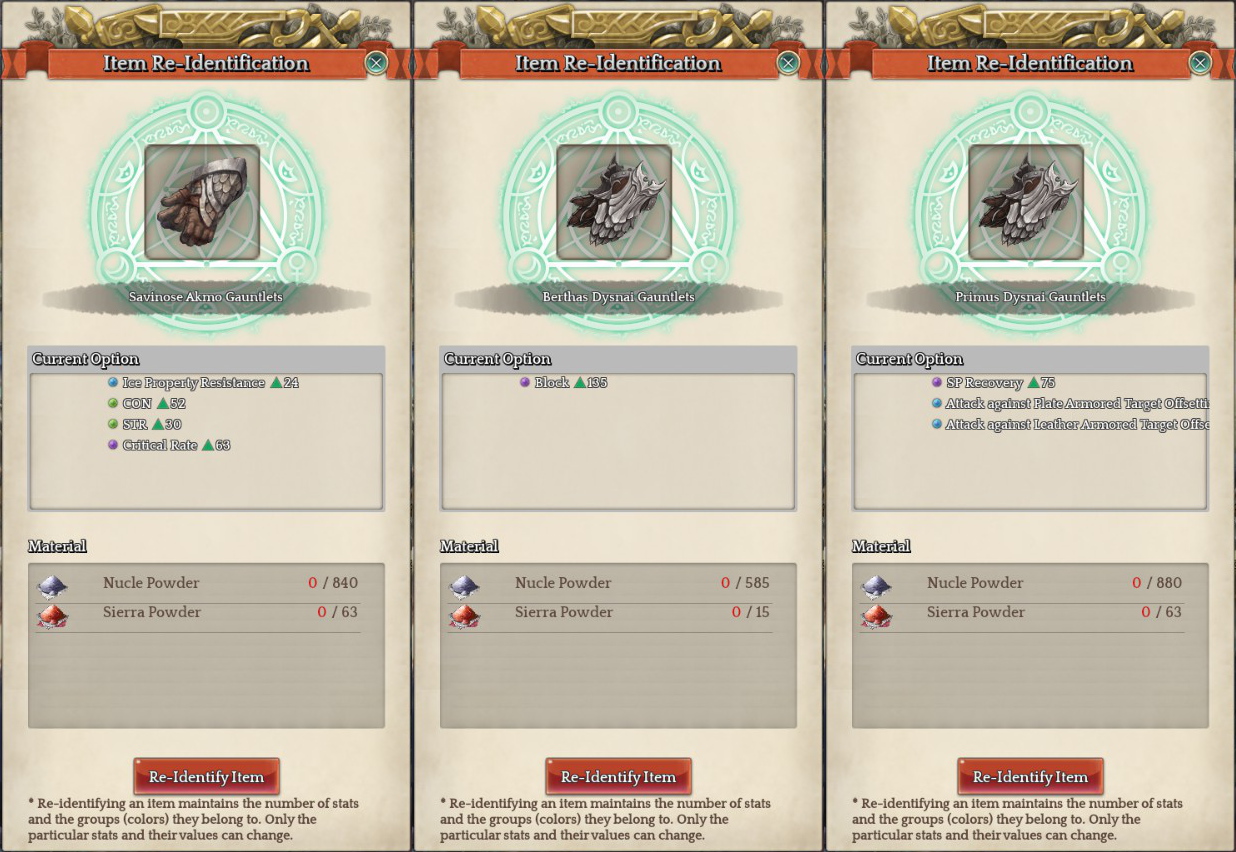
Image: Re-identification UI for three different equipment. Note the differing costs.
The sierra and nucle powder that you need to re-identify equipment is obtained as a drop from farming field mobs in the 420+ areas or as a drop from challenge modes. They are also obtained when dismantling equipment at a blacksmith. Nucle powder also happens to come from dimensional collapse.
Magnifiers
Magnifiers are single-use items that can change the stats of random-stat equipment. Each magnifier affects your equipment in a different way and are obtained in wildly different manners. They are usually put under the TP tab. Though each magnifier can be obtained from normally playing the game, many of them also often show up in the TP shop or in events. All Sandra’s magnifiers can be used only on equipment level 430 or above (Dysnai equipment).
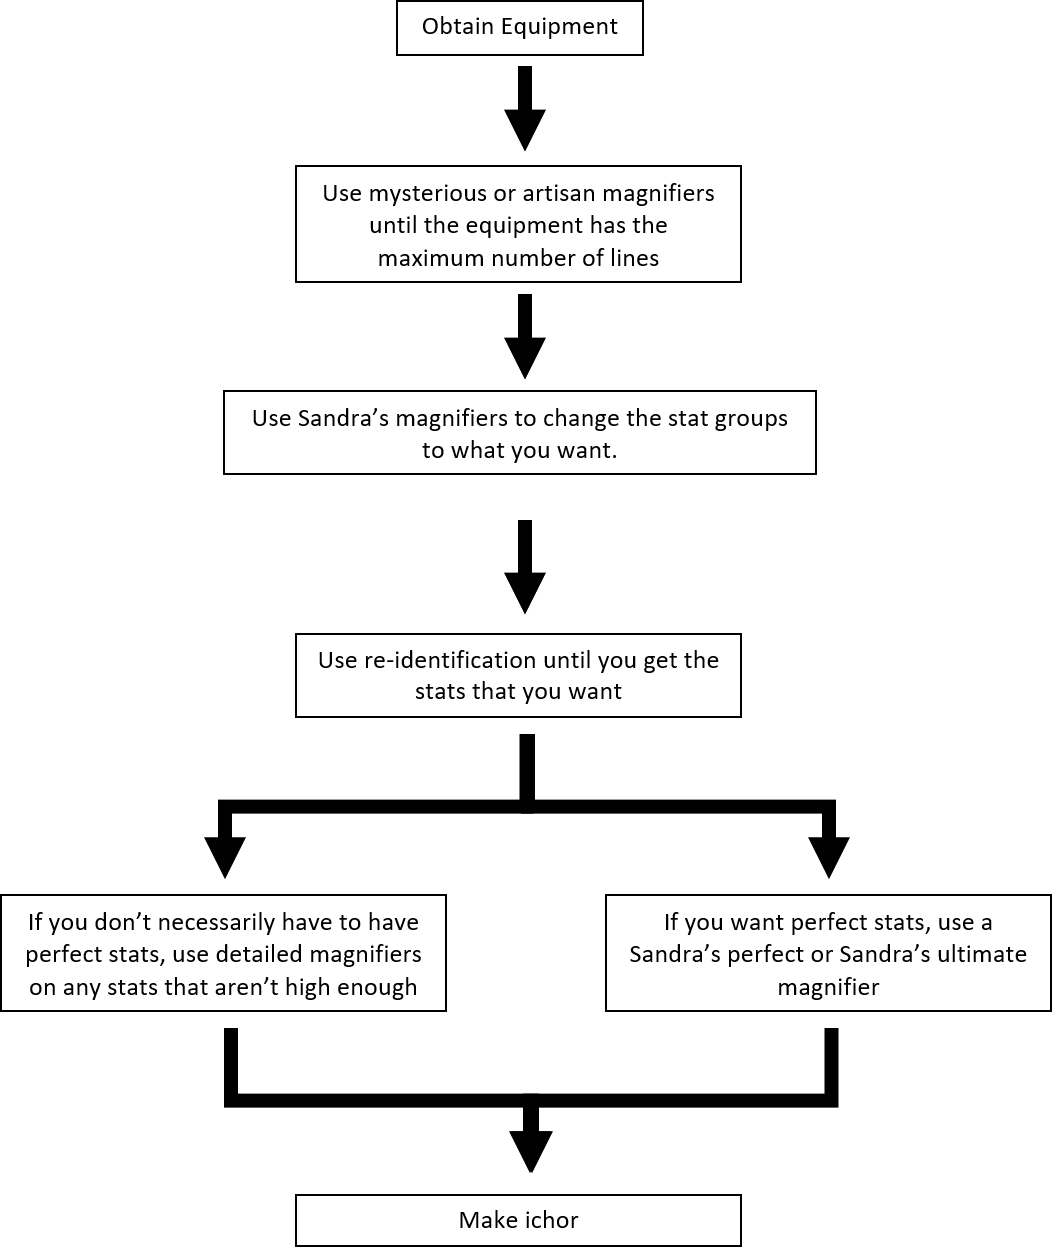
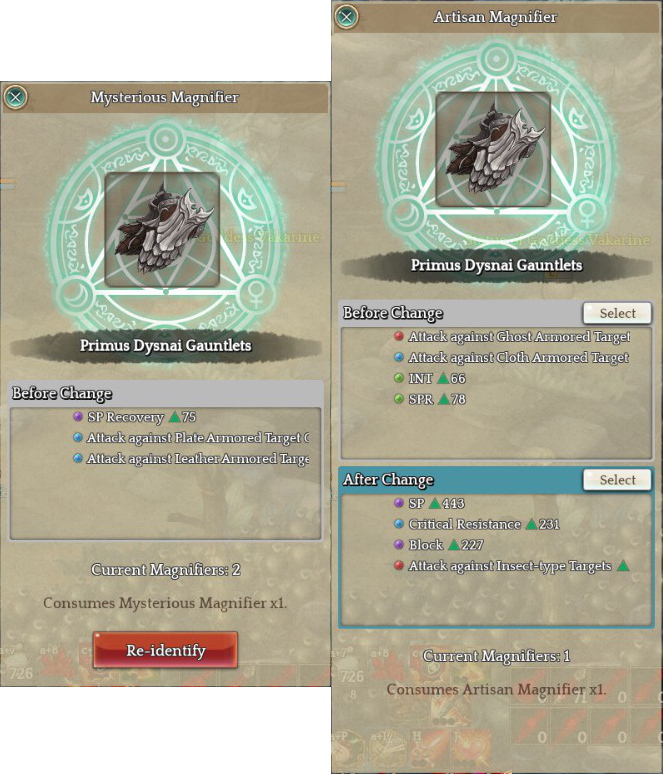
Mysterious Magnifier
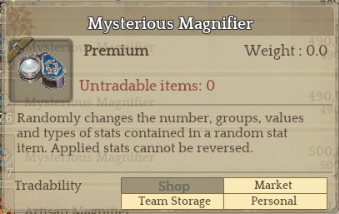
Mysterious magnifiers are the most basic and random magnifier. It randomly changes all your stats, and can even change the number of lines. It is one of two magnifiers able to affect the number of lines. Mysterious magnifiers are typically obtained from challenge modes, emergency quests, and Goddess’s Grace events.
Artisan Magnifier
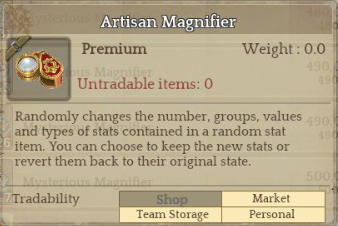
Artisan magnifiers are the same as mysterious magnifiers, except with the option of choosing between the current random stats or changing to the new stats. Artisan magnifiers are typically obtained from challenge modes, emergency quests, and Goddess’s Grace events.
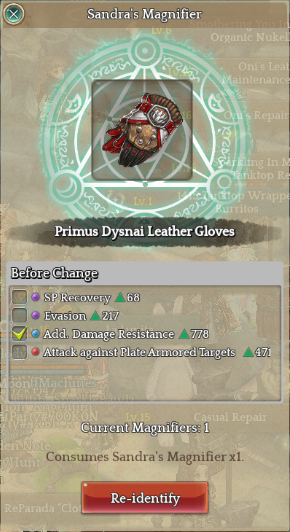
Sandra’s Magnifier
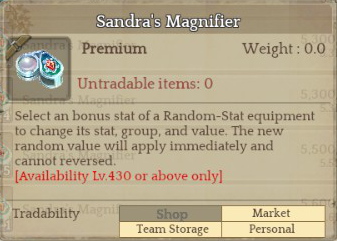
Sandra’s magnifiers change the stat, value, and category of a line. It can affect only existing lines and is unable to add or remove lines. Multiple lines can be selected and rerolled at the same time. Sandra’s magnifiers are typically obtained from emergency quests and Goddess’s Grace events.
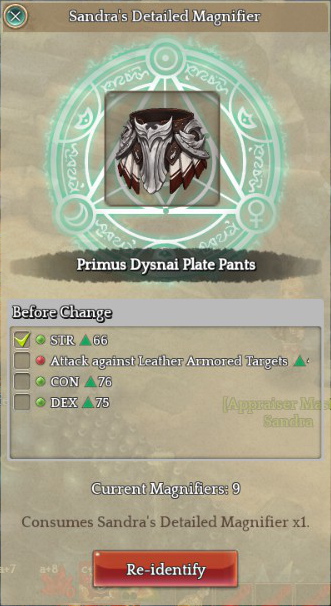
Sandra’s Detailed Magnifier
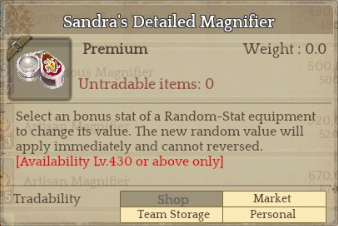
Sandra’s detailed magnifiers change only the value of a single line of your choice. Detailed magnifiers are typically obtained from emergency quests and Goddess’s Grace events.
Sandra’s Perfect Magnifier
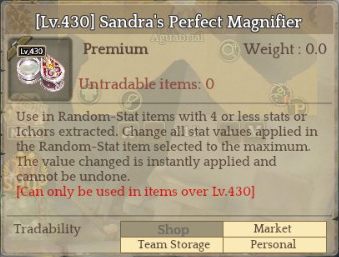
Sandra’s perfect magnifier changes the value of all lines to the maximum value. They can only be used on equipment or ichors with 4 or less stat lines. Recipes for perfect magnifiers are obtained from Dimensional Collapse Points and require a large amount of detailed magnifiers.
Sandra’s Ultimate Magnifier
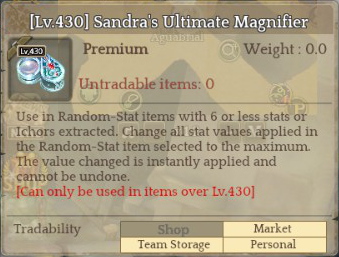
Sandra’s ultimate magnifier changes the value of all lines to the maximum value. They can only be used on equipment or ichors with 6 or less stat lines. Recipes for ultimate magnifiers are obtained from Dimensional Collapse Points and require a large amount of detailed magnifiers.