Tree of Savior Forum

Re:Build Guide to All Wizard Classes

Server: Telsial [SEA]
Team Name: Asterizm

I. Introduction

This is a guide that entails the information and explanation to every single wizard class since Re:Build. As we all know with Re:Build it brought along huge changes to the class ranking system. We lost some classes such as Linker and Thaumaturge but gain other classes such as Bokor and Taoist. In this guide, we will break down the pros and cons of all the wizard classes, and also touch on the important synergy different wizard class have with each other. The guide will mainly be PVE focused.

II. Class Rank Changes

Pre Re:Build you can choose a new class every 15 class level, either choosing a totally new class or an upgraded version (Circle 2/Circle 3) of the same class. Post Re:Build, you can choose a new class every 45 class level. In our current level cap, you can choose up to 4 classes, with Wizard being your base class and 3 extra classes to complement your entire wizard build.

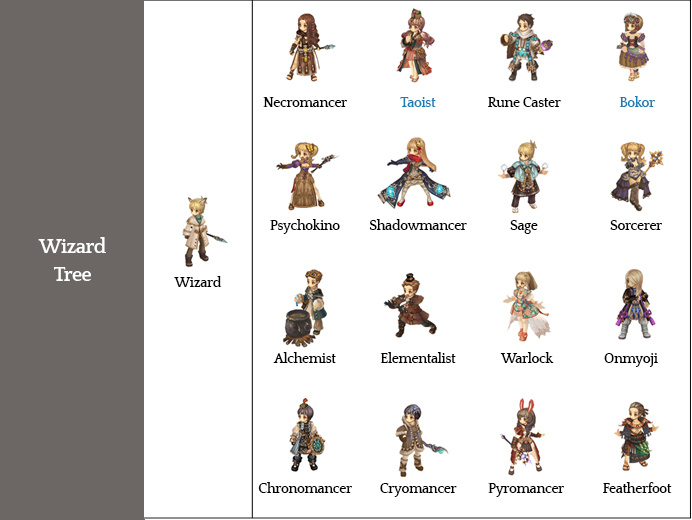
Below are a list of wizard classes to choose from. You can also get more information from the Tree of Savior Official Website

III. Breakdown of Classes

We will go through some of the key skills of every class and the recommended skill points for each skill. It can range from (0/max) or a range (1 - max/max) or (max/max). Classes will be ranked/rated based on several aspects as follows from 1-5, with 1 being the lowest and 5 being the highest.

  • Damage: How much damage in general the class does on monsters and bosses.

  • AOE: How much AOE does this class provide.

  • Support: How much this class provide support in parties, either through buffs, debuffs or crowd control.

  • Ultility: Outside of PVE content, what other utility does this c**lass provide

We will also touch on the synergy each class have with other classes. Classes in general can go quite well with one another, but certain classes with synergy such as combos and buffs/debuffs will be explained in more detail and organized under the synergy section. It does not mean that if a class is not mentioned in the synergy section means it pairs badly.

Guide on All Wizard Classes - Part 1

1. Wizard

image Wizardimage image

Wizards are the backbone of all magic users in the Kingdom. Even when Agailla Flurry used to be the master of all magic, she would hire helpers that would assist her in her other duties while she kept working on her duties as a Wizard. Wizard skills cover larger areas and are effective against a larger number of enemies. Wizards can summon monsters to fight for them or assist party members with support spells.

image
Energy Bolt (0/5): The very basic wizard skill that does not really do much at higher levels. However, it might be useful to keep at least 1 point to push mobs away in certain situations

image
Lethargy (1/5): Reduces enemy’s Physical attack/Magical attack/Evasion, and also increases the damage from Magic Circles. Since EP11, it now has a buff that gives you a chance to apply lethargy debuff when you attack.

image
Magic Shield (0 - 5/5): Absorbs enemies attacks. Considering that SP usage is pretty high now, sometimes it might be best not to use it as it drains SP. However, it can also be useful.

image
Earthquake (1 - 5/5): Another wizard skill that is rarely used, but useful when you need to knockback enemies in situations such as ET floors whereby you need to protect certain artifacts.

image
Magic Missile (5/5): The main highlight of the class. Fires multiple missiles that is good in attracting mobs to come to you, or finishing off low HP mobs.

image
Teleportation (1 - 5/5): Allows you to teleport a certain distance.

Breakdown

  • Damage - 1/5: This circle itself does not do much damage since it is just an introductory circle.

  • AOE - 2/5: Magic Missile do have pretty decent AOE that helps to lure mobs

  • Support - 1/5: Other than Lethargy, not much support comes from this class

  • Utility - 1/5: Not much utility from this circle as well.

Overall the base Wizard class provide some pretty basic skills. The only really useful skill here is Magic Missile as the rest of the skills do not have that much of an impact when you start to build your entire wizard tree with 3 other classes.

2. Pyromancer

imagePyromancer image image

Despite falling into the magician category, Pyromancers are also considered to be holy magicians in that they have a close relation with Gabija, the Goddess of Fire. Pyromancers are considered to be rather exotic by the Kingdom’s standards because of this despite the fact that divine powers and magic are mixed commonly outside the Kingdom’s borders. Pyromancers are mages that make use of fire spells that suppress groups of enemies.

image
Fireball (0 - 1/15 if paired with Elementalist or Psychokino) : Summons a fireball, which has an overheat of 5. By itself the skill is subpar, but what makes this skill good is the combos that can be done with it. Using Storm Dust (Elementalist) on Fireball will continuously apply Fireball’s damage within the range of Storm Dust. Multiple fireballs can be triggered by Storm Dust. The Fireball ticks are less frequent after EP11, but it is still a good combo (it just might not be a priority combo now). However, the casting speed of Fireball itself is pretty long. Another combo is using Psychic Pressure (Psychokino) on fireball also triggers Fireball’s damage over a wide area similar to Storm Dust. Outside of the combos, it does not really deserve much points.

image
Firewall (0 - 1/15): Damages enemies who touches it. A useful mechanic it has is that it knock back enemies so even if you do not want to use this as damage, it is good just to have at least 1 point.

image
Enchant Fire (0 - 1/15) : Used to be a party buff but not anymore. 1 point is sufficient because you gain more from higher damage from your skills than having higher Enchant Fire level. You are however better off buying higher level Enchant Fire Scrolls or crafting them yourself.

image
Flame Ground (1 - 15/15): Creates a large red circle of fire that does ticks damage. Damage wise it is not as high as other skills that does tick damage but it has a really wide AOE. One good synergy it has is that it allows Meteor (Elementalist) to apply as 5 hits on enemies receiving damage from Flame Ground. Also have good synergy with Heavy Gravity (Psychokino). Both Flame Ground and Heavy Gravity has roughly the same AOE, and Heavy Gravity allows flying enemies to be hit by Flame Ground.

image
Fire Pillar (10/10): Summon a Pillar of Fire. This skill does good damage. Most importantly, it stunlocks enemies in place which makes it good for crowd control. Also, using Raise (Psychokino) on Fire Pillar applies Fire Pillar as consecutive attacks.

image
Hell Breath (10/10): Continuously channels fire. A good channeling skill that does high damage over a long range. Also knockbacks enemies. Unlike many other channeling skills, the direction can be changed.

image
Prominence (5/5): Summon 4 flames on targeted location. Good damage but because the flames summoned can be quite random, and thus can be quite inconsistent. Since EP11 the cooldown decrease and made this skill better.

Breakdown

  • Damage (5/5): It is one of the highest damage dealing classes. The above stated combos have high damage and low to medium cooldowns. The skills with higher cooldown such as Fire Pillar and Hell Breath also does high damage by itself. As an offensive circle, it definitely does well in that department

  • AOE - 4/5: Most of the skills have pretty huge AOE, with some of the above mentioned combos having an even large AOE than the skill itself, such as Fireball flame ticks.

  • Support - 2/5: As it is a damage dealing circle, it does not offer much support outside of dealing damage. One key attribute it has is Fire Pillar holds enemies in place for 10 seconds which is good for crowd control

  • Utility - 1/5: Sadly, outside of PVE it does not offer much

Synergy

  • Elementalist: The obvious synergy it has is Fireball + Storm Dust and Flame Ground + Meteor combo. Also, Stone Curse increases the damage taken from Fire property attacks

  • Psychokino: Same as the above, but is because of Fireball + Psychic Pressure, Heavy Gravity + Flame Ground and Fire Pillar + Raise combo.

  • Onmyoji: Fire Fox Shikigami grants additional 95% critical rate of fire property magic at max level

  • Taoist: Tri Disaster Charm increases fire damage to enemies near charm

Pyromancer is a really solid choice as a DPS class. It is probably one of the strongest in the wizard tree that has a really good mix of damage and AOE, and this is further boosted by the tons of synergies it has with different classes. It is great as a standalone DPS class, while also working well with various other classes that makes it one of the more popular wizard classes to pick.

3. Cryomancer

imageCryomancer image image

Most mages dabble in different schools of magic but Cryomancers tend to stick to their specialty. Cryomancers believe that they are the stern keepers of the Kingdom’s tradition. Cryomancers specialize in ice magic which freezes and traps the enemy.

image
Ice Bolt (1/15): Single target freezing skill that does not do much damage. 1 point wonder just for freezing purposes

image
Ice Pike (1 - 15/15): Create ice spikes from the ground that freezes a lot of mobs. Great for crowd control due to its long freeze duration, short cooldown and 3 overheat.

image
Ice Wall (0 - 15/15): Create a wall of Ice, which shape depends on arrow/mouse keys. By itself it does not really serve much purpose other than freezing but it does huge damage when use in conjunction with Psychic Pressure (Psychokino). Psychic Pressure when used on Ice Wall can trigger ice shards to fly out, which can trigger almost 10 shards per tick of Psychic Pressure each shard doing 100% damage. When this combo is used on saalus bosses, it also freezes them. Adjust the skill points depending on how many ice walls you want to hit.

image
Ice Blast (10/10): Does damage to frozen or chilled enemies. The easiest way to use this skill is to use all 3 overheat of Ice Blast when Frost Pillar is used since mobs trapped by Frost Pillar will be constantly frozen.

image
Subzero Shield (0/10): This skill is generally more useful in PVP than in PVE. Does not have 100% uptime which makes it troublesome to constantly recast.

image
Snow Rolling (0 - 10/10): Charges and form a giant snowball that carries enemies. When the skill ends, enemies will land close to each other now with the new attribute, making it even better. Some might choose not to add this skill because of the long duration.

image
Frost Pillar (5/5): The best skill in the Cryomancer class. Create a tree of ice that freezes enemies hit by it. It lasts for quite a long time allowing you to freeze a large group of enemies over a long period. Also, it freezes saalus bosses.

Breakdown

  • Damage - 2/5: It is not a damaging class. Although the Ice Wall + Psychic Pressure combo can do really high damage, often it is situational to be used on bosses for a big burst and generally the class as a whole does not provide consistent damage over time.

  • AOE - 4/5: Ice Pike, Snow Rolling and Frost Pillar all have huge AOE, allowing you to hit large number of mobs with your attacks.

  • Support - 4/5: The high ranking in support is due to the crowd control Cryomancer provides. Being able to freeze a huge group of enemies makes it easier for your party to take them out without them getting hurt. Snow Rolling’s ability to gather mobs also makes it easier for party members to burst down large group of mobs

  • Ultility - 1/5: Outside of PVE, there isn’t any special attribute that it provides

Synergy

  • Psychokino: Ice Wall + Psychic Pressure remains to be very strong against boss. Both classes in general tend to have good synergy in crowd control

  • Chronomancer: Cryomancer and Chronomancer do not have much innate synergy with the skills. However, both classes are really strong support that complement each other well.

  • Taoist: Tri Disaster Charm increases ice damage to enemies near charm

Cryomancer is more of a support rather than a DPS class. The best trait about Cryomancer is the ability to CC mobs. Additionally, in Re:Build, Frost Pillar freeze and Ice Wall + Psychic Pressure freeze works on Saalus and Challenge Mode bosses, making it much easier for parties to clear them. Pair it with other support classes such as Chronomancer or Psychokino to get the best benefit out of Cryomancer.

4. Psychokino

image Psychokinoimage image

Strictly speaking, Psychokinos are not magicians but those with innate psychic abilities. As of recent, it was found that people without innate abilities could train to become Psychokinos. But unfortunately for someone like Agailla Flurry’s apprentice Jane, one must first be proficient in magic in order for them to gain psychic powers. Psychokinos can use their psychic abilities to control gravity to pull and push enemies away.

image
Psychic Pressure (0 - 1/15 if paired with Pyromancer or Cryomancer/15): Does continuous channeling damage. By itself it is quite weak, but it does combo with Fireball (Pyromancer) and Ice Wall (Cryomancer). Also, it can be changed to fire property and have its range increased by Fire Fox Shikigami (Onmyoji) although it isn’t that strong. Level 6 is sufficient to hit 10 Ice Walls for Cryomancer (level 12 to hit 16 walls).

image
Swap (0 - 1/15): Swap position with target. Mostly situational in cases whereby you want to swap places with a bunch of mobs or bosses

image
Magnetic Force (1/15): 1 point wonder used to gather mobs together. Really good for crowd control.

image
Heavy Gravity (10/10): Create a giant circle that deals damage and causes flying type mobs to be grounded. This is good to combo with skills that do not hit flying mobs such as Toyou (Onmyoji), Flame Ground (Pyromancer) etc.

image
Raise (10/10): The opposite of Heavy Gravity. Enemies are made into flying and cannot evade attacks. Can combo with Fire Pillar (Pyromancer). Unlike Heavy Gravity, this skill by itself do not do damage.

image
Gravity Pole (5/5): Fire a purple line of gravity that holds enemies in place doing damage. This is a very good crowd control skill as it holds enemies for your party members to kill. It does not do a lot of damage, but Fire Fox Shikigami attribute can boost it to do even more damage.

Breakdown

  • Damage - 2/5: It does pretty low damage, and does not compare to the main damage dealing classes in general since it only has 2 core skills for doing damage (Gravity Pole and Heavy Gravity). Note that a Fire Fox Shikigami boosted Gravity Pole does quite high damage. Gravity Pole being a channeling skill also hurts its DPS capabilities.

  • AOE - 3/5: Heavy Gravity and Gravity Pole both have good AOE. However, this are the only 2 skills that contribute to its AOE and thus will need more offensive classes to complement it

  • Support - 3/5: It does not do that good of a job at crowd control compared to Cryomancer, but it have enough skills to make it valuable in a party. Raise, Magnetic Force, Heavy Gravity and Gravity Pole all have good crowd control that either immobilizes, slow or stun enemies.

  • Ultility - 1/5: Does not really have much utility outside of PVE

Synergy

  • Pyromancer: As mentioned earlier, fireball + Psychic Pressure, Heavy Gravity + Flame Ground and Fire Pillar + Raise combo make Pyromancer a really good match with Psychokino.

  • Cryomancer: Ice Wall + Psychic Pressure remains to be very strong against boss. Both classes in general tend to have good synergy in crowd control.

  • Onmyoji: Fire Fox Shikigami boosts Gravity Pole to do extra hits, making it very strong.

It does a mix of both damage and crowd control but do not excel exceptionally in either. However, it does pair well with many classes that makes it a very popular pick among various wizard builds. By far the strongest synergy it has with is Cryomancer, as the Ice Wall + Psychic Pressure combo continues to be strong. Those 2 classes together also makes the entire build really good in crowd control and explains why it is such a popular combo in PVP as well (although PVP is not our focus in this guide, it is worth mentioning).

5. Alchemist

image Alchemistimage image

The patriarch of the Winterspoon family was the first known Alchemist known in the Kingdom and, to this day, the Winterspoons hold considerable influence in the world of Alchemy. The basic rules that govern Alchemists were also first set up by the Winterspoons. Alchemists use alchemy to reinforce gems and create new items.

image
Combustion (0 - 15/15): A mediocre offensive skill for alchemist. Useful if you need an additional attack to use.

image
Dig (0/15): Not much use at the moment

image
Item Awakening (1/1): Allows you to create a shop that helps awaken items. Worth it as it only costs 1 point.

image
Tincturing (15/15): The main draw for Alchemist, and that is to make potions. Make sure to max it to craft the best potions

image
Alchemistic Missile (0/15): A mediocre skill in general.

image
Magmum Opus (0/5): People get this to make Homunculus, but at this moment it is pretty bad

image
Gem Roasting (10/10): The other reason people make Alchemist, and that is to help roast gems.

image
Sprinkle HP Potion (5/5): Restore HP of allies. Useful when there is no cleric around

image
Sprinkle SP Potion (5/5): Restore SP of allies. Currently the SP usage is pretty high in general for most classes, hence this skill comes in handy during parties.

Breakdown

  • Damage - 1/5: Alchemist is not meant to be a damage class at all. You will need your other 2 classes to support you in dealing damage

  • AOE - 1/5: Same reasoning, no good offensive skills to make it good in dealing damage

  • Support - 3/5: Sprinkle HP/SP potion is good in helping out parties, especially Sprinkle SP potion since SP usage is quite high after Re:Build

  • Utility - 5/5: The wizard class that has the best utility outside of PVE. It is the only class that can craft potions, roast gems and awaken items, making it one of the best utility classes in the entire game.

Synergy

  • None: Alchemist needs 2 other circles to make it good in PVE. Sprinkle HP/SP potion is good but not enough to make it useful in party. You need other offensive classes or support classes to make it better in PVE.

The only reason to take it in PVE is for Sprinkle SP potion, since Sprinkle HP potion is not a good as the heal from cleric tree. Many people like to pair it with Chronomancer so that they can go full support for the team, and taking a third DPS class just so that they can contribute to damage as well. The main highlight of the class is having the ability to make potions, roast gems and awaken items makes it a highly sought after sub-class for many players.

9 Likes

Guide on All Wizard Classes - Part 2

6. Sorcerer

image Sorcererimage image

Sorcerers enhance and materialize the demonic souls and forces that permeate into our world, which is a celebrated feat in the field of magic. Historically, many sorcerers, with age, have suffered damage from these demonic forces they gained control over so it is just as important for them to keep a healthy body, as well as a sound mind. Sorcerers, are magicians that summon demons to do their bidding. They can mount or take control of the demons to fight on the field of battle.

image
Summoning (15/15): Summons a devil in the grimoire. Some of the more popular summons are Marnox, Froster Lord, Netherbovine, Gorkas, and Templeshooter. Different summons have different attacks and AOE. Marnox is the most popular but expensive choice among all the cards listed. Depending on your objective, other summons tend to do better against specific monsters. Some summons such as Mirtis can also knockback enemies which can be useful in high level stages of challenge mode. Other summons like Froster Lord have riding skills that can freeze monsters.

image
Summon Familiar (0 - 15/15): A really weak skill that I would recommend not adding at all. You can however put spare points into this.

image
Summon Salamion (1 - 15/15): The summon itself isn’t very strong, but it has a very useful attribute that heals your summons which makes it very useful for summon based builds.

image
Summon Servant (5/5): Summon a servant that grants you 5 different buffs at max level.

image
Riding (1/1): Ride the summoned devil. The fun part about Sorcerer is being able to ride on your summon and this lets you do it. The cooldown is really short and you can ride on it and use the skill while immediately un-riding it and your summon will still cast the skill. Different summons have different riding skills with various attacks and AOE

image
Morph (1/1): Mutant your existing summon to become the devil equipped in the secondary card slot, maintaining its previous stats. The good thing about this skill is that it allows you to use a second riding on a new summon as the new summon will not have the cooldown of the skill it previously used in the previous riding skill. To make it easier to explain, basically you can do this: Riding > use skill > unride > Morph > Riding (since it has low cd)

image
Desmodus (10/10): Summon bats to attack enemies and debuff them with vampirism. It not only increases the damage dealt by your main summon, but all your other summons as well including those from Necromancer and Bokor side, which makes this skill really useful for a pure summon build

image
Evocation (5/5): Summon demon from secondary card slot to attack enemies, applying Evocation buff to the demon created by summoning. An AOE attack that grants a buff to your demon allowing it to ignore 20% of physical/magic defense.

Breakdown

  • Damage - 3/5: Your main source of damage comes from your summon. However, outside of your summon and riding skills, you would need additional damage from other classes as Sorcerer itself do not have the damage required for end game content

  • AOE - 3/5: Depending on your type of summon, the AOE differs. However, most of the summons have pretty good auto attack AOE and riding AOE.

  • Support - 3/5: Summon servant grants several beneficial buffs to your entire team. Also, Desmodus debuff could also be useful to other party members who play Necromancer or Bokor but do not have Sorcerer.

  • Utility - 1/5: Outside of PVE content, it does not provide much utility

Synergy

  • Necromancer/Bokor: Both summoner builds benefit from Desmodus debuff. Also, summon Salamion heals both Necromancer and Bokor summons.

  • Warlock/Shadowmancer: Mainly due to Salamion being able to inflict “Bind” debuff that boosts the damage of the skills of those 2 classes

In general, Sorcerer provides good extra auto attack and riding skills with good AOE. However, it has the best synergy with at least 1 other summoner class notably Necromancer. Also, depending on the circumstances and type of monsters you are facing, different summons work more efficiently. It is hard to build a wizard that revolves around Sorcerer that isn’t a summon based build because the skills Sorcerer has are literally made to revolve around summons. Sorcerer is good as a filler class that you want to have just for extra auto attack.

7. Chronomancer

image Chronomancerimage image

Chronomancers hail from the school of magic that Agailla Flurry has established before passing away. The position of the Chronomancer Master had been vacant for many years until Lucid Winterspoon stepped up to carry on the legacy of Chronomancy left behind by Agailla Flurry. Chronomancers are magic users that manipulate time. They can quicken or slow time to assist their party members in combat.

image
Reincarnate (1 - 15/15): Can cause monster to reappear on the same spot where it was defeated. After Re:Build, it has a neat attribute that prevents your allies from dying and recover their HP fully. However, the duration of the skill is very short even at max level.

image
Stop (1 - 15/15): Stop monsters from moving. However, monsters cannot be attacked when they are stopped. It can be useful in instances such as ET whereby you need to protect artifacts. At higher levels the cooldown of the skill decreases. It also has an attribute that removes debuffs of rank 3 and below on you.

image
Slow (1 - 15/15): Slow down enemies. At higher level, their movement speed is even slower. However, the AOE of the skill is pretty small. Slow has good synergy with some Sage skills that makes them deal more damage (50% more for Micro and Ultimate Dimension, 30% more for Dimension Compression). It also allows Magic Missile to do 50% more damage, and Energy Bolt to do 100% more damage. Lastly, it allows Rune of Destruction to deal 50% more damage as well.

image
Time Forward (0/5): Increases the cooldown of a random skill of enemy. It is more of a PVP skill so we will not touch on it.

image
Backmasking (1 - 10/10): Control area and change it back to its previous state, causing magic circle’s duration to rewind. For example, if you cast Backmasking on Fire Pillar, the skill will last longer. It is expensive to use though as it costs 2 time crystal.

image
Quick Cast (0 - 5 if paired with classes that have long casting time/5: Reduce skill casting time. Quick Cast used to be a staple in many builds such as Elementalist and Onmyoji. However, now that rods gives an attribute that reduces casting time, it isn’t as needed as before. Also, skills will not be cancelled when hit my monsters now (innate Surespell) which makes this skill less useful than before. It can be really useful for Staff users who need the casting speed.

image
Pass (5/5): Reduce cooldown of your skills and those of your party members. The main highlight of the skill that makes Chronomancer a great support and that is the ability to shorten the cooldown of skills. This allows your party members to use their high damage skills again. Also, there is an attribute that increases the effects by x2, but the effects of Pass will only affect yourself. This is really good for people who wants to solo bosses and challenge modes.

Breakdown

  • Damage - 1/5: Obviously it has no damage since all the skills are purely for support

  • AOE - 1/5: Since it has no damaging skills, it does not have actual AOE. However, Pass AOE is pretty big and Backmasking AOE increases at higher levels.

  • Support - 5/5: The best support in the entire wizard tree. Having the ability to shorten the cooldown of all your party members skills is a great asset to have. Also, being able to shorten the cooldown of your own skills also allow you to provide more support with your other 2 classes. Reincarnate can also act as an emergency Revive. Stop provides good crowd control (so long you don’t need to kill them) and slow also makes it easier to kill monsters, with the added benefit of doing bonus damage for the skills of other classes

  • Utility - 1/5: Also do not provide much utility outside of PVE

Synergy

  • Sage: Most of Sage’s skills does bonus damage on slowed enemies, which makes Sage a good pair with Chronomancer. However, Sage’s skills by default have pretty average damage and AOE compared to other classes that sometimes you might be better off with another class. The AOE of Slow is also not big enough to affect a large group of monsters.

  • High Cooldown Classes: Generally, many builds which focus on doing high damage with a few skills can take Chronomancer. These classes include Pyromancer, Cryomancer, Taoist and Runecaster.

Chronomancer is the best support for parties in the wizard tree. Not only it has the skill to shorten the cooldown of allies, it also have other attributes such as having an emergency revive and good crowd control from Stop and Slow. On top of that, Chronomancer is a valuable asset to DPS builds to “Pass” their strong skills, by which that effect is amplified by x2 if the attribute “Focus Time” is in play. Overall, Chronomancer is a really solid pick among multiple builds.

8. Necromancer

image Necromancerimage image

Since the days of Agailla Flurry, the Necromancy involving the use of human body and soul had been abolished for good. Since then, Necromancers have reorganized themselves as a group of magic users who conduct studies on monsters and not humans.
Necromancers are a class that bring dead monsters back to life. They can breathe life into the dead monsters to attack their target or create summons out of them.

image
Gather Corpse (0/1): Release energy onto monster, allowing you to collect their corpse when they die. This skill is really lackluster and not really worth the SP cost.

image
Create Shoggoth (5/5): Create Shoggoth with stats based off the card in Necronomicon. Only Beast, Plant and Mutant cards are allowed. Generally whatever card to you won’t have much different and you summon the same Shoggoth anyway. Other than being an extra summon for damage, the Shoggoth also spreads Greater Corruption to monsters around it. As of EP11, Greater Corruption increases damage of poison skills by 30%.

image
Flesh Hoop (1 - 15/15): Create a circle of corpse flesh around you. Enemies affected by the skill will receive Necromancer Bane debuff which stacks up to 15 stacks proportionate to skill level. This debuff increase the damage of your Skeleton Soldiers and Skeleton Archers.

image
Raise Dead (5/5): Summon 1 Skeleton Soldier, and can summon up to 5 (total 5 Skeleton Soldiers/Archers/Mages which can be mixed). Skeleton Soldiers have the highest DPS out of all the summons. They are melee so they are more prone to dying than the other summons.

image
Disinter (1/1): Collect leftover corpse of enemies. This skill allows you to collect a bunch of corpse when enemies die. The best time to use this skill is when you take out a large bunch of monsters

image
Corpse Tower (1 - 10/10): Summon a tower made of corpses. Can only summon 1. This summon is not as strong considering it is stationary and does not have 100% uptime.

image
Flesh Cannon (1 - 10/10): Throw corpse on targeted area. Another useful skill to inflict Necromancer Bane debuff.

image
Raise Skull Archer (5/5): Summon Skeleton Archer. This summon does less DPS than Skeleton Warrior but it is ranged and hence can easier take out an enemy from far away. Also, being ranged means it can stay alive longer.

image
Raise Skull Mage (5/5): Summon a Skeleton Mage. It casts a knockback buff for summons when summoned and also occasionally casts “Flesh Strike” which debuffs enemies with Necromancer Bane debuff.

Breakdown

  • Damage - 3/5: Most of your damage comes from your summon as Flesh Cannon and Flesh Hoop does not do a lot of damage and is mostly used to stack Necromancer Bane debuff. Hence, it is important to keep your summons up constantly to get the damage from this class. It can summon up to 5 Skeleton summons, a Shoggoth and an immovable Corpse Tower, all which do pretty good DPS when attacking together.

  • AOE - 2/5: The AOE of this class is pretty weak. Flesh Cannon and Flesh Hoop has little AOE, and summons generally do not cover a very wide area. It is best to pair this with another class that has better AOE

  • Support - 3/5: Generally this class is more of a damage dealing summoner class with no buffs to the party, unlike Sorcerer whose Servant buff can benefit the entire party. However, the ability to spread Corruption helps parties boost Physical and Poison damage.

  • Utility - 1/5: Does not contribute anything outside of PVE

Synergy

  • Sorcerer: As mentioned in the Sorcerer section, Desmodus debuff affect Necromancer summons, increasing their damage to debuffed enemies by 40%. Salamion also heals Necromancer summons.

  • Featherfoot: Necromancer provides a lot of debuff that can help Featherfoot a lot. Kundela slash from Featherfoot does more damage to enemies which have 2 or more debuffs. Most importantly, Greater Corruption now increases poison damage by 30% as of EP11.

Necromancer suffers from the lack of AOE, but this can be overcome with another high AOE class. Generally, like the other summoner classes, Necromancer works best when paired with at least 1 other summoner class, notably Sorcerer. However, it may get a little too troublesome to micromanage multiple summons. Also, it is troublesome to keep track of how many skeleton summons you have and needing to resummon them once in a while unlike Sorcerer’s summon which is tanky and Bokor’s summon which can replenish itself. It also have a special ability to spread “Corruption” that gets enhanced to “Greater Corruption” with an attribute that boosts the damage of your summons and poison skills by 30%. It also have a Necromancer Bane debuff on 2 of its skills which increases the damage of Skeleton Soldiers and Archers. Overall, Necromancer isn’t really a very common pick unless paired with either Sorcerer or Featherfoot.

9. Elementalist

image Elementalistimage image

Elementalists are scholars of magic that study how the elements that make up this world are moved by the will of the Goddesses. Their ultimate goal is to emulate this divine power to understand and gain control over the 4 basic elements that make up the material world. Elementalists are masters of the elements. They have powerful offensive spells but require some time to recuperate after each cast so support from party members is recommended.

image
Electrocute (0/1 - 15 if paired with Taoist/15): Release a surge of electricity to attack enemies. Electrocute is a low CD skill with low damage as it only hits 4 times, but if there is a large group of enemies, it can hit up to 8 times which makes it stronger. Also, the range is increased when used in tandem with Storm Calling (Taoist) which also further boosts it’s damage.

image
Hail (1 - 15/15): Drop chunks of ice on targeted area. It is useful as a form of crowd control against mobs and some bosses such as Challenge Mode and Saalus bosses. After EP11, the damage has increased by quite a lot and does more damage as a critical hit on frozen enemies, and does additional damage depending on the size of enemies.

image
Storm Dust (15/15): Create a sandstorm on targeted area. The skill itself is pretty sure, but gets even stronger when paired with Fireball (Pyromancer). Using Fireball in the AOE of Storm Dust creates extra tick damage to enemies nearby. Flying enemies take half the damage. Also, enemies have residual tick damage even after the skill end with an attribute.

image
Fire Claw (1 - 15/15): Send out a wave of fire. It does not do a lot of damage at range, but does a good burst damage when use directly in front of mobs, especially against bosses with a larger hitbox. It is one of the highest DPS skills of the wizard tree, having 2 overheat since EP11.

image
Elemental Essence (0 - 10/10): Increases the damage bonus of property attacks when attacking enemies’ weakness. Also reduces “Elemental Essence” damage increase effects while reducing attack penalties received by enemies. The buff is good but the duration is very short, so it depends on you whether you want to take it or not.

image
Stone Curse (0/ 1 - 10 if paired with Pyromancer/10): Petrifies enemies. Petrified enemies take additional damage from Fire and Psychokinesis properties and reduce damage from other properties. This skill is useful to petrify bosses to boost the damage of your fire skills, and hence you benefit most from Pyromancer. However, it also reduces the damage taken from other properties so make sure that you do not use other property attacks such as lightning or ice when monsters are petrified. A good way to maximize your damage is to use your other elemental skills when bosses or mobs are stuck in Hail, and use your fire skills when they are stuck in Stone Curse.

image
Meteor (5/5): Drops a giant meteor on targeted area. One of the biggest AOE in the game which also does a lot of damage. This skill’s damage is further boosted if used by enemies affected by Flame Ground (Pyromancer), multiplying the damage of Meteor by around 1.5x.

Breakdown

  • Damage - 5/5: Elementalist does good damage with Meteor and Storm Dust. When paired with Pyromancer, the damage is even higher. Electrocute also does good damage if hit a large number of mobs. Fire Claw does a huge burst when used on bosses as well.

  • AOE - 4/5: Elementalist has really good AOE. Meteor is one of the biggest AOE in the game, while Electrocute covers a wide range and Storm Dust have medium size AOE that does tick damage even if enemies leave the skill’s AOE

  • Support - 2/5: Hail and Stone Curse are good crowd control skills, but they have fairly long cooldown to make it effective in crowd control. Also, it does not provide any party buffs nor provide any other useful debuffs.

  • Utility - 1/5: Like other damage dealing classes, it does not have much utility outside of PVE

Synergy

  • Pyromancer: Storm Dust combos with Fireball and Meteor combos with Flame Ground. Additionally, Stone Curse induce a debuff that increases Fire damage to enemies. Pyromancer + Elementalist is one of the most popular meta DPS builds because of their high damage and strong synergy.

  • Taoist: Storm Calling combos well with Electrocute. Also, Tri Disaster Charm increase the damage of all Elementalist’s skills except Storm Dust.

  • Chronomancer: Because of it’s high cooldown, Chronomancer is also a good pick to “Pass” the cooldown of skills such as Meteor. Also, Meteor/Electrocute/Hail/Stone Curse all have charging time, and hence benefit from Quick Cast.

Overall Elementalist is a good pick as a damage dealing classes. The potential of the class is further boosted by pairing it with other classes that have good synergy with it. It also has one of the best AOE in the game. One flaw with Elementalist is the high casting time but this can be overcome by using a rod or pairing it with Chronomancer with Quick Cast. Also, as of EP11, the casting time of Electrocute and Hail has shortened so it is less of an issue now.

4 Likes

Guide on All Wizard Classes - Part 3

10. Sage

image Sageimage image

Sages are mostly made up of either aged scholars or government officials who have gained magic powers over the years. In the case of the latter, it is presumed that Sages obtain their power from being continuously exposed to the Divine Tree while working in the government official for years. Sages reach enlightenment through years of accumulated knowledge to manipulate space using magic. They specialize in manipulating the different dimensions or creating portals that can be used for traveling to known locations.

image
Portal (1/15): Memorize current location or create a portal for party members to use. This is the main highlight of the class as it is the only class in the entire game that can do this.

image
Micro Dimension (15/15): Distort space into a small size that deals damage to enemies. The AOE of this skill is pretty small, but it has good range and does two hits with the attribute. It also have a duplicate attribute, but at this moment the attribute is pretty useless and a waste of attribute points and SP.

image
Ultimate Dimension (1 - 15/15): Distorts space into a large size to deal damage, and deals 50% more damage to slowed enemies. It does additional after effects damage as well but overall the skill isn’t as painful as other damaging skills. It has an attribute that can increase the AOE of magic circles but often using this skill just for the attribute is a waste. It also has an attribute to apply slow which is beneficial for Sage’s other skills.

image
Blink (1/15): Leave behind an apparition at your location and teleport you to a random place. This skill is good to lure mobs to it so that you have some breathing space to heal up or cast skills.

image
Missile Hole (1 - 10/10): For a short period, minimize damage from missile and magic attacks for you and party members. This used to be a very good buff but now it is mediocre as it lasts for a very short time with a high cooldown and hence do not have 100% uptime. It does however have a useful attribute that increases your movement speed for a 3 seconds when you cast the buff.

image
Portal Shop (1/1): Set up a portal shop. You can allow people to use your portal shop to teleport to places you have saved with “Portal”

image
Dimension Compression (1 - 10/10): Compress space around single enemy dealing damage. It is useful as a mob gathering skill. You can charge it to full to utilize the full damage.

image
Hole of Darkness (1 - 5/5): Summon a hole that causes damage to enemies. There is an attribute to make enemies disappear and reappear after a while which does more damage. Enemies affected by the skill takes damage and enemies around those will also take damage. This skill is quite strong but it takes some time for the damage to take into effect if you use the attribute. It is useful also in circumstances when you get too overwhelmed by monsters that you need them to disappear of a while.

Breakdown

  • Damage - 3/5: It does pretty ok single target damage with Micro Dimension. However, the casting time is pretty long. Ultimate Dimension and Hole of Darkness also do good damage, but not up to par with other stronger damage dealing classes.

  • AOE - 3/5: It does have pretty good AOE. Micro Dimension have fairly good AOE affects multiple enemies around the skill. Ultimate Dimension and Hole of Darkness also have pretty respectable AOE. Dimension Compression is good as a gathering skill.

  • Support - 2/5: Missile Hole is the only buff that helps party members, and the duration of the buff is so short that sometimes it is barely noticeable. Dimension Compression is also useful in helping to gather mobs

  • Utility - 5/5: Obviously with it being the only class in the entire game that can provide teleportation warp to party members and to the public, it definitely deserves a 5.

Synergy

  • Chronomancer: Due to Sage’s attribute “Maestro of Dimension”, it increases damage to enemies which are slowed using non-property attacks by 30%. However, there are very few classes who could make use of this attribute because not many skills are non-property attack.

Sage is mainly used as a portal shop. For people who wants to use Sage in PVE gameplay, they would need to take 2 other stronger classes to make up for the shortfall that Sage has because Sage do not have that much damaging dealing potential, nor does it have that much support potential. The most popular build for Sage (and probably the only build) is Sage - Chronomancer - Alchemist, because it is the only one that has all the support capabilities of wizard. However, often there are much better options to take in PVE or raids such as another DPS/AOE class.

11. Warlock

image Warlockimage image

People often wrongly assume that Warlocks harness the power of demons. But Warlocks are also children of the Goddess’ and as children often feel that they should not burden their parents, the Warlocks have a similar attitude. It is because of their unique and independent approach to spirituality, that the Warlocks are an often misunderstood group. Warlocks are wizards who harness the power of evil spirits. They can summon evil spirits and can command them to defeat monsters.

image
Invocation (1 - 15/15): Allows you to summon evil spirits periodically at random locations. These evil spirits remain on the field unless you redirect them with either Evil Sacrifice or Ghastly Trail. This skill very strong if you redirect a lot of spirits to a single target using “Evil Sacrifice”. It is one of the skills that induce “Blind” debuff on enemies, and does 30% more damage against enemies inflicted by “Blind”

image
Dark Theurge (1 - 15/15): Summon evil spirits around you, which does more damage to enemies under “Blind” debuff. You can either use this skill by walking straight to enemies, or redirect them with Evil Sacrifice. It is one of the skills that induce “Blind” debuff on enemies. Also does 30% more damage against enemies inflicted by “Blind”

image
Evil Sacrifice (1/1): It redirects evil spirits to the targeted area. This skill is useful when you want to redirect a large number of evil spirits to a specific monster or boss to deal a burst damage. Also does 30% more damage against enemies inflicted by “Blind”

image
Ghastly Trail (1/15): Make evil spirits follow you. This is a channeling skill that causes evil spirits to follow behind you. It is not that useful that much to channel the whole skill. Press it once just to receive a buff that boost your spirit damage.

image
Pole of Agony (10/10): Summon a pillar of darkness that constantly hit enemies. This skill does good damage over time, and continues to deal damage even when monsters walk out of the skill AOE. Also does 30% more damage against enemies inflicted by “Blind”

image
Masterma (10/10): Create a giant purple-ish black circle with a star that damages enemies. With the Phantom Pain attribute, it does damage over time proportionate to your magic attack for 20 seconds. It inflicts a “Stigma” debuff. This skill is really strong against bosses as it continuously damage bosses when hit by it. As of EP11, the “Stigma” debuff is classified as a “Curse”. Also does 30% more damage against enemies inflicted by “Blind”

image
Demon Scratch (5/5): Summon shadow arms that damages and pull targets towards you. It is best to use this skill when targets are at a fair distance from you since it can do hits that way. It also pulls targets towards you making it easier for you to hit melee skills and also helps in gathering monsters together. Also does 30% more damage against enemies inflicted by “Blind”

Breakdown

  • Damage - 4/5: It has good damage from Masterna and Pole of Agony, both does really high damage on a bunch of enemies and on a single target. Invocation also summons evil spirits which contribute to even more damage. Demon Scratch is also a fairly good skill that can hit a large group of enemies

  • AOE - 3/5: Masterma and Demon Scratch have good AOE. Pole of Agony however has a more restrictive AOE. Dark Theurge AOE is not that strong

  • Support - 1/5: Other than the Masterma debuff, it does not really contribute much to parties other than dealing damage.

  • Utility - 1/5: Likewise, it does not have any outside utility

Synergy

  • Shadowmancer: Both Warlock and Shadowmancer are dark property wizards. Warlock has an attribute that applies additional dark property damage to dark property skills. Hence, Shadowmancer can benefit from this attribute. Shadowmancer’s “Shadow Condensation” also induce “Blind” debuff which increases the damage of most Warlock’s skills.

  • Bokor: Bokor’s Hexing not only reduces enemies magic defence, but it also boost dark critical damage with “Hexing: Dark” attribute, boosting the power of Warlock’s skills even more. Also, Effigy has chance to inflict “Blind” debuff which increases the damage of almost all Warlock skills.

Warlock is probably the most well balanced out of the dark mages, with a good balance of damage and AOE. Other DPS classes such as Pyromancer, Elementalist and Taoist tend to be more popular than Warlock, but Warlock can shine even more when paired with classes that have good synergy with it. Warlock now have even more synergy with other classes from the EP11 changes which makes it much more viable than before.

12. Featherfoot

image Featherfootimage image

Magic and Religion have parted ways and are currently two separate studies within the limits of the Kingdom. But for many nations outside the Kingdom’s borders, they are still treated as one and the Featherfoot is one such an example. Since Medzio Diena, the Kingdom has recognized many foreign shamans as either clerics or magician’s within its realm and have helped them assimilate into the Kingdom in order to better seek their assistance in the time of need. Featherfoots are wizards who utilize the power of incantations. They can absorb an enemy’s life, or help allies by making enemies weak from a curse.

image
Blood Bath (1/15): Stab enemy with a bone knife which recovers some of your HP if enemy is a Beast/Devil/Insect type of affected by Enervation debuff. This is a useful single target skill to recover some HP.

image
Blood Sucking (1/15): Attack and absorb the lifeforce of enemies. If the enemy is a Beast/Devil/Insect type of affected by Enervation debuff, it heals you. This skill is really useful as it allows you to self heal without using potions. However, the AOE is quite small and you cannot rotate while channeling this skill.

image
Bone Pointing (1/15): Summon a bone that attacks and curse enemies. This is one of the main skills used to curse enemies. It is preferable to use this on a boss so that it has a specific target to fire the shards to debuff it. However, it can also act as an aggro lure for mobs.

image
Ngadhundi (1 - 15/15): Stab enemy with a cursed knife and inflict enemies with “Decay” debuff. The AOE of this skill is pretty small and does low damage.

image
Kurdaitcha (10/10): Walk around with bloody footprints that curses enemies. It has one of the highest damage in the wizard tree. The footprints left on field now stay for 15 sec and can stack, which does multiple hits. It has an attribute that increases the walking speed but increased the cooldown of the skill which I recommend not getting.

image
Kundela Slash (10/10): A very strong skill with 3 overheat that does high damage but have low AOE. “Cursed” enemies takes 100% more damage.The attribute “Curses of Curses” allow Kundela slash to do the number of hits that equals to the number of debuff the enemies has up to a maximum of 3 hits. Coupled with the fact it has 3 overheat, that makes the skill extremely strong for single target.

image
Levitation (1/1): Allows character to levitate, making you immune to melee attacks but more vulnerable to missile attacks. Levitation allows you to increase your Featherfoot damage by 30%. It does have 1 flaw and that is that it does not have 100% up time.

image
Blood Curse (10/10): Sacrifice HP to do damage to enemies, also inflicting “Curse by Blood” debuff. Enemies will have their SP recovery reduced to zero, and heals attacker’s HP when attacked. You can only use this skill when using “Levitation”. This is a good skill to inflict AOE curse on enemies.

image
Enervation (5/5): Temporary inflict a curse spell on enemies within range to cause additional damage when hit. Note that despite it being a skill that inflicts “Curse”, it does not work with Bokor’s Effigy. It is a good skill to use before using a skill that inflicts multiple hits.

Breakdown

  • Damage - 5/5: The main damage comes from Kundela Slash. If done right, this skill with 3 overheat can do high damage to single target. However, it can get troublesome to actually need to debuff monsters to get the most of out the skill. Nonetheless, the damage of Featherfoot is pretty good on single target

  • AOE - 2/5: Most Featherfoot skills have a small hit box. Enervation does a wide AOE debuff, while Blood Curse does huge AOE over a large group of enemies.

  • Support - 2/5: Decay is a good debuff for party members. Also, Enervation is useful in making the multi hit skills of party members stronger.

  • Utility - 2/5: It has good utility being one of the wizards that can self-heal.

Synergy

  • Bokor: The curse from Bone Pointing allows Bokor to use Effigy. Also, Featherfoot “Witch Doctor” attribute increases the damage of dark property attacks on cursed enemies.

  • Warlock/Shadowmancer: Featherfoot “Witch Doctor” attribute increases the damage of dark property attacks on cursed enemies, which further increases the damage of dark wizards like Warlock and Shadowmancer.

  • Necromancer: Necromancer’s “Greater Corruption” increases the damage of poison property attacks (Featherfoot’s main skills) by 30%, which makes it a great pick.

EP11 was the best thing that happened to Featherfoot, giving it even more synergy with multiple classes that it didn’t have before. It can now fit into a poison-based build with Necromancer, or a dark-based build with Warlock/Shadowmancer, and even a curse-based build with Bokor, all which can perform sufficiently well. Featherfoot has really high single target damage with Kurdaitcha and Kundela Slash, but lack in AOE. Hence, good picks for Featherfoot would be classes that can make up for the lack of AOE that Featherfoot has.

13. Runecaster

image Runecasterimage image

There were never many Rune Casters in the Siauliai and Orsha areas. But since the Millenary, Rune Casters have spread throughout the Kingdom but still the most of them can be found in the Northern districts of the Kingdom. Rune Casters are wizards who use ancient symbols imbued with magic. Although it takes some time to draw energy from the symbols, they contain enormous power.

image
Rune of Ice (0 - 15/15): Throws an ice sphere to deal damage. It is the equivalent of the old Elementalist’s freezing sphere but freezes as well. It is a single target skill that does good damage but is overshadowed by other stronger Runecaster skills

image
Rune of Giants (1 - 15/15): Turn you or ally into a giant, increasing your HP and defence. Under this buff, you are limited usage of skills. You can cast other Runecaster skills and Magic Missile in this state. You can also use Chronomancer skills such as Slow and Pass. However, most other skills are restricted. Getting this to at least 1 is also useful for exploring maps fast.

image
Rune of Justice (1 - 15/15): Charge divine magic in a straight line. It does good damage on a medium number of monsters. The AOE is fairly good but not great, and the downside is that it has a 2 second casting time. Enemies who are hit by Masterma (Warlock) receive more damage from Rune of Justice.

image
Rune of Protection (1/10): Applies effect that reduces damage. The main draw for this skill is the attribute that provides knockback immunity for yourself, which is very useful when casting skills.

image
Rune of Destruction (10/10): Inflicted powerful damage to targeted area. Attacked enemies reflect magic dealing additional damage to other enemies and reduces their magic defence. It also deals 30% more damage to slowed enemies. This skill is probably the strongest skill in the Runecaster’s tree. It also reduces magic defence of targets which makes your other skills do more damage after that.

image
Rune of Rock (5/5): Send 5 giants rocks falling from the sky. This skill has good damage and has a very large AOE that hit multiple times.

Breakdown

  • Damage - 3/5: Runecaster’s skills do good damage, but is not up to par with many other skills. Furthermore, the high cooldown of Runecaster’s skill makes the DPS of Runecaster look even worse. Runecaster also suffer from long casting time that can be mitigated with rod attribute or Quick Cast (Chronomancer)

  • AOE - 4/5: AOE of Runecaster is however pretty solid. Rune of Rock has a really huge AOE, while Rune of Destruction and Rune of Justice do medium size AOE. However, long cooldown holds this aspect back as well

  • Support - 1/5: Previously Rune of Protection can be shared with Linker but now that Linker is moved to Scout, Runecaster do not provide any useful buffs to the party. The only debuff it provides is a magic defence debuff from Rune of Destruction

  • Utility - 5/5: Being able to craft scrolls such as Enchant Fire (Pyromancer) and Pole of Agony (Warlock) allows it to have great utility. Also, Rune of Giants is useful for map exploration as it covers more distance than dash.

Synergy

  • Chronomancer: Due to the high casting time of Runecaster’s skill, Runecaster really benefit from Quick Cast. Furthermore, many of Chronomancer’s skills such as Slow and Pass can also be used in Giant Mode. Chronomancer’s slow also boost the power of Rune of Destruction

  • Pyromancer/Warlock: This synergy is not really for PVE purposes, but rather pairing Runecaster with these classes allow Runecaster to craft the scrolls that are demanded in the market, namely Enchant Fire and Pole of Agony.

Runecaster seem to fall short compared to other damage dealing classes. To put it into perspective, Runecaster only have 6 skills compared to every other class who has at least 7 skills. It lacks the firepower that a damage dealing class generally needs. Runecaster is however, the only class that can craft scrolls demanded by the market.

3 Likes

Guide on All Wizard Classes - Part 4

14. Shadowmancer

image Shadowmancerimage image

Shadowmancers began when a magician was inspired by the Sorcerers who materialized demonic spirits into our world. Currently, their ultimate goal is to capture the shadow of the eclipse to create a powerful wide area magic spell. The Shadowmancer is a mage that is able to perform powerful attacks or hide in the shadows.

image
Shadow Thorn (15/15): Use enemy’s shadow to deal damage to them. What makes this skill strong on single target is that it has 4 overheats, and does 2x the damage on ground enemies with an attribute “Stepping Shadows”. It also has a much faster cast time that other single target skills such as Micro Dimension (Sage) and Kundela Slash (Featherfoot). Also, it ignores 50% of enemies magic defence under “Blind” debuff.

image
Shadow Conjuration (1 - 15/15): Cast your shadow outwards, dealing damage to enemies within it. It does good damage and also does additional tick damage to ground enemies with its attribute “Shadow Trap”. However, the AOE is pretty narrow. EP11 made this skill even better with 2 overheats.

image
Shadow Pool (1/5): Turns into a shadow and enemies cannot attack you. It is useful as an emergency escape when you need it and hence you don’t really need that high of a level for it.

image
Hallucination (1/5): Summons a shadow that looks exactly like you to take damage on your place. Basically it is another form of Blink (Sage) to draw aggro away from you.

image
Shadow Condensation (10/10): Extract shadows from surrounding enemies and compress them into beads that explode after 3 seconds, inflicting damage to enemies. It inflicts a 3 sec duration “Blind” debuff on enemies, and has a maximum orb limit of 5. The skill was revamped mainly to induce “Blind” debuff, but the duration of the debuff is still pretty short.

image
Shadow Fetter (0 - 10/10): Nail shadows of enemies to ground to prevent them from moving. This skill can actually be really useful against bosses that move a lot. However, it is often situation and people generally might not find it worth much of an investment

image
Infernal Shadow (5/5): Separate enemy from their shadow. When shadow is attacked, the enemy receive a portion of the damage dealt, and this effect disappears when the shadow’s HP reaches zero. The damage transferred is reduced to 25% if target is a boss. This skill is really useful in party when used on bosses. Although the damage transferred is reduced to 25% for bosses, it is nonetheless still useful as bonus damage for party members especially those who have large AOE that can hit both the boss and the shadow at the same time. Hence, Shadowmancers benefit from this skill by using skills that can hit both the shadow and the boss. However, the AOE of Shadowmancers often do not allow that.

Breakdown

  • Damage - 4/5: Shadowmancers have good single target DPS. Shadow Thorn also has really fast casting speed that does even more damage on grounded enemies.

  • AOE - 2/5: Like Featherfoot, it shines more on single target DPS but really lack AOE. Shadow Conjuration and Shadow Condensation is not strong enough of an AOE move to make it good in the AOE department.

  • Support - 4/5: Shadow Fetter is useful for pinning bosses down. Hallucination also helps to take aggro. What makes Shadowmancer unique is Infernal Shadow that helps to boost the overall damage output of the party by casting the boss’s shadow. The cooldown is also fairly short (30 second cooldown for a 15 second duration) means you can keep this effect up half the time in the entire duration of the boss fight.

  • Utility - 1/5: Sadly, it also do not have other attributes outside PVE.

Synergy

  • Warlock: Shadowmancer also deals dark damage, the same as Warlock. Hence it can benefit from Warlock’s “Darkness” attribute. Warlock also have skills that can hit both the shadow casted by Infernal Shadow and the boss, namely Masterma, Pole of Agony (if they are close enough) and Demon Scratch.

  • Bokor: Being dark property, it benefits from Bokor’s Hexing debuff attribute that allows Shadowmancer’s dark property skills to do additional 30% damage onto enemies affected by Hex.

  • Featherfoot: Featherfoot’s “Witch Doctor” attribute increases the damage of dark property attack done on enemies with “Curse” debuff.

Shadowmancer also can benefit from Psychokino’s Heavy Gravity and Taoist Upper Level allowing it to hit more damage onto flying enemies. However, Shadowmancer is generally best paired with his dark property buddies. Shadowmancer is more targetted to boss fights from Infernal Shadow and its high single target damage from Shadow Thorn, and do not really do that well in AOE based content like challenge modes.

15. Onmyoji

image Onmyojiimage image

Onmyoji joined the Kingdom around 90 years ago during the Millenary. They had served the Kingdom for 50 years and declared themselves an independent group about 40 years ago. Though they still provide their services for the Kingdom, they are now acknowledged as an independent group much like the other clerics and wizards.
The Onmyoji are able to summon divine spirits and use the magic of Yin and Yang in combat, which allows them to face a large number of opponents simultaneously

image
Fire Fox Shikigami (0, 1 if paired with Psychokino, 15 if paired with Pyromancer/15): Summon a Fire Fox Shikigami that attacks nearby enemies. It applies additional critical rate to fire-property attacks up to 95% for the duration of the summon. This means that Pyromancer can get a critical buff on all its skills. Also, the skill has an attribute “Fire Property” that adds changes Psychic Pressure (Psychokino) to fire and increases the length, and adds fire property hits to Gravity Pole (Psychokino). This makes Gravity Pole a very hard hitting skill.

image
Greenwood Shikigami (1/15): Summon a Tree Shikigami that pulls nearby enemies. This skill does not do very high damage, but it has large AOE with suction effects that helps to gather mobs. It also has a “Poison” attribute that allows it to do continuos damage.

image
Howling White Tiger (15/15): Release the roar of the White Tiger to instill fear in nearby enemies, and does 50% more damage on Plant type enemies. Saying that it damages nearby enemies is an understatement, because the skill literally has the widest AOE in the game hitting almost the entire screen. It has good damage, really huge AOE and short cooldown of only 15 seconds. Additionally, it has an attribute “Virtuous Roar” that increases movement speed of party members by 10 for 10 seconds when the skill is cast.

image
Water Shikigami (0 - 15/15): Release a stream of water to enemies in front. This skill has good damage and hit like 1/3 of the map. Also, having a short cooldown of 20 seconds allow you to use it often as well.

image
Genbu Armor (0 - 5/5): Creates a protective field around you. Attacks received consume SP instead of HP. It is often situational and in this meta whereby SP drains pretty fast, not many people will invest in this skill at all.

image
Toyou (0 - 10/10): Invoke Earth Shikigami and deals damage over a very large area. The AOE of this skill is more than half the screen. The damage is fairly good and the cooldown is low. One flaw is that the skill do not hit flying enemies although it has an attribute that have a 50% chance when maxed to affect flying enemies.

image
Yin Yang Harmony (5/5): Generate alternate Dark (Yin) and Holy (Yang) property damage. This is a channeling skill that casts across a very large AOE in front of you, doing multiple hits and high damage to enemies affected by it. It probably has the second biggest AOE in the game losing only to Howling White Tiger. It also has an attribute “Mediator” that increases Holy and Dark property attack by 20% after using the skill, and thus benefiting most of the dark related classes such as Bokor/Warlock/Shadowmancer

Breakdown

  • Damage - 4/5: Onmyoji skills have short cooldown and does good damage. The high cooldown skill specifically Yin Yang Harmony does huge damage. Overall Onmyoji is a solid for an AOE centric damage dealing class. It does not do as well against single target unfortunately.

  • AOE - 5/5: The reason why you don’t see any 5/5 in earlier classes such as Pyromancer and Elementalist even though they have huge AOE, is because none of the classes come close to the AOE that Onmyoji has. Every single skill hits at least 1/3 to hitting the entire screen which makes Onmyoji the god of AOE.

  • Support - 2/5: It has fairly good crowd control with Greenwood Shikigami and also boost the movement speed of party members when using Howling White Tiger but other than that it doesn’t provide much support other than AOE damage.

  • Utility - 1/5: Also do not provide much utility outside of PVE.

Synergy

  • Pyromancer: It grants critical rate to fire property damage, and hence benefiting Pyromancer skills.

  • Psychokino: Fire Fox Shikigami boosts Gravity Pole to do high damage. The boost to Psychic Pressure however is not that significant. Heavy Gravity also allows Toyou to effectively hit flying enemies

  • Warlock/Bokor/Shadowmancer: Yin Yang Harmony grants a 20% damage boost for each second per attribute level and hence boosting the dark property skills of those 3 mentioned classes

Onmyoji has the best AOE in the game. It however do not do that well against bosses as the skills are suited for AOE combat such as Challenge Modes. Onmyoji also do have good synergy with various classes that makes it popular. If you are looking for a class to kill up the gaps in the AOE department, Onmyoji is a good choice to bet on.

16. Taoist

image Taoistimage image

Taoists harness the power of faith obtained through years of training. They believe that through their training that man can achieve greatness akin to that of the Goddess’. The Kingdom has acknowledged and sanctioned them as an official part of the Kingdom’s clergy but where they come from such categorization means little. The Taoist class uses the power of Taoism. It is capable of using a talisman to attack enemies or help allies.

image
Begone Demon (0/15): Explode Creeping Death Charm and Tri Disaster Charm. No one really ever uses this skill because it is much better to keep the charms on the field

image
Storm Calling (10/10): Instill a charm that causes a storm, attacking enemies once and causes enemies to receive additional damage from Lightning property attacks. This skill combos well with Electrocute (Elementalist), allowing Electrocute to hit over a wider range and thus making it stronger. Also, it boosts Lightning property attacks which basically means every other Taoist skill.

image
Creeping Death Charm (15/15): Instill a Creeping Death Charm that moves forward slowly. This skill is one of the strongest single target DPS skill as the charms continuously do damage while slowly moving forward. Bosses often have a large hitbox and thus the charm can hit the boss multiple times. Furthermore, it has an overheat of 3 which makes this skill much stronger. One flaw is that if bosses do move away from the charm, bosses will not take damage from it.

image
Lightning Charm (1/1): Activate a charm that allows Taoist skills to gain chance of additional Lightning property attack. This is a useful buff to further enhance the power of your Taoist skills. The duration of the skill however is quite short (30 seconds) and require constant recasting.

image
Tri Disaster Charm (10/10): Instill a charm that increases vulnerability to Fire, Ice and Lightning properties, allowing enemies near the charm to receive more damage from those 3 elements. This skill is extremely good to boost not just your own skills but your party members skill as well. In Challenge Modes whereby monsters constantly come to you, using multiple Tri Disaster Charm over a wide area can increase the AOE of the charm radius. Note that the charms effect do not stack. Because it also increases damage of Fire and Ice, Pyromancer/Cryomancer/Elementalist are good picks with Taoist.

image
Divine Punishment (1 - 4/10): Deals damage to a single target, which applies hits to enemies near original target with the attribute "Broad “Strike”. The charging time to charge the skill to full is quite long and hence the skill is not used that often compared to others. It does huge damage when charged full though.

image
Upper Level (0 - 1/1): Creates a magic circle that allows magic circles in front to affect flying-type enemies. Various attacks such as Flame Ground (Pyromancer) and Toyou (Onmyoji) which only safely hit grounded enemies can thus use Upper Level to hit flying enemies as well.

image
Eradication (5/5): Summon a group of talisman behind you and send them forward. This skill has a quick casting time that does good damage over a wide AOE. Also, it can hit up to 15 targets which is quite a lot. Having an overheat of 3 also allows one to use all 3 overheat to quickly take out an enemy.

Breakdown

  • Damage - 5/5: Other than Pyromancer, Taoist is another class that does a lot of damage. Eradication has good damage for a medium AOE skill with 3 overheat. What makes this class super strong is the single target DPS from Creeping Death Charm that melts bosses when all 3 charms continuously stack onto bosses.

  • AOE - 2/5: Creeping Death Charm is more of a single target DPS spell, and hence the only skill that has good AOE is Eradication. Storm Calling also has a huge AOE but it only does 1 hit and serves more to boost the damage of Lightning property skills rather than do damage by itself.

  • Support - 3/5: Tri Disaster Charm is really good in supporting parties with classes that do Fire/Ice/Lightning damage as the effects of the charm benefits the entire party.

  • Utility - 1/5: As a main damage dealing class, it does not have other special traits outside of PVE

Synergy

  • Pyromancer/Cryomancer: These 2 classes benefit most from Tri Disaster Charm since all of their skills are either all fire or ice property.

  • Elementalist: Meteor and Fire Claw benefit from Tri Disaster Charm, while Electrocute benefit from Storm Calling and Lightning Charm.

Taoist is one of the strongest among the wizard tree. Creeping Death Charm probably has the highest single target DPS in the entire wizard tree and is thus a popular pick for people who lack a class to do single target DPS. Additionally, Tri Disaster Charm is a very strong skill that benefits Pyromancer and Cryomancer a lot, making those 2 popular pairings with Taoist.

17. Bokor

image Bokorimage image

Bokors are kind of mediators between man and god. Because of this, they are considered both magicians and clerics. They have migrated to the Kingdom from their tribal society around 900 years ago during the Reign of King Melkhiel and today they are now more recognized as clergy than wizards. Bokors use voodoo skills to raise the dead or curse their enemies to attack them from afar.

image
Hexing (1 - 15/15): Curse an enemy to reduce their magic defense and prevent recovery. The higher level the skill, the more it reduces the target’s magic defense. Depending on whether you are more focused on your Zombie summons or more on providing targeted damage you can either spend 1 point just for the Curse or max it for the magic defense reduction. Higher level also increases the duration of the Hex. It increases the minimum critical rate of dark property attacks to enemies affected by Hexing, making it pair well with other Dark property classes such as Warlock and Shadowmancer.

image
Effigy (15/15): Deals damage to cursed enemies from afar, and deal additional damage on every third casting if used in succession. A really strong skill that has very short cooldown (5 seconds) that does damaged to enemies affected by curse. Enemies cursed by either Hexing or Bone Pointing (Featherfoot) can be affected by Effigy. It can be used safely from a distance so long the target remains cursed.

image
Zombify (1 - 15/15): Applies debuff to nearby enemies that spawn zombies when they die. This is the main skill to use to spawn zombies outside of using Zombie capsules. The strength of the zombie depends on the enemy that is killed. The zombies’ strength also scale off the users SPR and INT. Higher level Zombify results in stronger zombies.

image
Mackangdal (0/1): Throws a talisman to ally that temporarily suppress pain and they are invulnerable to any damage when talisman is active, but received accumulated damage once effect end. This skill is not useful for PVE so don’t bother.

image
Bwa Kamiyan (1 - 10/10): Instruct zombies to celebrate and walk behind you, dealing damage to enemies touched. One good feature of the skill is that is slightly paralyzes enemies who are hit by the skill when the skill is being channeled, making it somewhat good for crowd control as well.

image
Samediveve (5/5): Plant a glyph that increases the maximum HP and movement speed of zombies near the glyph, while only half the effect applies to you. This is a good buff to both you and your zombies.

image
Damballa (5/5): Detonates zombies near target area and deals damage to nearby enemies. This skill is very strong and each skill factor is based off 1 zombie. If multiple zombies detonate it can do very high damage. Also, the cooldown of the skill is very short (10 seconds). Zombies also often refresh itself once exploded and hence you can use this skill constantly.

Breakdown

  • Damage - 4/5: Bokor do have good damage from the zombies and also damage from Effigy and Damballla. However, the damage of Damballa is dependent on how many zombies you have and can thus be inconsistent.

  • AOE - 3/5: Bokor have decent AOE as Bwa Kayiman can paralyze a large group of monsters and Damballa can hit a lot of enemies. However, skills like Effigy is more targeted towards single target bosses or targets and hence it does not excel that much in AOE compared to the other spell casting classes.

  • Support - 2/5: Bokor can support the party with Hexing debuff that reduces the magic defense of targets. Bwa Kamiyan also helps to paralyze monsters which can also be useful in party play.

  • Utility - 1/5: Similarly, it does not have outside utility other than in PVE

Synergy

  • Warlock/Shadowmancer: The natural synergy Bokor have is with other Dark property users. Both Warlock and Shadowmancer benefit from the increase minimum critical rate of dark property skills debuff by Hexing.

  • Featherfoot: Because Bone Pointing both allow Bokor to use Effigy, Featherfoot is also a great pick for Bokor. Note that Bone Pointing’s Hexing debuff is only lvl 1, so it is best to use Bokor’s Hexing instead on bosses, and Bone Pointing for groups of enemies.

Bokor is a strong class with really good damage. Unlike Necromancer, Zombies are self replenishing (probably the reason why bots use Bokor as well) and you do not need to actively keep track of how many zombies you have. It also has the best burst out of the 3 summoner classes. Bokor is a popular pick with summon, dark and poison classes due to the various synergy it has with them.

3 Likes

Selecting Your Class

1. Synergy

First off, in every explanation of the various classes, I mention a lot about how and what kind of synergy that specific class has with other classes. For example, Pyromancer has good synergy with Elementalist with their skill combos, while Warlock and Bokor also has good synergy with their Dark elemental property skills. These synergies are important in choosing classes that complement well with each other.

Some classes lack specific synergy. For example, Chronomancer do have specific synergy with Elementalist and Runecaster because both benefit greatly from “Quick Cast”. Chronomancer may not have any specific synergy with Pyromancer or Taoist, but Chronomancer can still pair well with both of them due to it being able to use “Pass” high cooldown skills or high damage dealing skills to burst down large group of monsters or to melt down bosses.

Some classes do not have specific class or elemental synergy, nor do the skills complement well with each other. For example, Cryomancer do not pair well with Shadowmancer because Cryomancer is focused on crowd control and lack AOE damage, while Shadowmancer is focused on boss killing and single target, while also lacking AOE damage. These 2 classes in general do not pair well with each other.

2. Choosing Based off Synergy

One way to start off on building your wizard is to ask yourself what are you focused on. Are you focused more on damage dealing? Do you prefer single target or AOE damage? Do you instead want to focus on supporting your party?

For example, lets say your main aim is to do damage. Then you need to pick a damage dealing class that you like. Pyromancer seem to be the obvious choice with a good balance of AOE and damage. The next thing you need to do is to find another class that pairs well with Pyromancer. For example, Pyromancer can do well with Elementalist and Psychokino because both classes have exclusive combos that work well with each other.

If you choose Pyromancer + Elementalist, the final class depends on what else are you looking for or what do you feel you are lacking. You can also find a class that complements the other 2 well. For this case, a solid 3rd pick would be Taoist, as it buffs the fire spells of Pyromancer, and also cover up the lack of single target DPS that Pyromancer + Elementalist have since a lot of their skills tend to focus on AOE damage.

Lets say you choose Pyromancer + Psychokino, instead of Taoist, another solid pick would be Onmyoji. This is because Pyromancer benefit from the critical buff that Fire Fox Shikigami provide, and Psychokino benefit from the boosted Gravity Pole.

Another example is lets say you want to focus on supporting your team. The general pick would be Chronomancer. You might also want to further boost this support with Alchemist as it can provide Sprinkle HP and Sprinkle SP Potion. Finally, what the class is lacking is probably some sort of AOE or single target DPS. Taoist in this case would be a great pick and this combination of 3 classes can do well in supporting the party, as well as doing a lot of damage to bosses

By knowing the class synergy, you can customize and get a build that can suit your needs.

Build Examples

Fire Element Builds

Pyromancer - Elementalist - Taoist
Pyromancer - Elementalist - Onmyoji
Pyromancer - Elementalist - Alchemist
Pyromancer - Psychokino - Onmyoji

Ice Element Builds

Cryomancer - Psychokino - Onmyoji
Cryomancer - Psychokino - Taoist
Cryomancer - Elementalist - Taoist
Cryomancer - Chronomancer - Taoist

Dark Element Builds

Bokor - Warlock - Shadowmancer
Bokor - Sorcerer - Warlock
Warlock - Shadowmancer - Onmyoji

Chronomancer Builds

Chronomancer - Elementalist - Taoist
Chronomancer - Alchemist - Taoist
Chronomancer - Runecaster - Taoist

Summoner Builds

Bokor - Sorcerer - Necromancer
Bokor - Sorcerer - Warlock
Bokor - Sorcerer - Featherfoot

Other Misc Builds

Psychokino - Onmyoji - Taoist
Warlock - Runecaster - Onmyoji

Outdated Builds

Pyromancer - Psychokino - Sage
Pyromancer - Bokor - Featherfoot
Chronomancer - Runecaster - Onmyoji
Chronomancer - Elementalist - Onmoyji
Pyromancer - Sorcerer - Necromancer
Pyromancer - Bokor - Necromancer

3 Likes

Reserved for future uses

Disagree. It is superior to Combustion in most scenarios. Lower cooldown, 3 overheats, lower cost (no silver) and it is the only Soul element skill in the wizard tree outside Psychokino, which has an advantage against dark AND holy.

Should be (5-10/10). At level 10, it gives your summoned demon +60% damage.

In regards to summon familiars, just pick it at lv1 if you want some meat shield and have a point to waste.

Alchemistic Missile is just not as fast or strong compared to other single target DPS skills such as Shadow Thorn/Kundela Slash and even Micro Dimension. After trying both, I do agree that Combustion is pretty bad as well. I generally would not recommend using Alchemistic Missile or Combustion because there is almost always a better skill to use in place of them.

Noted and changed the skill level accordingly. Thanks for pointing it out.

I still recommend maxing Misile Hole since 10 seconds is still a big deal. Assuming it still works as a party buff (as indicated in the description), then this will give your party a better chance at surviving a wave of ranged mobs (very useful in places like CM and keeping your healers alive).

It’s also a good compliment with Hell Breath, giving you physical and ranged immunity against mobs for at least 10 seconds. Makes dungeon clearing easier.

There are many ways where Pyro and Sage can compliment each other. For instance, after dropping a Hole of Darkness (HoD), you can do a Fire Pillar (FP) follow-up to keep mobs locked down. The reason why you use HoD first is because it has longer cd compared to FP.

If mobs are too spread, go get their attention with Enchant Fire, kite them, blink, HoD, then FP. Alternatively, you can just go straight to Enchant Fire > Blink > FP if you’re confident that you can kill it fast.

Dimension Compression is the only Sage skill that has casting time (3 sec). However, this isn’t an issue since you can charge it while moving. For a skill with 20 sec CD, it’s a nice source of damage while repositioning in boss fights.

I have Missile Hole a range of 1-10 because you can either use it as a 10 sec buff, or use it as an emergency 5.5 sec buff when range mobs are attacking.

Currently in kTOS there are some changes in the Sage’s skill, mostly reduction in Sage’s damage so Sage would not be viable as a damage dealing class anymore compared to others (not that it does good damage now also). Depending on how significant the skill changes are some skills may be worth it while some are not. If I’m not wrong Dimension Compression can have faster casting speed with Quick Cast in future patches so that might make it viable. At this moment, more often there are better skills to use than using Sage skills, and many of Sage skills are used as filler skills when you main skills are on cooldown. Hole of Darkness do have its many uses though such as using it in emergency when there are too many mobs in CM.

We will need to wait and see how the skill changes affect Sage class as a whole and I’ll try to update it accordingly. Now that Sage is going to be a “green icon” class in future, I do hope that they try to buff that aspect of Sage because even with the future changes, there isn’t much “support” that Sage actually provide in PVE content that other classes cannot do better.

What weapon would you guys recommend for pyro-elem-taoist?

I’m leaning more toward rod + shield (Faster cast, higher defense), but some people think it’s more worth it to use staff for the higher matk, especially when staff helps pyro’s fire spells.

If you are using this weapon just for Pyromancer - Elementalist - Taoist, you can benefit a lot from the Staff Mastery: Fire.

However, generally people would recommend rod + shield because it is more flexible. Pyro-Ele-Tao do not benefit much from the faster cast speed except for casting meteor, but if you are using rod + shield combo, this weapon combo would be better in general if you play multiple wizard classes like me. Also, the defense really helps a lot in survivability.

I prefer going rod + shield. You can even use the shield for other classes who needs it. It just provides more flexibility. However if you are looking for raw damage output, Staff would be better. Staff is also somewhat “easier” to get considering you only need to get 1 weapon vs getting 2 weapons (rod + shield).

Whats better to put excess points into for pyro - ele - tao. Electrocute or Fire Claw?

and still torn between omnyoji vs tao . ive read all pros and cons lol but overall endgame = tao? and more on farming mobbing = omn?

thanks

Both. Electrocute has short CD so you can use it often and works well with the Storm Calling effect in crowded areas. Fire Claw will soon get a second overheat which will make it great.

Tao vs Onmy -> Tao because you already have enough AoE with pyro + ele. Use onmy on builds where the two other classes are single tartget oriented.

so ill just balance out points between electro and fireclaw?
ok copy. thanks!

Not sure if I’m too late to share my opinion.

Since you are pyro, I assume you use agni, so therefore fire claw is better imo. No cast time and quite short cooldown. If it does indeed get an overheat, more the reason to choose it.

Even though electrocute synergizes well with taoist, I still think electrocute is quite underwhelming.

never too late bro

i have fireclaw maxed now. but i never really tried electrocute with storm. leveling it up increases its max jumps, will it not help a lot in little mobbing ? so no point at all in electro or just a reasonable point on it?

thanks tho.

In future Electrocute will actually have its damage scale accordingly as you level it up. Right now it only increases the number of monsters it hit. Under Storm Calling it doubles the enemies it hits also also does more damage. It is a good filler AOE skill of 10 sec cooldown that you can use when your other skills are down in challenge modes but of course best to use it under Storm Calling.

Fire Claw is more single target DPS oriented and in future it will have shorter CD and x2 overheat, making it a very powerful nuke on bosses. It does not do much for AOE.

How much you want to put depends on you. If you are going to use it in Storm Calling most of the time, you don’t really need to pump it very high since it does hit DOUBLE the targets.

ok that makes sense, didnt notice that damage is not scaling now. thanks

well thanks guys, i hope theres a guide like this for other classes, this guide is so useful for overview and class synergies.